

As Social Media Marketers, Graphic Designers, and many other roles somewhere in between, we’re often juggling multiple clients and their creative requirements. Creating graphics efficiently for a single brand can be challenging…but once you add a handful or more of additional clients to your creative roster, the level of digital asset management and workflows associated with keeping on top of the visual requirements for each can cause headaches.
In this article, we go through some tips for how you can set up your Easil account and workflows to manage multiple clients with ease, and remove some of the bottlenecks that often end up with Graphic Design teams.
First up, it’s essential to think about your Easil account structure, and it’s hierarchy, and assess the best options for your agency, and the clients you’ll be looking after.
HOW TO STRUCTURE YOUR EASIL ACCOUNT FOR MULTIPLE CLIENTS
When working with multiple clients, there are a few things you should consider when setting up your Easil Account:
- Each brand is best with up with own separate Brand Kit.
- Every team or sub-team is able to have a collection of branded templates.
- You will not want your clients to have access to other clients Brand Kits, templates, or team members.
- Will you be retaining ownership of the Account and artwork created within (Brand Kit & Team Templates), or will the client?
In regards to the order of priority for setting up the Account, the fourth item on the list – Ownership – is the one you’ll need to assess and decide on first. It will result in setting up your Client as a ‘New Team’, or using your own Easil account and setting each client up as a Sub-team:
1. CREATING YOUR CLIENT’S ACCOUNT AS A NEW TEAM
If your client is to retain ownership of the account and billing, then you should select ‘New Team’ as the option:
At the time of transfer to your client, you’ll be able to invite them to the team, assign them with Admin permissions, and then ask them to remove you from the team. Alternatively, if you have further work to do with the client they may opt to simply remove ‘Admin’ access from your role, and retain you as Designer and/or Brand Manager to help manage the creative side of things.
In Easil you can be a member of multiple teams using the same email address, and toggle between access for each. However, each team will be responsible for paying for your subscription seat within that team.
2. ADD YOUR CLIENTS TO YOUR OWN EASIL ACCOUNT AS SUB-TEAMS
This second option provides the opportunity for you to generate revenue for creating templates for your clients monthly, as well as optionally providing Design review services through your Brand Manager role.
What does this mean?
When your clients are part of your team, you can limit their access to Easil to only include ‘Team Templates’, and instead, build out collections of exclusive templates for them. You’ll be in charge of the billing for the Easil account, so they won’t have visibility over the monthly charge and you can include this in your retainer and/or template catalog billing to the client.
As the sub-teams option sits underneath your primary Organisation account, you will be responsible for paying for all users within Teams and sub-teams underneath those. Clients in sub-teams also will not have access or visibility over the billing within Easil. You should also make it clear to your client/s that this method provides ultimate control of the account with you.
MANAGE MULTIPLE BRANDS WITH EASY TO USE BRAND KITS
Long gone are the days of preparing a brand kit for your client and handing it over in document format, along with a suite of logos, and leaving them to read through and manage the brand via these guidelines. These days a project does not get wrapped up there, and there is ample opportunity for taking things further than this handover point.
With employees of every role and creative skill set – or lack of – being regularly tasked with visual content creation as part of their day-to-day roles, there is an easy-sell option of accompanying that PDF output Brand Style Guide with a fully functioning ‘living’ brand kit.
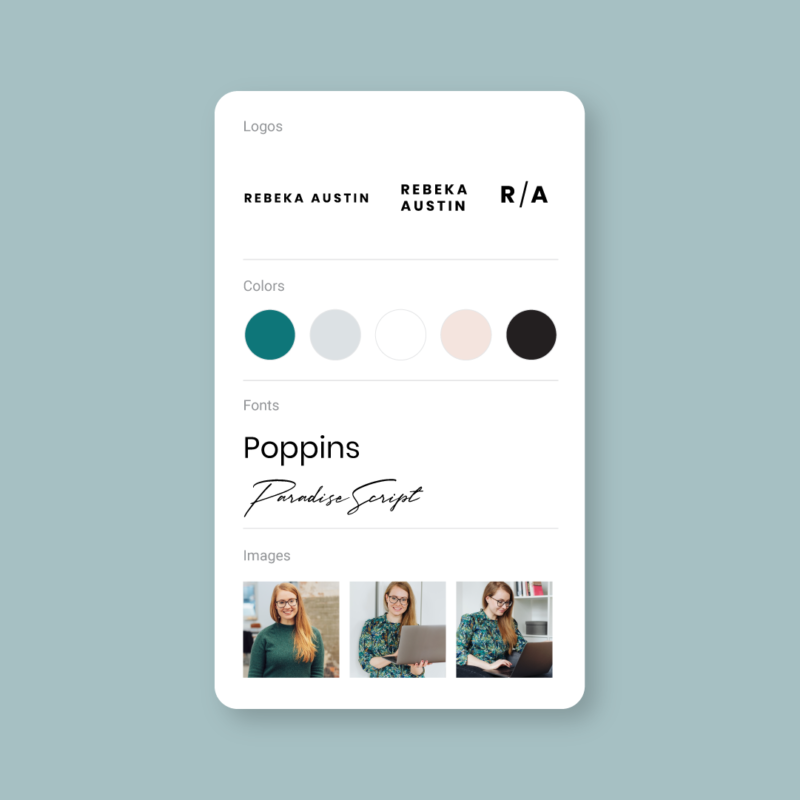
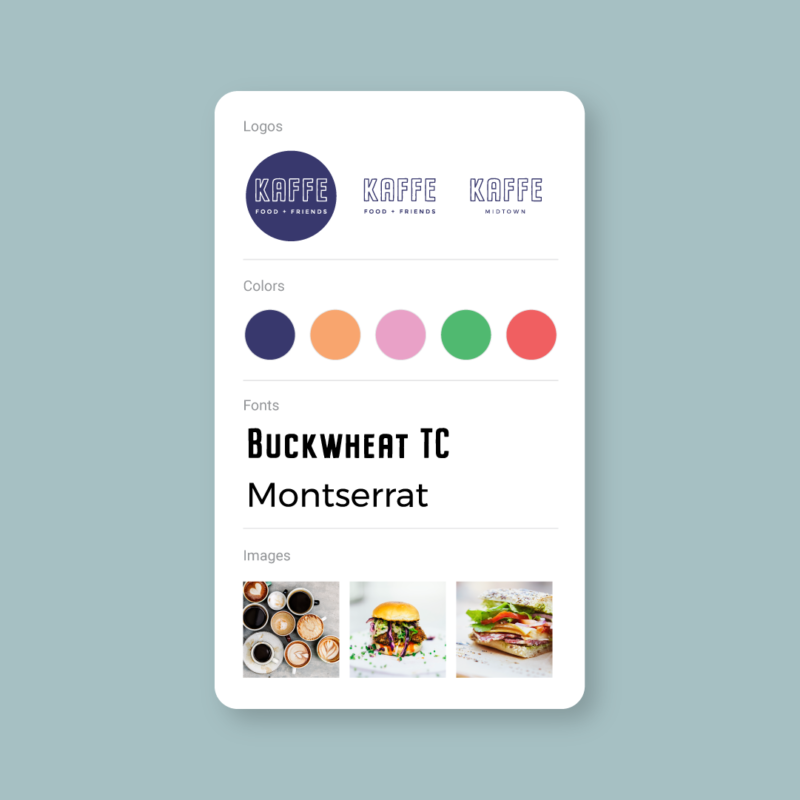
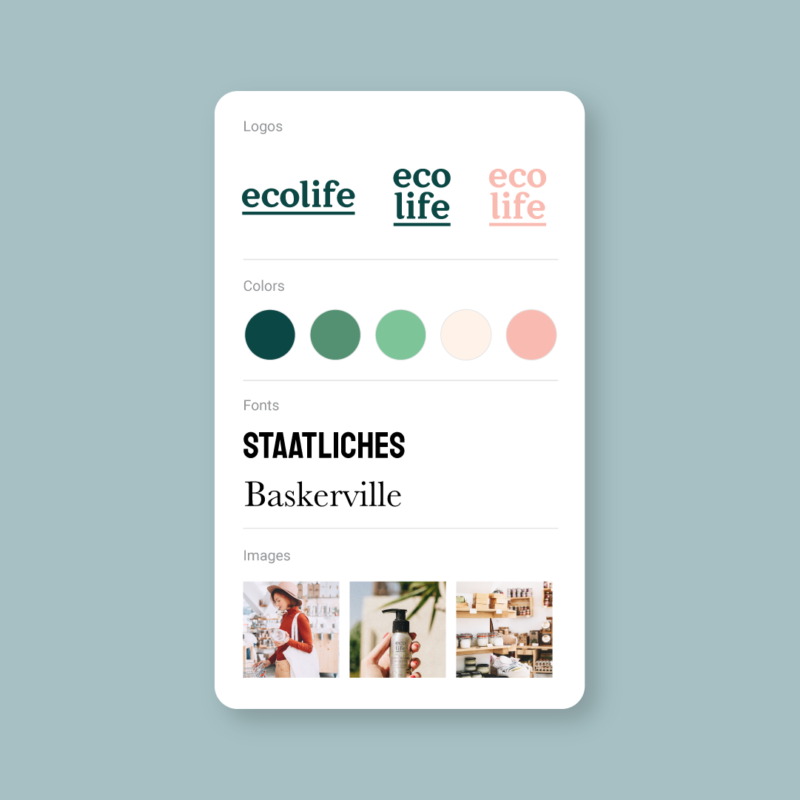
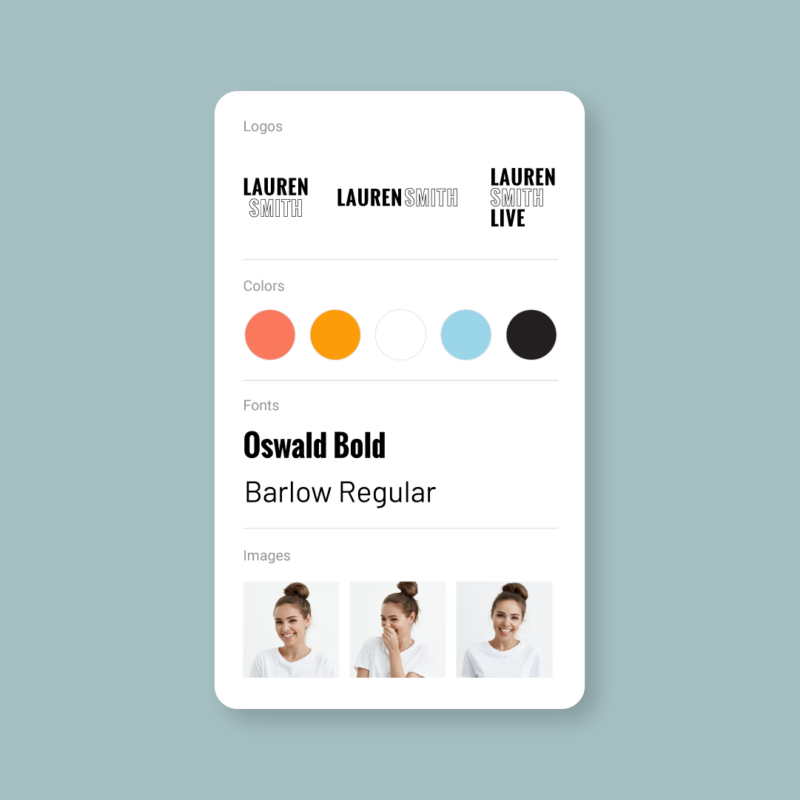
In Easil, you can build a Brand Kit that will assist you with styling graphics, for each client, in their own Team or Sub-Team in your Easil Account, creating a separate Workspace for each brand containing their own Brand Kit, Team Members, Design Templates and workflow setup.
How to set up a Brand Kit:
Click on the Brand tab in the top navigation bar. You must have ‘Brand Manager’ role applied to access this tab. Then, work through each of the tabs adding the brand assets:
1. Brand Colors: Click ‘Add Palette’ and then add Hex color codes, or RGB values for each color palette, closing the color selector after each color is added. You can create multiple palettes for a brand, for example adding Primary colors, a secondary and tertiary palettes, or seasonal colors if applicable.
2. Brand Fonts: Click on the Brand Fonts navigation in the left side navigation, and then ‘Add Font’. When the pop up modal appears, you can add one font at a time, and select to name the font (eg Heading Font, body copy font), or use the Font name, by toggling that selection on. Drag and drop your font file and confirm that you have the correct rights to use the font for your intended purposes. Alternatively, select a font from Easil’s library by using the dropdown option. Click on ‘Save Font’ to confirm, and then repeat for additional fonts.
3. Brand Images: Drag and drop images onto this tab to bulk upload quickly! Or, you can select single or multiple images via the upload button. Accepted image formats are JPG, PNG and SVG.
Optionally create a folder to move your images into, and use the ellipsis (…) to move each image to the relevant folder. Note: folder names are visible for your team mates when searching for images.
Hot tip: Use naming conventions for your images with keywords to assist with search, separating keywords with hyphens. eg team-planning-whiteboard.jpg
4. Brand Logos: Drag and drop logo formats or use the Upload button to select files from your computer. Accepted file formats are SVG (preferable), PNG and JPG.
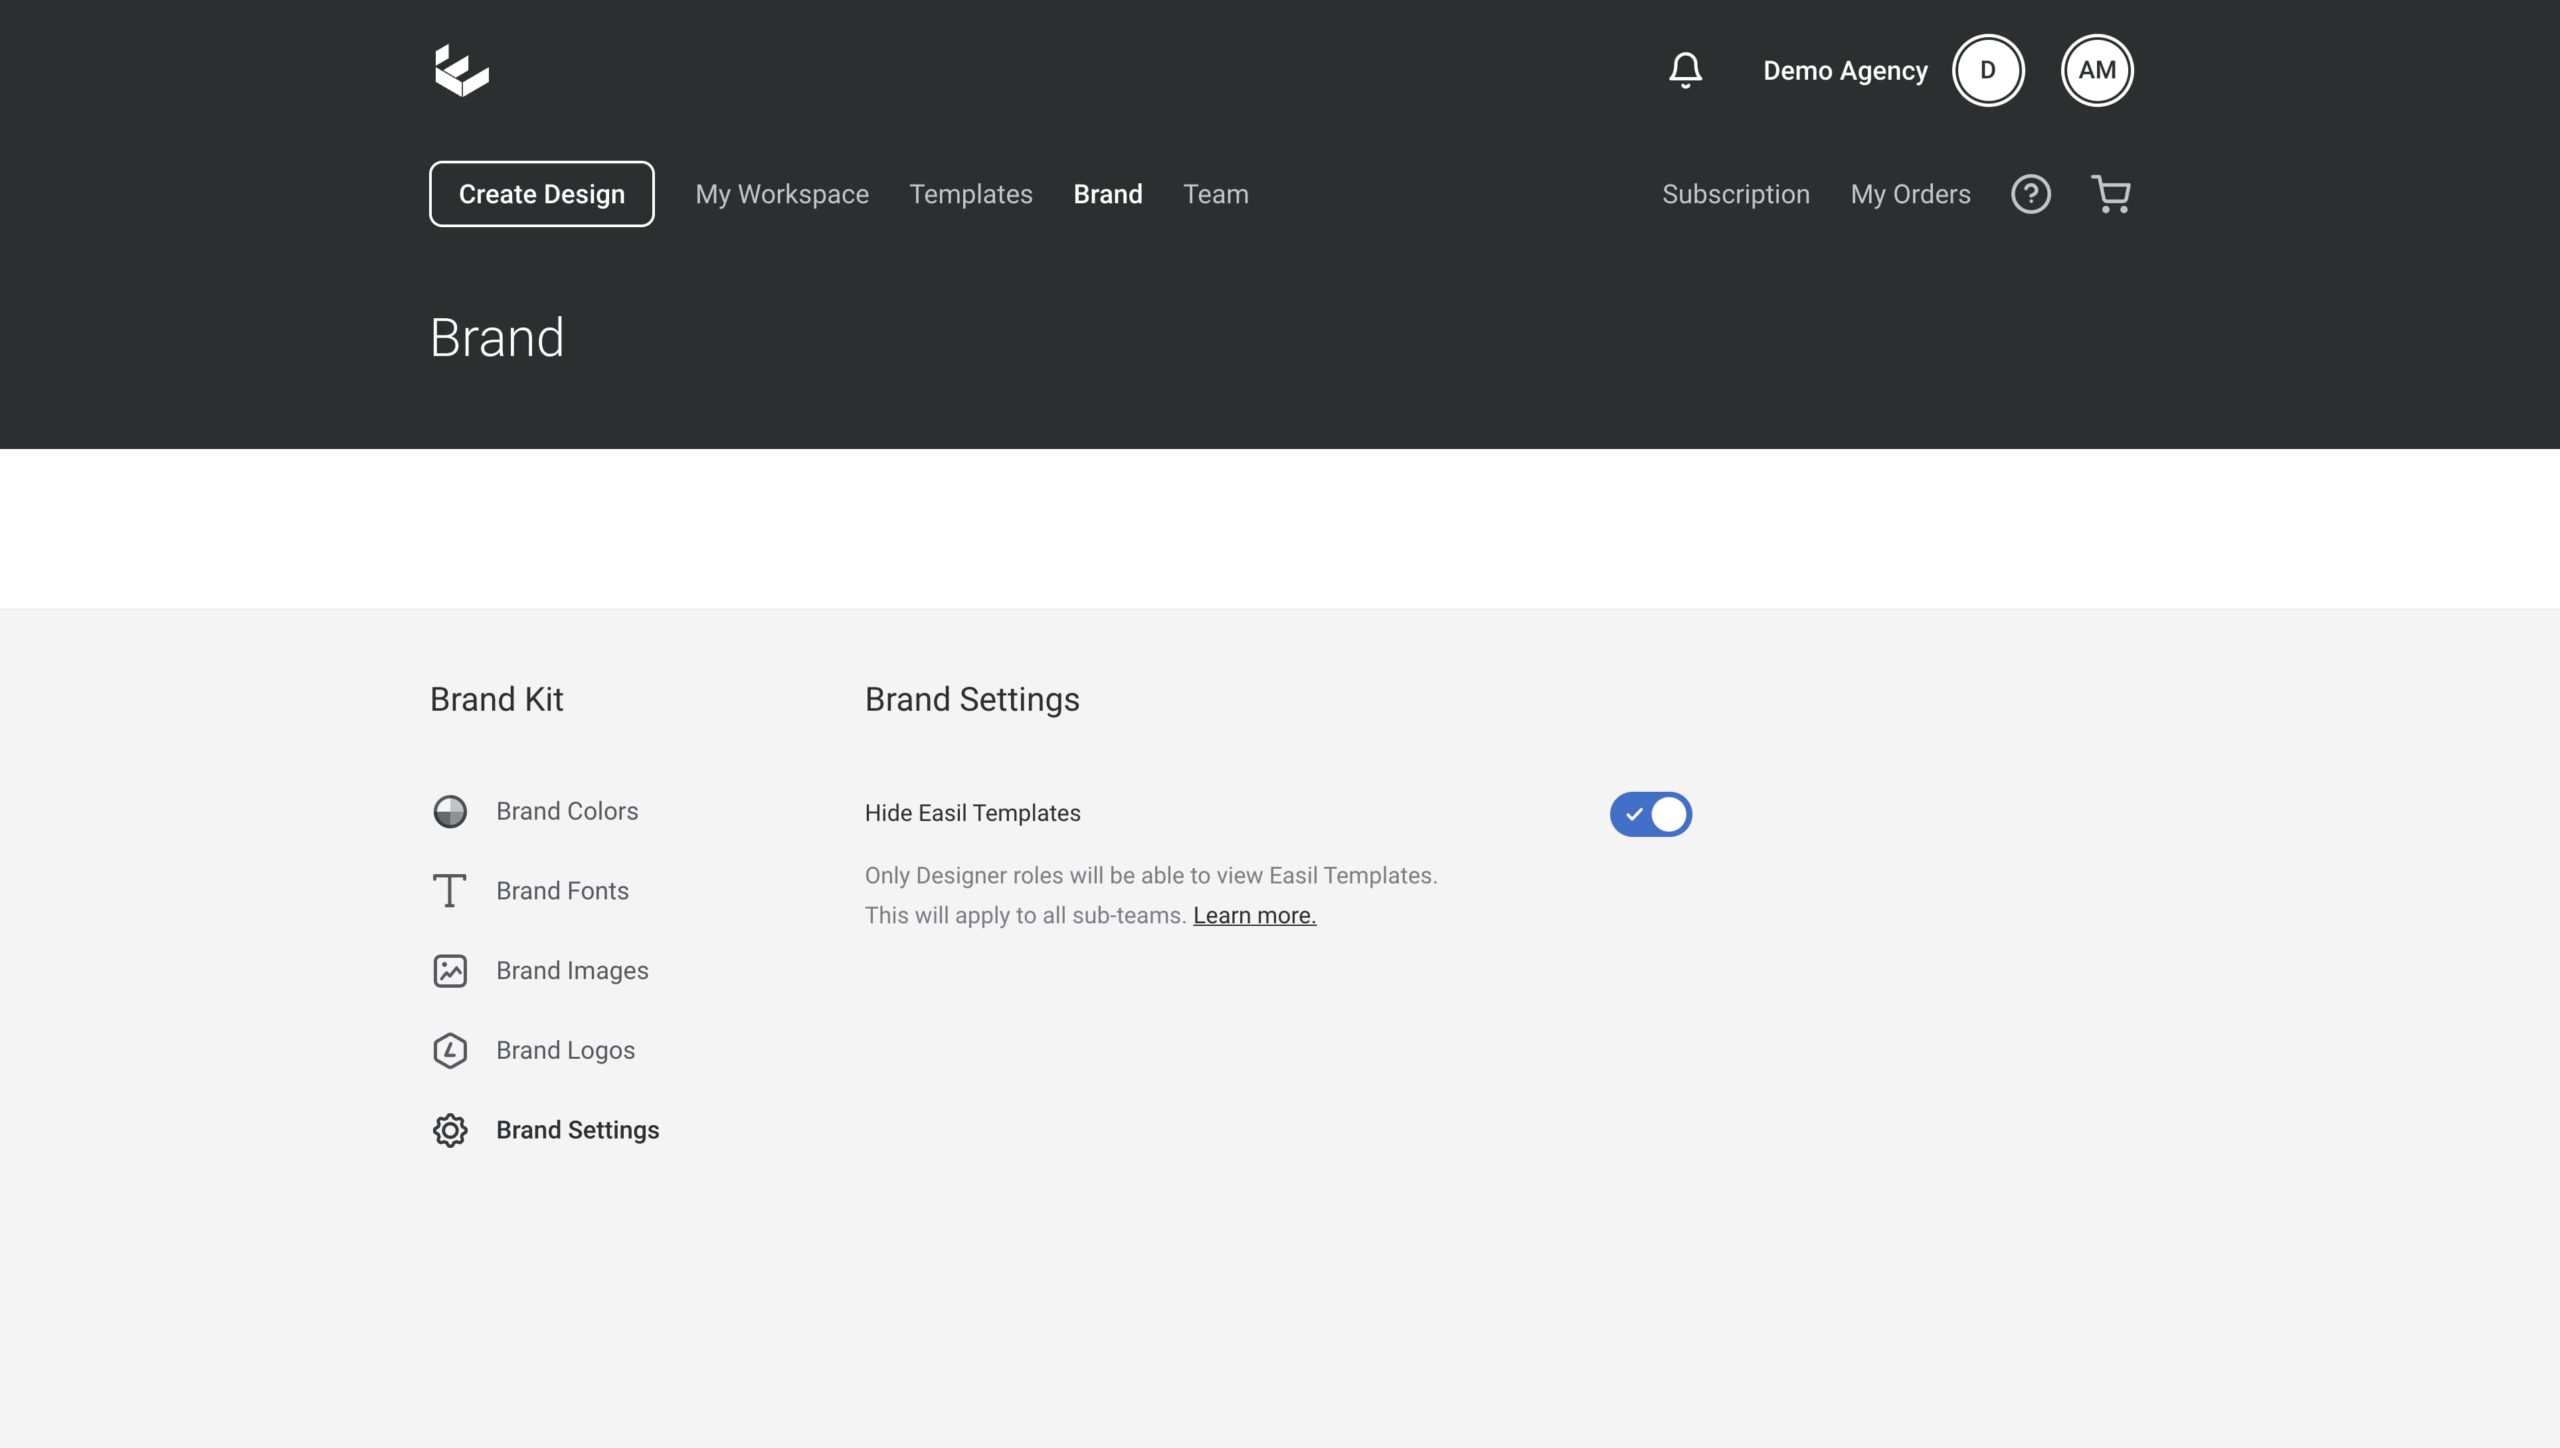
5. Brand Settings: This tab contains controls for team templates. If you are having clients log into Easil, you can hide the Easil template library from them. This setting is carried down from the top/organisational level of Easil.
CREATE SUITES OF BRAND SPECIFIC TEMPLATES
Having access to hundreds, or even thousands of pre-designed templates in a catalog is handy for any social media manager. However, templates are generic, and they should be considered a starting point for brands that want to get serious with their visual content strategy, or for post ideas.
Once you have a visual brand kit set up in Easil, you can take things a step further for your clients and provide them with a suite of exclusively designed templates, that will slash even more time off their content creation timeframe!
Just how ‘exclusive’ these templates are is up to you. You could either start with a base Easil template, and apply the specific brand colors, fonts, graphics, and imagery to them, and save it as a Team template for them, or you could design each one from scratch. Pre-filling the templates with brand-specific content and imagery will allow your client to make minor edits to the graphic template, and have it downloaded in minutes!
How to create a Team template, starting with an Easil template base:
- Click on the Templates tab, and access Easil Templates.
- Open a design and make your edits to the template, updating to the brand colors, fonts, etc.
- Return to your Workspace by clicking on the ‘E’ Easil logo at the top left.
- Locate the design thumbnail, and click on the black arrow at the bottom right of the card.
- Click ‘Convert to Template’.
This design will now be available as a master template within the team you have created it, meaning that when other team members click on it, they’ll be working on their own copy, keeping the original in tact.
OFFER BRAND MANAGER SERVICES
With a built-in Approval Workflow, there is an opportunity for agencies to provide their clients with both a custom built template catalog, but also provide outsourced Brand Manager Services.
By acting as their Quality control person, you can work with your clients to opt in which designs require approval prior to downloading. Then when their team creates these designs, they can submit their updated design back to the Brand Manager (that’s you!), for you to check all design looks A-OK, and make any adjustments before providing the Approved design back to them.
For businesses without an in-house Graphic Designer, this is a great option to ensure the graphics produced by their team are still high quality, but still reap the benefits of lower design costs and faster turnarounds!
To opt a Template in for Approval, follow these steps:
- Create the Design, including any resizes.
- Apply any locking/restrictions to each size, if application [see the next section for more info on this].
- Convert the Design to a Team Template.
- Head to Team Templates, locate the Design and click on the black arrow pop-out, and add the Approval requirement:
Tip: If you create an exclusive catalog of designs and want to ensure the team are using only those designs, you should hide the Easil templates from being visible to these users. You can manage this by clicking on ‘Brand’ and then heading to settings:
APPLYING RESTRICTIONS TO DESIGNS
If you’d prefer not to work with your clients taking on the Approvals side of designs – or being their Design Police – you can assist them with keeping their designs on brand with locking/restrictions. With tightly controlled design restrictions in place, many brands / teams can avoid using the Approval Workflow altogether.
Read more about setting restrictions in this article. Or jump straight into the practical side with our quick in-app lesson to learn the basics, here.
INVITE TEAM MEMBERS TO EACH BRAND
Once you’ve taken care of the initial Template setup, you will be ready to invite clients in to access each brand. Use the Team Switcher to navigate to each sub-team, and from there click on the Team tab. If you would only like the clients to access designs to make their own copies, apply the ‘Member’ role to their invitation.
If you are handing over a ‘Team’ to a client (eg not setup as a sub-team of your Easil account), then you will likely want to invite at least one person with full permissions applied (Admin + Brand Manager + Designer). Any client with Admin role applied can manage and remove any team members, including you.
OVER TO YOU
If you’re ready to streamline working with multiple brands / clients, then these tips are bound to give you a huge head start. However, if you would like assistance with anything at all Teams related, feel free to reach out to our team via social media, or in-application chat by clicking the (?) button.


