
When there just are not enough hours in the day, you need to be able to delegate tasks to people you can trust. But for a graphic designer, it’s a scary thought.. handing off your pixel perfect designs to your teammates that may not the same eye for design (or any eye for design at all…).
The fear is real.
Rogue staff changing colors of logos. Or using the wrong font.. gulp.. comic sans…
It’s time to take control of your time, and your designs, as there is now an easier way [for everyone involved] to create perfectly branded graphics and documents.
Within Easil, teams can now produce their own branded templates, apply locking and restrictions to elements of their design that they’d like to protect, but also add a final layer of security by adding it to a Design Approval Workflow, aka, your own Design Police.
This means that anyone in your team can be empowered to create branded materials, and the design and marketing teams can rest assured that they’ll retain full control of the end result, but not be burdened with the entire production process.

HOW THE DESIGN APPROVAL WORKFLOW IS SET UP
If you already have a team and your own branded templates set up in Easil, implementing the Approval process is a simple extra step that is literally a click away!
Brand Managers are key to the approval process, and will be tasked with the job of monitoring Approval Requests, and setting the templates to requiring approval. Ensure that you have this role assigned to anyone that should have access to this part of the workflow, and that users that will require to submit for Approval, do not have the Brand Manager role assigned.
SETTING UP TEMPLATES FOR APPROVAL (BRAND MANAGER ROLE)
Any Designs that have already been created into Team Templates will be able to immediately be added to the new process. Note that this is a template ‘opt-in’ system, meaning that you can pick and choose which designs you’d like to ensure an approver looks over, and allow other designs to bypass the flow and allow instant downloading for the user.
- Navigate to your Teams Template section, and locate the Design that you would like to activate.
- Click on the black arrow icon located at the bottom right of the design card.
- Select ‘Enable Approval Process’.
- This Template is now required to be submitted for Approval by any team members that create copies of the template. It will have a blue check-mark icon added to the bottom left corner of the card so that any user will clearly see that this design requires approval.
Design Templates can be opted-out of the Approval Process by a Brand Manager clicking on the black arrow icon and reverting to ‘Disable approval process’.
SUBMITTING DESIGNS FOR APPROVAL (NON-BRAND MANAGER ROLES)
Teammates that make a copy of a Template requiring approval will have access to make changes within the restrictions set on the original template.
For example, if the original design has any locking applied, these will still be limited as usual. The approval process is an additional step that will prevent the user from downloading a file prior to approval being granted.
A non Brand Manager team member requiring approval for a template will be able to request this from two different areas; from their Workspace, and also within the Easil editor.
Requesting Design Approval from the Workspace:
- Locate the design that is ready for submission for approval in the Workspace.
- Click on the black arrow icon located on the bottom right corner of the design card.
- Select ‘Request Approval’.
- On the pop-up, add an optional comment, and then Submit.

Requesting Design Approval from within the design editor
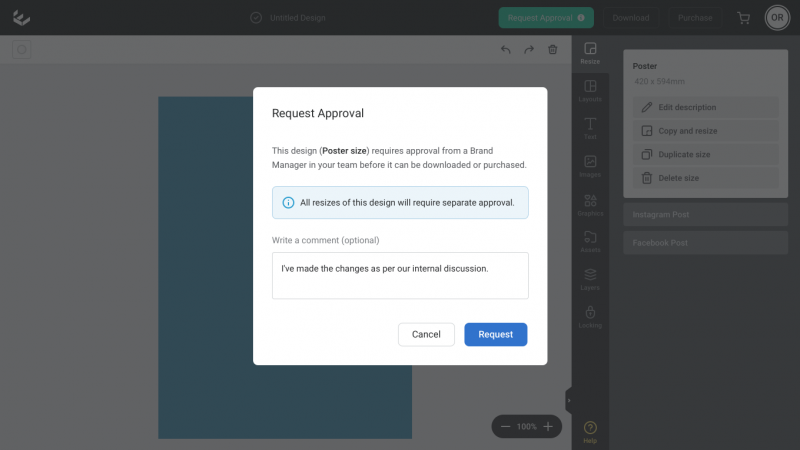
Any designs requiring approval prior to download are also clearly labelled within the Easil editor.
- Click on the ‘Request Approval’ green button at the top right side of the Easil Editor.
- Optionally, a comment can be added to send with the Design, to the Brand Manager/s on your Team.
- Click on ‘Request’ to finalise the submission.
- A grey ‘Approval Requested’ button will be visible at the top right of the Easil design editor.
- On the pop-up, add an optional comment, and then Submit.
Note: You can retract a request for approval at any time prior to the design being approved, by clicking the arrow on the right side of the Approval Requested button, and select ‘Cancel approval request’.
Requesting Design Approval – Pending state
Designs that are submitted, and are awaiting review by a Brand Manager, will be placed in the My Designs tab in the submitters Workspace, under ‘Pending Approval’.
Use the arrow located at the right side on the section to scroll through to additional designs if they are not visible from the main view.
APPROVING OR DECLINING REQUESTS (BRAND MANAGER ROLE)
All team members with Brand Manager role applied will have access to all team designs submitted.
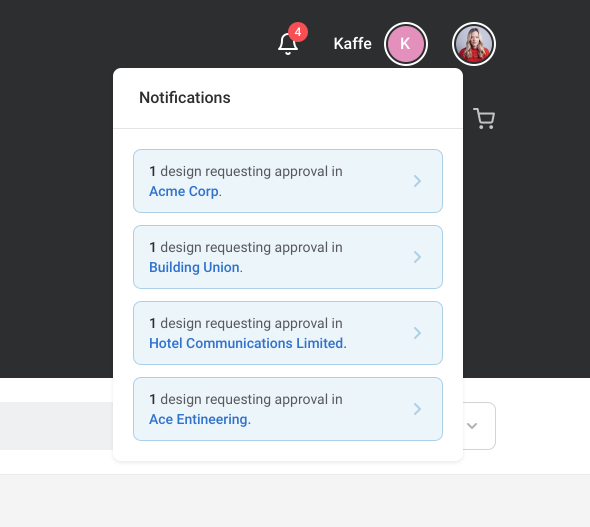
A notification will be visible at the top right of the Brand Manager’s workspace, along with details of each of the approvals, and designs to be actioned will be displayed in the My Designs Tab > Requesting Approval with an orange check-mark at the bottom left corner.
To approve a design without making any changes:
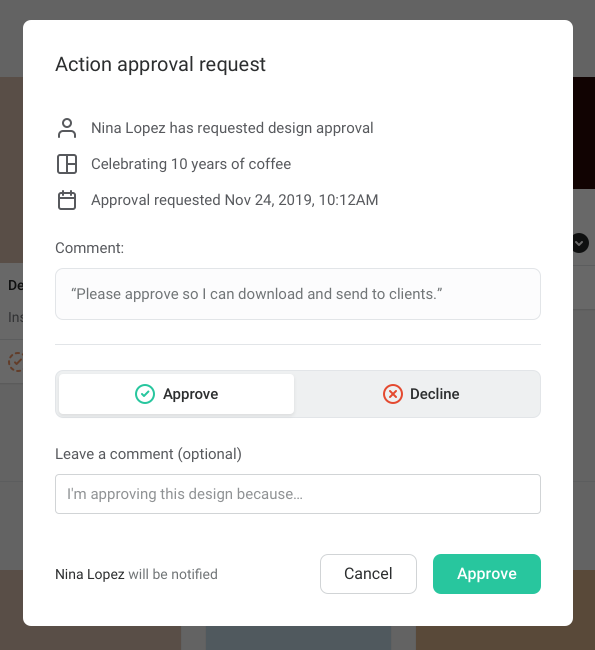
- In the Workspace, you can click on the black arrow icon located on the bottom right corner of the design card, and ‘Action approval request’.
- On the pop-up, toggle to the green check-mark approved status, and then click on the Approve button.
- A comment can optionally be added that will be emailed back.
Make changes to a design, and then approve:
- Click on the design card title to open the design in the Easil editor.
- Proceed to make any changes using the editing tools.
- Click on the green ‘Action Request’ button at the top right of the editor screen.
- On the pop-up, toggle to the green check-mark approved status, and then click on the Approve button.
- A comment can optionally be added that will be emailed back.
For reference, a copy of all Approved Designs can be found in the Workspace of the Brand Manager that has approved the design. In this area, designs can be unapproved if an error was made in the approval process. Unapproved designs will be sent back to a Pending Approval column in your My Designs tab.
To decline a design:
- In the Workspace, click on the black arrow icon located on the bottom right corner of the design card, and then ‘Action approval request’.
- On the pop-up, toggle to the red check-mark declined status, and then click on the Decline button.
- A comment can optionally be added that will be emailed back.
A reason for decline can optionally be supplied in the comment field, and will be emailed back to the user that submitted.
APPROVED DESIGN PROCESS (NON-BRAND MANAGER ROLES)
When approval is granted by a Brand Manager, the design is returned to the submitter, and will be located in a new tab in the Workspace, titled ‘My Approved Designs’.
Any designs that are located within the My Approved Designs tab will be able to be downloaded, or ordered.
Further changes cannot be made to the approved design – and it can only be downloaded in the current approved state.
To make changes to a design that has been approved, click the ‘Copy and Edit’ button from the black arrow icon located at the bottom right of the design card. This will make a draft copy of the approved design in your My Designs tab.
DECLINED DESIGN PROCESS (NON-BRAND MANAGER ROLES)
If a Brand Manager declines a submission the design will be returned to the team member with a notification email (including reason for decline, if stated), and return to the ‘My Designs’ section of the Workspace, under ‘Approval Declined’.
From here, the options available are:
- Re-submit for approval: This will ask for approval on the design again, in it’s current state.
- Revert to draft: This allows changes to the design to be made, prior to re-submitting for approval.
- Archive: Filing the design in archives and not proceeding further with changes or the approval process.
OVER TO YOU
Are you looking for a way to work with team mates to maintain brand standards? Try out the Approval process, and let your design team get away from making minor design changes, and back to working on the big ideas.