Knowing the fundamentals of good typography can take a standard design from basic to professional in just minutes!
With Easil templates, our design pros have done all the hard work in laying out elements and their correct hierarchy. But if you’re planning on creating designs from scratch, or to make substantial changes to templates – it’s definitely worth the time to learn these skills!
The following lesson will introduce you to a few key text editing options that are available in Easil, as well as some key pointers for choosing fonts and other type principles.
HOW DO TEXT BOXES WORK IN EASIL
When working with a text, it’s important to first know how an Easil text box functions. Here are the things you need to keep in mind:
- Clicking a text box once selects the text box to apply changes in formattings, such as applying a new color, font, size, or opacity.
- Changes applied to the box such as color, font, size, opacity or line spacing, are applied across the whole text box. eg you cannot apply a font to one word, and then another to other words.
- Double-clicking the text box enables text edit mode, to allow you to change the words that appear within the box.
- You can reposition a text box within your document by clicking to select, and drag to its new position.
BASIC TEXT EDITING TIPS
The following skills can be learned by clicking through to the in-application lesson.
- Change the Font on your text;
- Update the Size of the text within the text box;
- Add a Drop Shadow or Glow effect to your text,
- Change the Alignment of the text, and
- Add an image to the text using the Text Mask Tool
HOW TO CHANGE THE FONT

You can apply any of Easil’s fonts to any editable text box:
- Select the text box by clicking on it in your design.
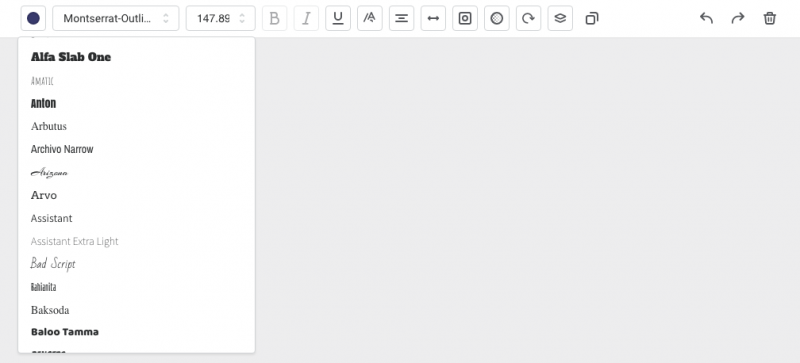
- Open the Font chooser dropdown located at the top left of the Actionbar.
- Scroll down to choose a font to apply. Or if you know the name of the font, you can also start typing the first few characters of the font name to skip to the font to select.
Hot tip: You can upload your own fonts to use in Easil! These will appear in the font dropdown under ‘My Fonts’ and can be used to apply to any editable text boxes within your design.
HOW TO CHANGE THE FONT SIZE

To change the size of the font within a text box:
- Select the text box by clicking on it once.
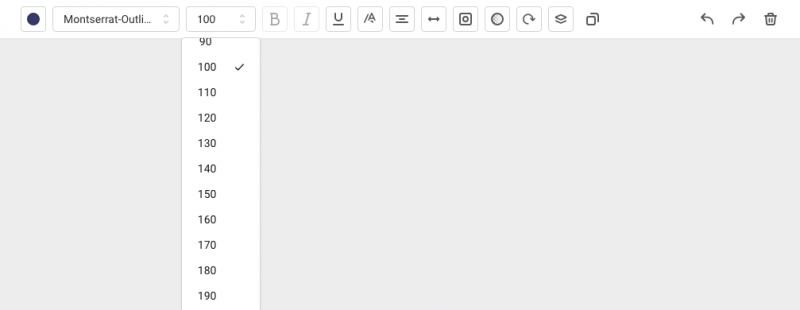
- Click on the Font Size dropdown located at the top left side of the Actionbar.
- Scroll down to choose a size or enter the font size you require into the input field, and press enter.
HOW TO ADD A DROP SHADOW TO TEXT
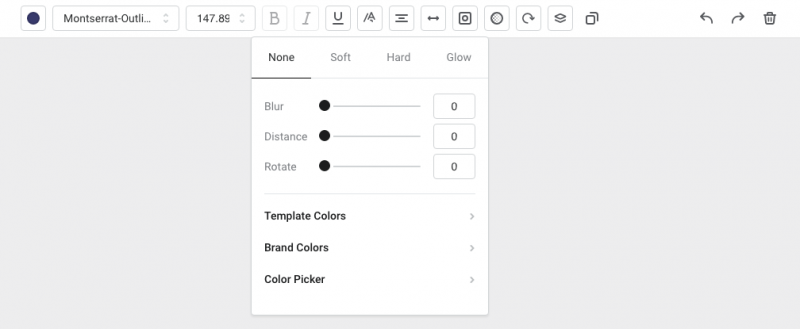
Easil offers 3 different options for text effects within the Shadow Tool (located in the top ActionBar, when you click on a text box); Soft Shadow, Hard Shadow, and Glow. In addition to these pre-set options, you can apply your own settings by using the Blur, Distance and Angle sliders located underneath, and applying your own colors to the shadow or glow.

- Click the text box by clicking on it one.
- Then click on the Shadow tool in the Actionbar.
- Click on the pre-set options at the top to apply the default settings for Soft or Hard drop shadows, a Glow effect, or to remove the effects, press ‘None’.
- Use the sliders and Color chips underneath to further customize.
Hot tip: Glow effects work best against dark backgrounds. To intensify the glow, try duplicating the text and adjusting the position of the 2nd layer so it’s directly on top of the first.
CHANGE THE ALIGNMENT OF THE TEXT
To change the Alignment of the text within a box:
- Single-click the text box to select it.
- Click on the Text Align button on the Actionbar.
- Choose from Left, Center or Right Alignment by clicking on the options.

ADD AN IMAGE TO TEXT USING THE TEXT MASK TOOL
Adding an image to text is a fantastic way to take your design to the next level! You can create gold text, glittery text, champagne or beer in text… the options are only limited to the photos you have on hand!
- Single-click the text box to select it.
- Click on the Mask tool in the Actionbar.
- Whilst the text is still selected, click on the Images tab in the right Sidebar, and click to add one of your own images to the text.
- To adjust the image, click on the text box again, and then the Mask icon. You’ll now be able to see the editing options for text including ‘Crop’ (using the change the size of the image placed inside, as well as the position) Opacity adjustment, applying a Filter, and clearing the image:

Hot top: Text with an image placed inside is still editable! Double click to enter text-editing mode, and remember to adjust the position of your image once you have finished typesetting.
Your lesson with Basic text editing and effects is complete! Ensure you watch the video tutorial, as well as do the walk-through in Easil lesson to get the most benefit. Happy Designing!


