
If you commission a custom image, photograph, illustration, icon, pattern or graphic design for your business, it’s important that you get a return on your investment.
We’ll show you some creative ways to use your custom image as many times as possible, taking one image and applying it in ten different ways to create stunning designs.
You might be familiar with this scenario in your business, where you:
- invest in a professional photograph or photo shoot, commission a pattern design or illustration or background image.
- use it once for some business creative.
- then never use it again?
Not any more! In this post, we’re sharing some super creative ways to use your custom, professional graphics in more ways than one (ten ways, in fact).
If you’ve outlaid good money for a professional photographer, illustrator or branding design, it’s important that you make the most of it, in creative ways. This is all about how to hack visual design using one single custom image to create a range of unique designs.
Let’s show you how it works, starting with our single custom image. Here’s our image that we will be using throughout this post in our examples:
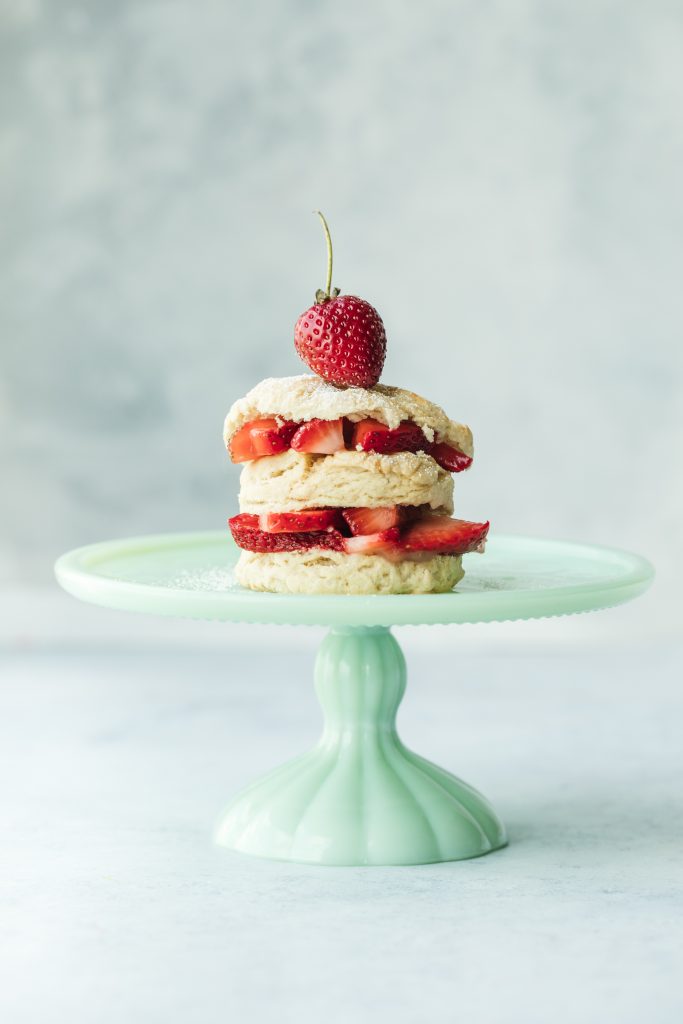
Our custom image is a professional foodie photograph. It’s droolworthy and ready for creative action!
Hot Tip: If you have any custom, approved brand images, upload them into your Brand Kit in Easil, so that your entire team can use them. This is one of the best parts about Easil’s Brand Kit – it’s not just about your brand logos, fonts and color palettes. Brand Kit stores your brand images too. Now your entire team can access your most important brand assets, 24/7.
Ready to jump in and hack visual design? Let’s do this!
One Custom Image (Used 10 Ways!)
1. Crop your Custom Image
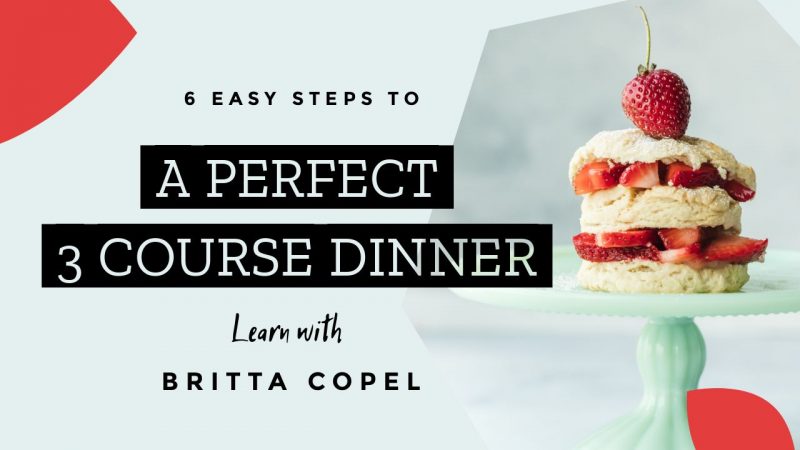
Cropping your image to zoom right in on the detail can create a totally different focus and perspective. It might even be impossible to tell that you have used the original image!
Our custom image lended itself very well to being cropped into a square image for social media:

To create this design, we:
- Opened an existing Easil template for an Instagram Square post.
- Uploaded our image, and extended it out past the limits of the canvas, by using the mouse to drag the corners of it. This cropped off the edges of the design canvas.
- Updated the text overlay to match our topic.
Hot tip: Play with the orientation of the image by rotating it slightly. Click on your custom image, then choose the Rotate tool to rotate it at any angle to suit your design. Or you can flip it too. Use the Flip Horizontally tool to flip it horizontally, or the Flip Vertically tool to flip it vertically.
2. Apply a filter to your Image
Applying a filter can be the easiest way to change up your design and to use your custom image in a new and different way. Easil’s pre-set filters are perfect for this. Simply select the filter you wish to use from the Easil Filters tool in the dashboard, and apply it to your image.
In this design, we wanted the image to be subtle, working behind the main promotional message of the graphic:

To create this design, we:
- Added our image to a pre-designed template in Easil.
- Selected the image, and then clicked on the Filters tool to choose our filter options. We chose a black & white filter and then adjusted the brightness and contrast until it would work behind our text.
- Clicked on the text and headings that were provided in the template, and edited them to the new wording you see above.
- Used the Color Palette Tool to switch out the heading colors to something that would stand out against our black and white background image.
Hot Tip: Mix up your own Custom Filter using Easil’s Advanced Filter options. Click on any image and choose the Filters tool. As well as pre-set filters and controls for filter adjustment, you’ll see a Filter ID Code. This is your unique filter code and you can change it by changing the settings for Brightness, Contrast, Saturation, Grayscale, Sepia, Blur and Hue. When you create a filter that you love, simply copy and save the code. This is your unique custom Filter ID, and you can use it again and again.
3. Add your image to a simple shape mask
Easil has a growing selection of shape masks that are perfect for adding effects like this one below. Shape masks are simple to create, and can really lift your design to create interest. They’re also perfect for showcasing your custom image!
To create this design, we:
- Chose the Shapes tab in the Right Hand Side Menu Panel in Easil.
- Then we selected the Shape Masks tab from the menu. This brings up a large selection of different Shape Masks that you can use to add to your design and fill with stunning images.
- In this case, we chose the ‘8 Sided Boxy Shape Mask’ and clicked to add it to the design.
- We then opened up the Images tab, selected our Custom Image, and dragged it to the Shape Mask. Easil will always snap your image into the Shape Mask for a pro-quality design!
Hot Tip: If you’re a non-designer, start playing with Shape Masks by using one of our Easil Templates. Choose a template that already includes a Shape Mask, and switch out the image to your own Custom Image by dragging it into the Shape Mask. Then simply change the text wording and colors to match your image. Starting simply with a template is a great way to learn when you’re a non-designer.
4. Place your Custom Image inside text
Creating stunning designs with Image in Text is one of our favourite things to do at Easil. You can find out more about Text Masks in articles like this on our blog.
Easil’s Text Masking feature allows you to turn any font – either a font in Easil or your own uploaded font – into beautiful text filled with any image you choose. It’s a feature that takes your designs from amateur to pro, without being a designer!
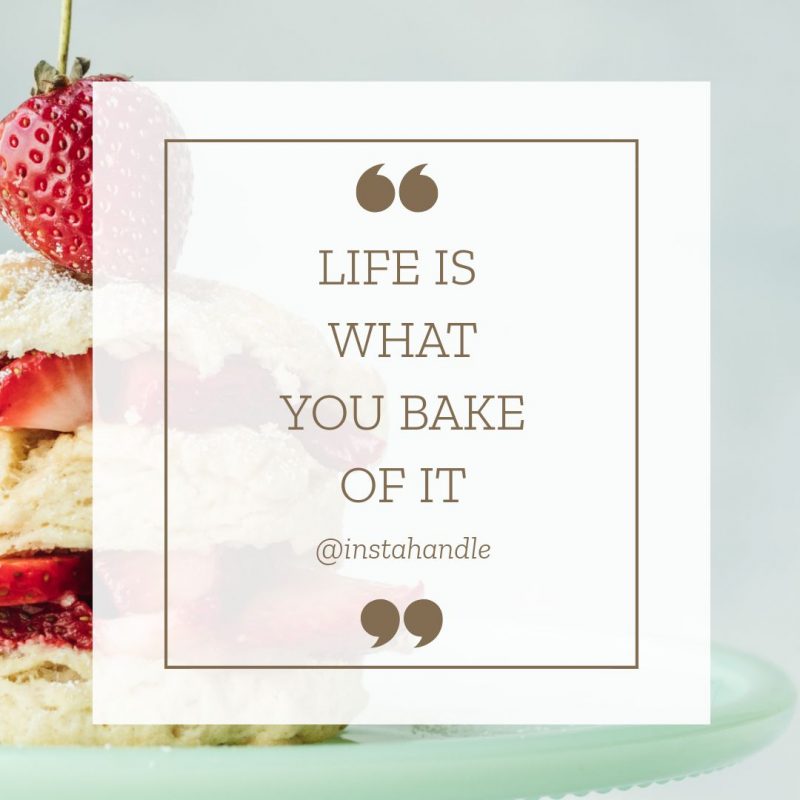
In this design we used our custom image to fill a text mask, create interest and draw the eye:
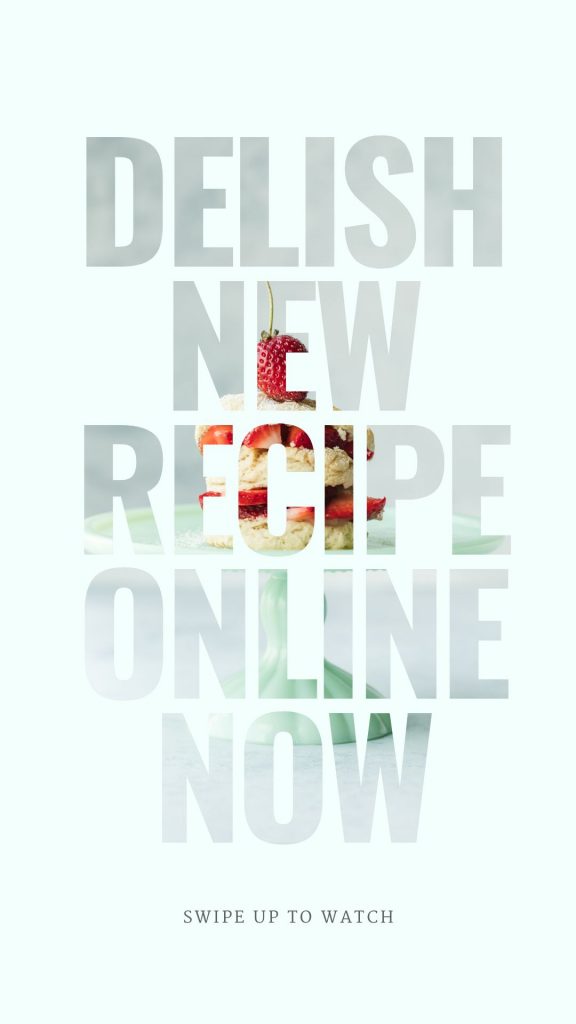
To create this design, we:
- Started with an Instagram Story template that uses a bold font. For text masking, we recommend bold, chunky fonts for the best effect.
- Clicked on the text heading to highlight it. This brings up the Action bar options for text at the top of the workspace.
- Clicked on the Text Mask icon in the Action Bar.
- Selected our Custom Image by clicking on it. Easil then added the image into our text.
- Adjusted the background colour to contrast with the colours in the image.
- We now have a stunning text mask effect!
Hot Tip: You can easily reposition the image in your text mask by clicking on the Crop tool that is part of the Text Mask tool subset in the Action Bar. The Crop tool will allow you to move the image around so you can position it the way you want it to sit behind the text. Once you’re done, return to the main menu by clicking off the text or pressing the left arrow on the Action Bar.
5. Add your Image to a Geometric Shape Mask
Geometric Shapes can add a lot of interest to your design, so why not go geometric with your shape masks too? In this next design we used a geometric shape mask in a hexagon style from our library of Easil Shape Masks:
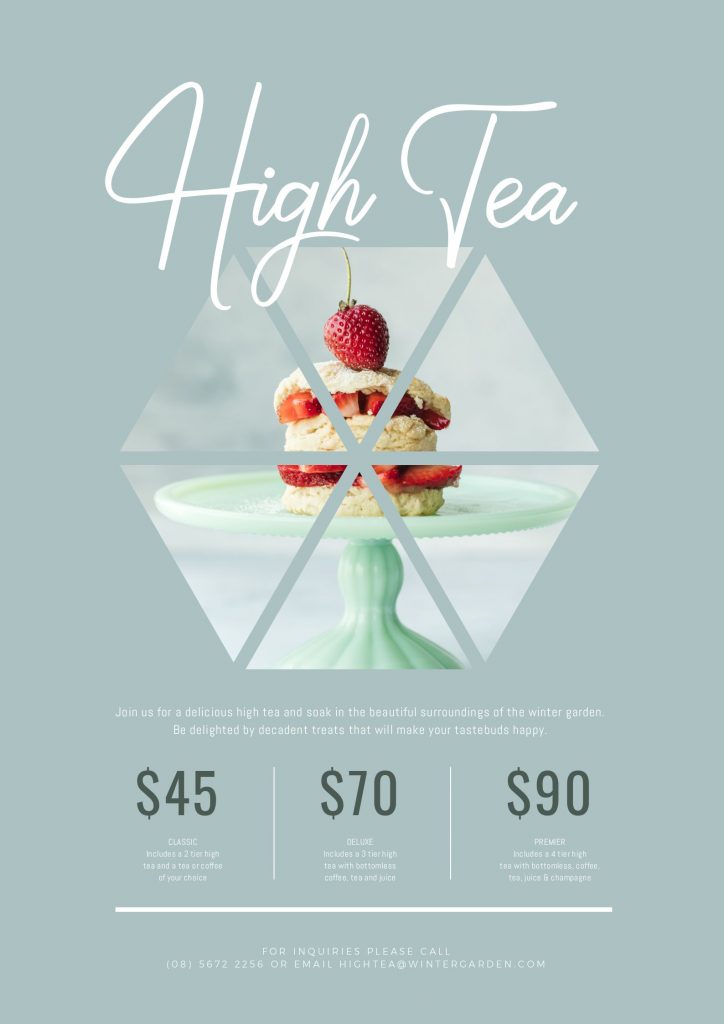
To create this design, we:
- Started with a template that has a single central image, or in this case a central grid of images (click the image above to see the original template).
- Removed the images, then searched for “Geometric Shape Mask” under the Graphics (Shapes) tab.
- Selected one of our favourite Geometric Shape Masks and clicked to add it to the design.
- Located our Custom Image under the Images tab and dragged it into the shape mask. The image automatically drops into all the sections of this multi-sectional geometric shape mask.
Hot Tip: Use a shape mask which reflects the theme of your design. We used this hexagonal shape mask as it looks like slices of cake!
6. Add some doodles to your Custom Image
Hand drawn design elements are all the rage right now. They can really lift a design, or taking a simple photograph or custom image to new levels of wow-ness.
In this design, we’ve taken our custom image and added some of Easil’s exclusive hand-drawn “doodles” to lift it:
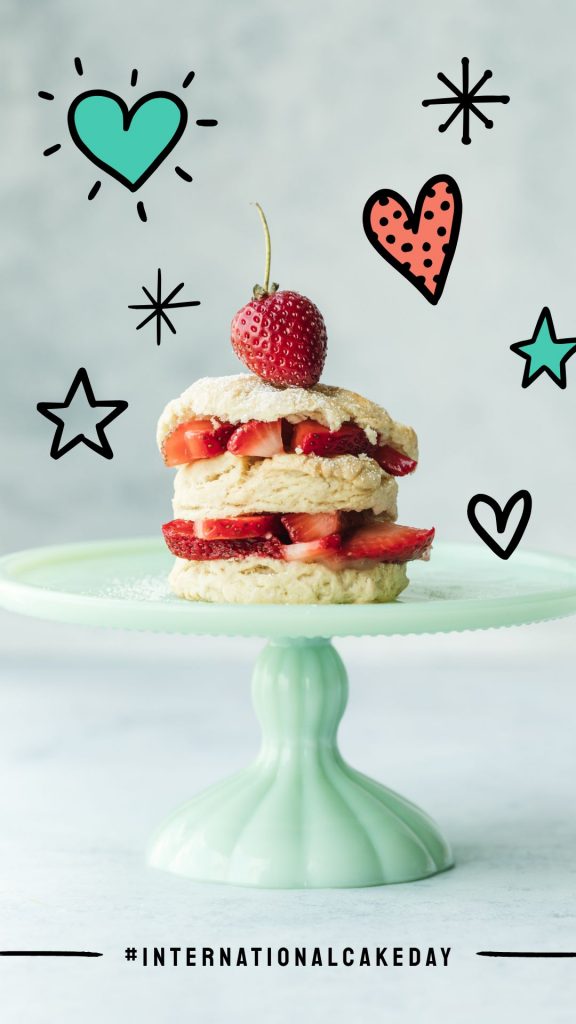
To create this design, we:
- Resized our design to an vertical image.
- Added our Custom Image by selecting it from Images, and dragging it to centre to fit the canvas.
- Added some text for International Cake Day.
- Clicked on the Shapes tab and searched for ‘Doodle Kit’ to add to our design.
- Placed the doodle shapes on our design to give it some fun and personality.
Hot Tip: If you find an element, shape or icon that you love in Easil, save it to Favorites! To do this, finish your design, then click on the Assets tab in the Right-hand menu. Choose Template. You’ll see elements of your design come up under Images or Vectors (regardless of whether you are working on a custom design or using a pre-designed Easil template). Choose Vectors and you will see any hand-drawn doodles included in your design. Hover over each graphic and click the Heart to add it to your Favorites. Keep adding elements you love to build up your Favorites over time!
7. Create an animated GIF with your Image
If you haven’t met Easil’s GifMaker yet, then you haven’t really discovered one of the most fun parts of Easil! We love creating GIFs, and with our GIF Maker you can create GIFs from text, but you can also create GIFs with design elements, filters, images, and more.
Speaking of creating GIFs with images, we used our custom image to create this GIF below. It adds some action and energy to our Custom Image:

To create this GIF design, we:
- Added our custom image to a square Instagram-Size template.
- Searched in the Shapes tab for assets using the term “Ripped Paper” and chose a graphic that had the torn edges effect.
- Clicked to add the graphic to our design as a layer, then used the Color Palette Tool to choose a strawberry pink color.
- Clicked Duplicate on the top menu to copy the paper effect 3 times so we had 4 of them, in total.
- Used the Color Palette Tool to change the color of the duplicate elements to be different shades of pink for contrast. Then positioned them so that they covered the image in 4 different color panels.
- Clicked the Text tab and added the word Yum using a large, bold font as a layer over the pink sections.
- Duplicated the entire design 5 times.
- Removed the sections in order as we moved down the design pages to reveal the image underneath, with the final page of the design being the full image without any pink layers on it. Use the Layers tab to help hide or remove layers as you are working.
- Published the image as a GIF at Fast speed.
Hot Tip: If you want to quickly choose different shades of the same color, click the Color Palette tool and then click Color Picker. You’ll see a strip of colors on the left hand side that are derived from the color you are working with (in this case, pink). You can quickly choose an alternative shade of pink or choose a specific color from the selection panel.
Check out some other creative ways to work with GIFs in this article, that includes 7 awesome animated GIFs that you can easily re-create.
8. Apply an overlay to your Image
This is perhaps one of the most simplest (yet powerful) moves that you can make in Easil. It really lifts your design. It’s simply a matter of adding an image to a design, then adding an overlay over that image to transform it.
To lift it even more, you can use transparency to allow the custom image to peek through the overlay. Just like we have in this design:
To create this design, we:
- Added our image to an Easil Template.
- Searched for a square shape, by clicking the Shapes tab and searching for “Square”.
- Placed the colored square shape over the top of the image. We made ours white, then used the Opacity tool (in the Action Bar) to adjust the Opacity of it. This allowed the image to show through slightly.
- Adjusted the order of the box in the layers so it sits behind the text, and makes it easier to read.
Hot Tip: Another way to use opacity is to add a colored shape over your design and then using the Opacity tool to reduce the opacity of the shape. Essentially this adds a color filter across your entire design. Then use the Position tab to bring forward any text you have on the design by moving the shape overlay backwards. This works well when you want to make white/light text stand out over a colored or busy background.
9. Adjust the transparency of your image
We haven’t finished with the Opacity tool yet. We love how this tool allows you to take an image and convert it from being “solid” or opaque to being transparent… almost like a ghost.
The key here is the level to which you adjust the transparency. When you do this right, you will be able to have your image shine through your design. Too much transparency and you can barely see your image. Too little transparency, and you won’t be able to tell the difference from your original image.
Find a middle ground and you can create effects like this:
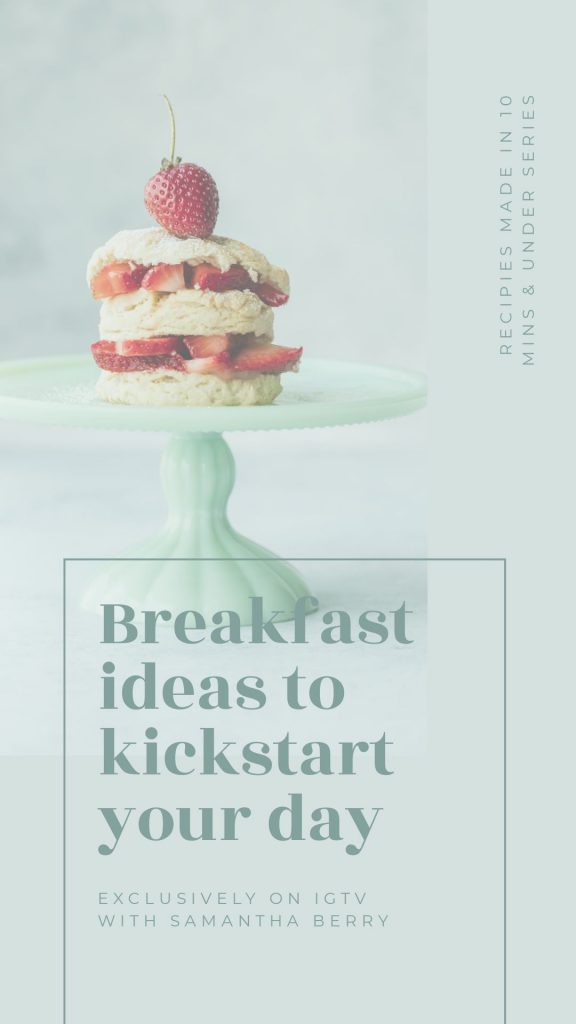
To create this design, we:
- Used a template in Easil that was perfect for the IGTV image we wanted to create.
- Clicked on the Images tab and chose our Custom Image and clicked to replace the image in the template with our image.
- Used the Opacity tool to reduce the Opacity back to 55 percent.
- Changed our text to say what we need it to say, then published our image!
Hot tip: Play with applying a background color to your design too. Your image will blend with the colour you place behind it when you use the Opacity Tool. This is perfect for reducing the amount of visible detail in an image; particularly if you’ll also be adding text on top of it.
10. Layer it up
One of the most powerful functionalities in Easil is Layering. You’ll see it in many of our templates, but you might not know how to use it yet. It actually brings some of the powerful “layering” functionality of tools like Photoshop into your favorite DIY Design tool!
Here’s the best part about layering in Easil: You can use layers with transparency or filters to get ultra creative. In this example, we’re able to feature our custom image in the background, and then add a pop of color and fun with a second, strawberry-topped custom image over the top.
Think of the layers as being just like a Strawberry Shortcake Layer Cake:

To create this design, we:
- Placed our image as the back layer, positioning it so there is a clear zone of white space to add text.
- Duplicated the layer using the Duplicate tool in the Action Bar, then repositioned and cropped the second layer, so it displays nicely within the white space created.
- Applied a filter to brighten the image on the top layer, and adjusted the opacity so that the bottom layer would show through slightly.
Here’s how it looks across the different layers:


Hot tip: This style works best with images that include some element of ‘white’ space. This allows you to creatively crop your image to add different layer effects. Play with the Layers tool in Easil to get familiar with it, and remember that you can switch different elements on or off by clicking the “Eye” icon. This allows you to see how certain elements will feature in your design before actually adding or removing them.
Don’t forget to lock your design!
You can easily add any of your Custom Images to your Brand Kit for your whole team to use. If you like a design and want to use it again, create a Template for your team to access, allowing you to use your Custom Images many times over and over.
And if you’re working in a team and need to share graphics, you can make this process so much easier when you use Easil’s Design Locking feature. Here it is in action:
Design Locking allows you to control the permissions on your designs right down to granular controls for editing. Set clear parameters for who can edit your designs and how they can edit them. In the words of Beyonce, if you like it, put a lock on it.
The benefit? You can use your Custom Image over and over and lock it into brand assets so that your team can use them in the right way every time.
Over to You
Are you happy with what you’ve seen in this post? This means no more outlay on a custom image, professional photos or graphics… without getting some mileage out of them!
Let us know what you think by sending us an email, or a DM on social!