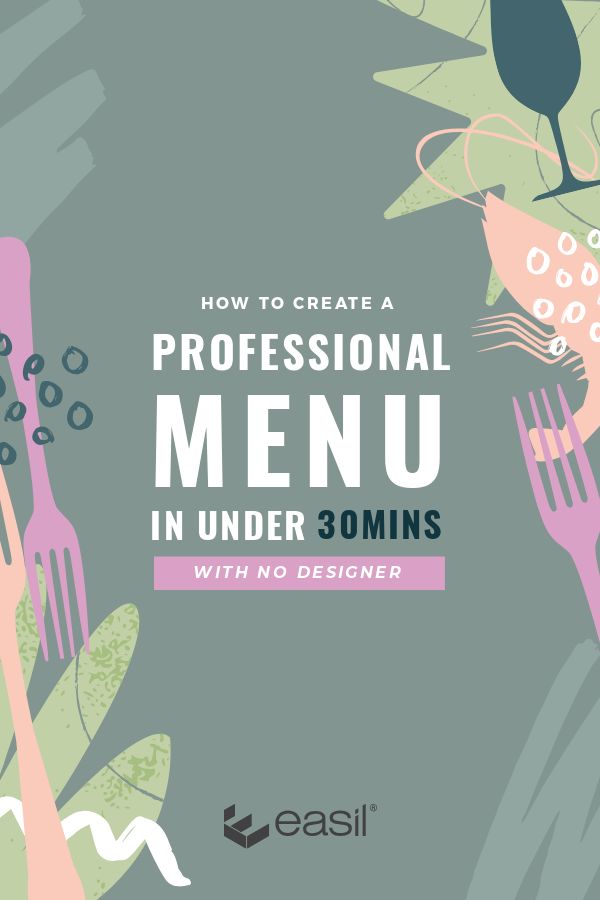
Would you like to learn how to create a professional restaurant or cafe menu (or take-away menu), without hiring out to, and managing a Graphic Designer?
Restaurant and Cafe menus often fall into one of two camps. Amazing designs created by a professional designer, or a quick option thrown together in-house in ‘Word’ that detracts from the pro brand you have established.
Professional menus take a lot of thought and know-how, and the back and forth between designers, chefs, and managers can be incredibly painful. So it’s easy to take the second option and create a sub-standard menu that does not represent your venue’s brand, food mood, or food quality.
In this post, we’ll show you how to step up from those poorly made in-house options to create a striking menu that will even impress (or fool) a Graphic Designer into thinking it was professionally made! It’s all in the secret sauce; – a pre-designed menu template!
Prefer to watch a video? The recording below covers the basics of using tables, and videos further throughout this blog take you through more options, step-by-step!
6 STEPS TO CREATING A PROFESSIONAL RESTAURANT MENU WITHOUT A DESIGNER
Ready to create your restaurant, cafe, or bar menu? Prepare the following before you jump into Easil, and then follow our six steps to executing your menu:
- Prepare your menu content. Outline each of the categories, and their headings eg Entrees, Mains, Desserts. It doesn’t need to be final, as you can easily edit them later. Having a rough outline will however assist with selecting the best template for your requirements.
- Review the content and pricing options that will be required. For example, will each menu item have a single price option, or will there be two price columns, or even 3? Again, this information will ensure you select the correct template or table formatting to suit your content.
- Decide on the size of your menu. Will it be printed on Letter size or A4 page? Landscape or portrait? If you’re distributing it as a takeaway menu, ensure you leave enough space to put all your contact details, and order process.
- Consider your restaurant’s demographic. If you have an older clientele, you’ll want to ensure the text is legible. Options include clearer font options, larger font sizes and simple backgrounds that do not detract from the text.
Once you have gathered the above, we’ll be ready to choose a template to get started with!
#1 SELECT YOUR MENU TEMPLATE
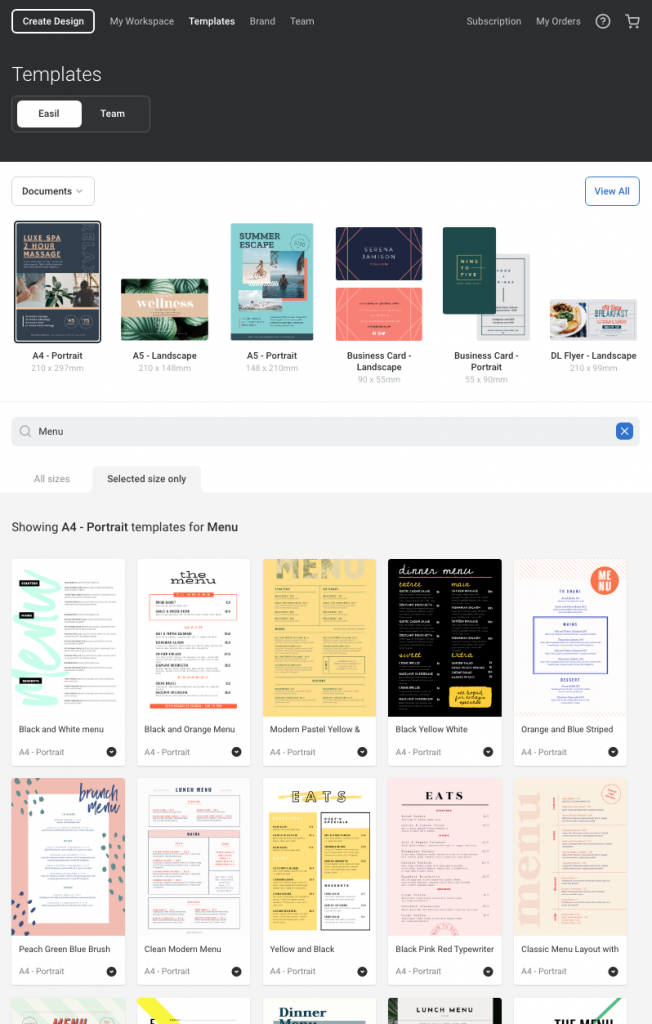
- Log into Easil, click on ‘Create Design’ and then type in ‘Menu’ into the search box.
- To further refine your search, you can also select the size you will require by clicking on a size thumbnail within the different document categories. You can toggle between ‘All sizes’ and ‘Selected size only’.
- Browse through the designs and then click on a design to open it in the Easil editor. Clicking on the design will make a copy of the master template, and automatically save it to your ‘My Designs’ section.
#2 APPLY YOUR OWN FONT STYLING TO A TEXT TABLE
One of the advantages of building a menu in Easil is its unique tables component. This feature provides you with the ability to easily add rows, or ‘row sets’ formatted in the same manner, rearrange the order of those row sets, and provide overall styling changes to each similar cell type, and more.
Let’s look at some of these features in more detail:
UPDATE THE STYLING OF ALL LIKE CELLS WITHIN A TABLE
You can update the font, the size of the font or its styling throughout the whole table with just a couple of clicks:
- Select any cell by clicking within it.
- Use the options from the Actionbar at the top to choose and apply a font, font size, letter spacing or styling options.
- Tab or click through to the next cell and apply your chosen formatting to those cells. Keep in mind it’s best practice to keep the font size the same size for all cells in the same immediate row.
- If you have a row ‘set’ that is set for a food description, set those cells at a slightly smaller font size to visually separate from the menu item headers, and optionally change the color and font too.
ADD FORMATTED TEXT ROWS TO YOUR MENU
Once you have formatted a row or all cells within a row set, you can simply press the + symbol at the bottom center of the table to create a duplicate row. Click into each cell to edit the content!
RE-ARRANGE THE ORDER OF ROWS IN YOUR MENU
Click and drag any row set within your menu and then move it up or down within the menu table to re-arrange.
SNAP-ON ADDITIONAL ROW STYLES
With a table selected, you can also snap or click-on additional row types. For example, you may want to add a section of text without any pricing options. Or you may like to add a different font styling to another menu heading.
- Click on the table and navigate to the Graphics tab on the right side, and then Tables.
- Drag across a new row style that has not yet been used in the existing table styling and ‘snap’ it onto the existing table.
- Click into the row and apply styling to the row. Drag on the same row type to repeat the identical styling within another section of the same menu table.
#3 ADD YOUR CONTENT TO THE FIRST TABLE WITHIN YOUR MENU
To edit text, click within a cell and start typing. Then just tab through to the next cell and repeat entering your menu content.
If you’re copying and pasting content from another application, such as Word, ensure that when you paste into Easil, you clear the formatting prior to pasting the content in.
#4 DUPLICATE THE TABLES FOR OTHER SECTIONS OF YOUR MENU
When you’ve completed a table block, you can duplicate the entire table to use in another column or section by clicking on the Duplicate icon in the top Actionbar. Take note of where the columns are in the original template and duplicate your tables to the same locations. Then delete the original template tables.
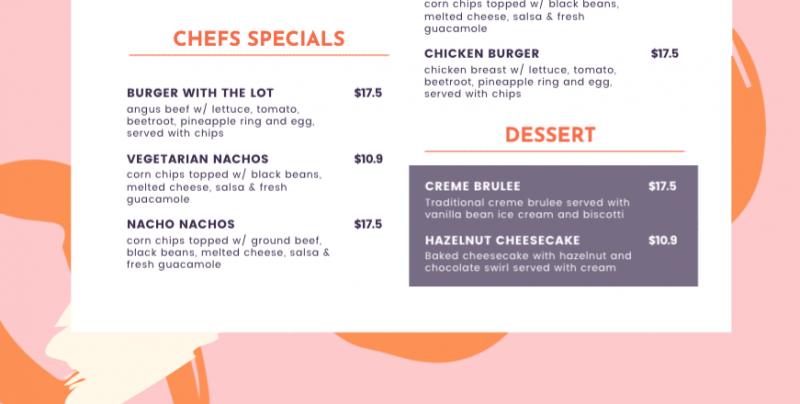
Keep in mind that you can change colors and formatting of text in any table sections that are separate. eg If you’d like to create a call-out section for high-profit menu items, you could reverse that section out of a darker color, like this:
#5 APPLY YOUR BRANDING ELEMENTS, HEADING STYLING, AND IMAGERY TO YOUR MENU
Customize your menu by applying your brand colors to the menu as highlights such as borders, patterns or graphic elements.
If you’re unsure about styling, duplicate the page you are working on and create two different options with colors and graphics. Once you’ve selected a style you’re happy with, delete the other page.
Hot tip: If you have a double-sided menu you should create your second page by duplicating the front at this stage.
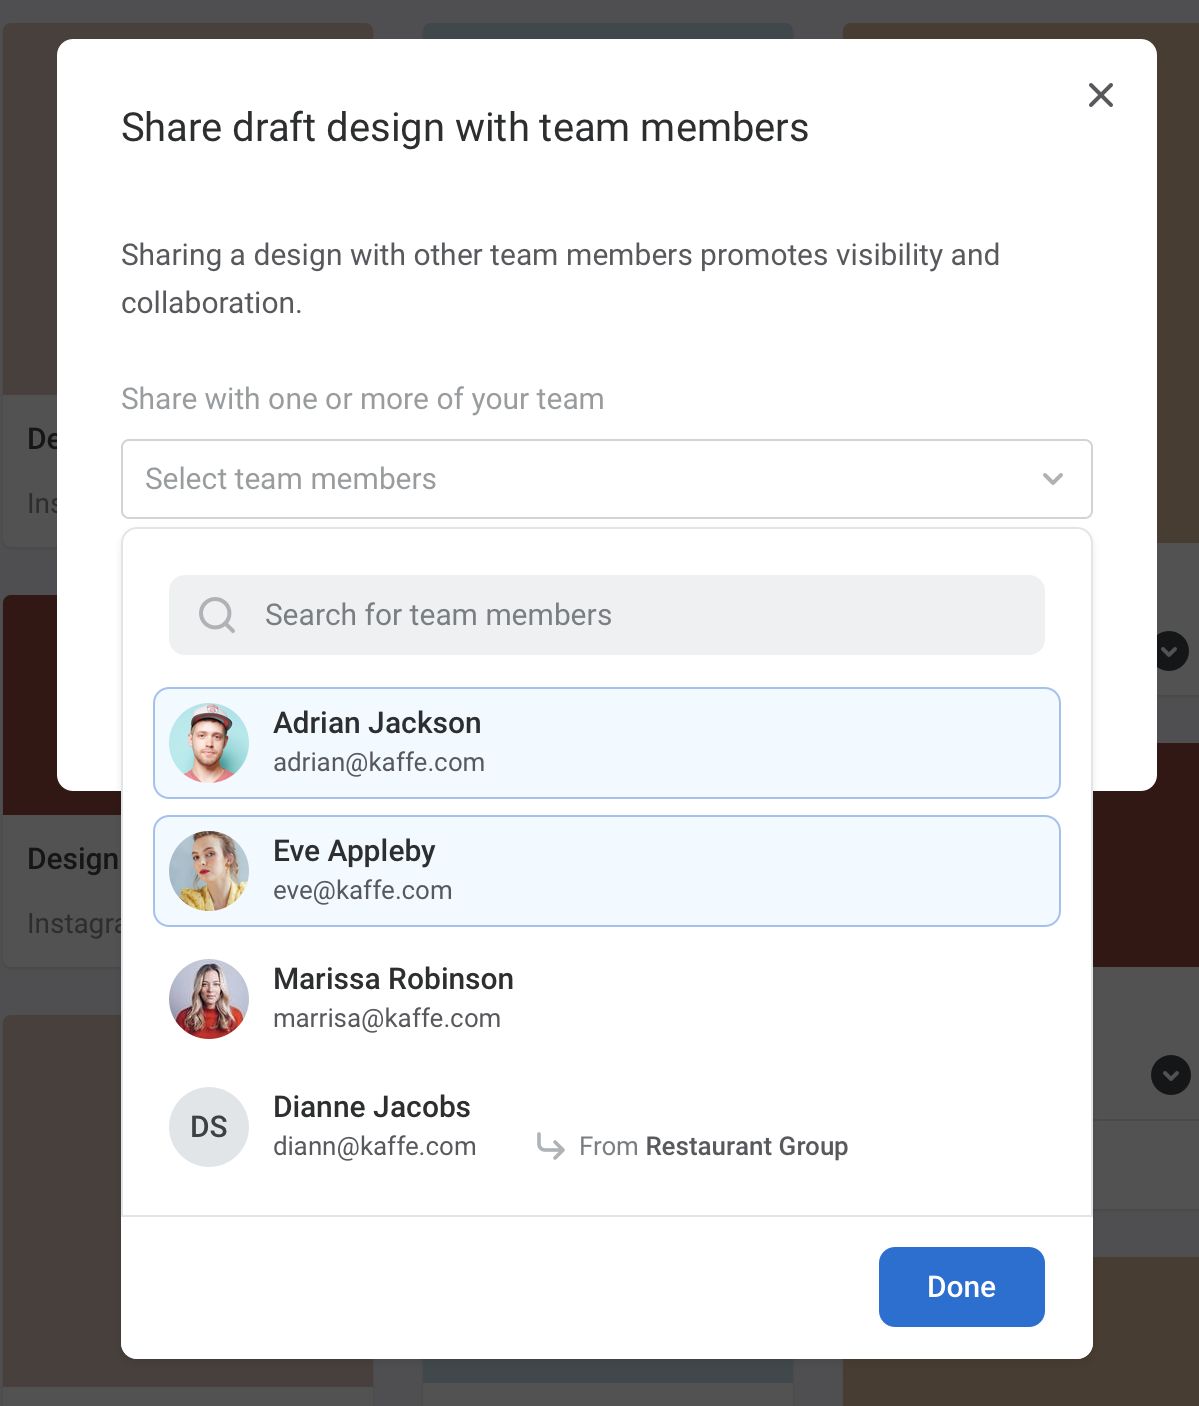
#6 COLLABORATE ON FINAL EDITS OF YOUR MENU
Editing the menu is often the most arduous step when working with an external Graphic Designer. Re-arranging food items and updating content can take several rounds of emails back and forth. Within Easil, you can simply share the design back with your chef, and ask them to make any edits as required.
To share your work-in-progress document with another team member:
- Ensure they’ve been invited to, and accepted your Team invitation.
- Locate the menu file within your ‘My Workspace’ > ‘My Designs’.
- Click on the black chevron on the lower right corner.
- Select ‘Share draft design’ from the pop-up menu.
- Select the teammate you’d like to collaborate with.
You can now both work between the menu editing together!
After you’re happy with the menu design, go ahead and Download using the in-editor output options.
We recommend PDF – Print for printing purposes, with the ‘Bleed & Crops’ selected if your design contains elements that stretch over the page boundaries. This option is preferred for external printers who will print your menu on a larger sheet and then trim down to the finished size.
EXTRA DESIGNER TIPS FOR A PROFESSIONAL MENU
Our Easil DesignAssist crew have put together a few additional tips for taking your menus to the next level!
USE CELL BORDERS TO ENHANCE HEADINGS
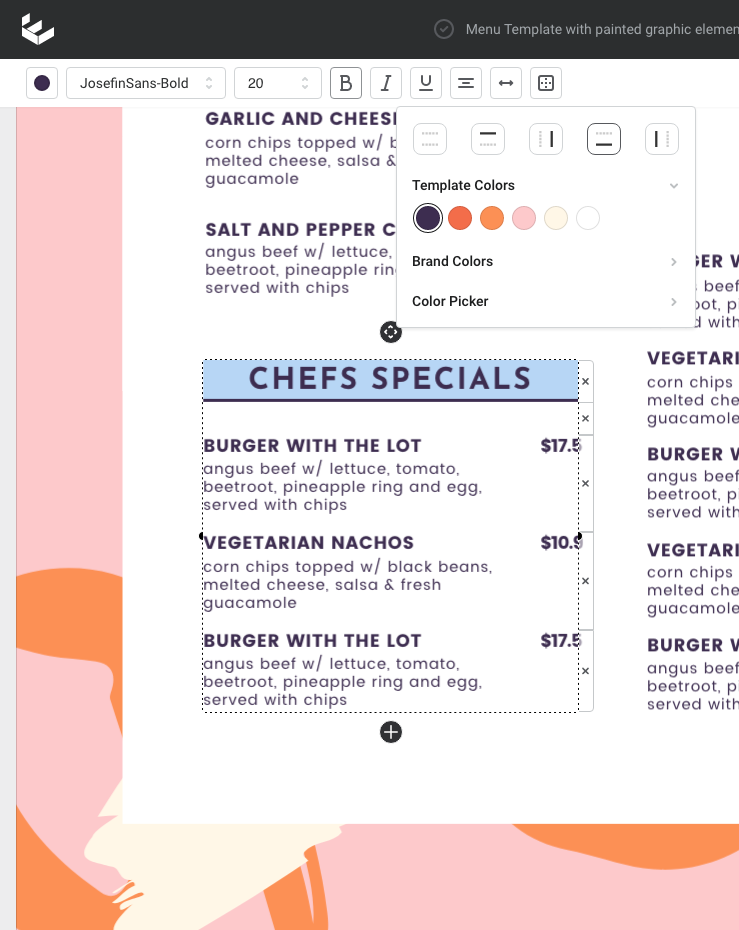
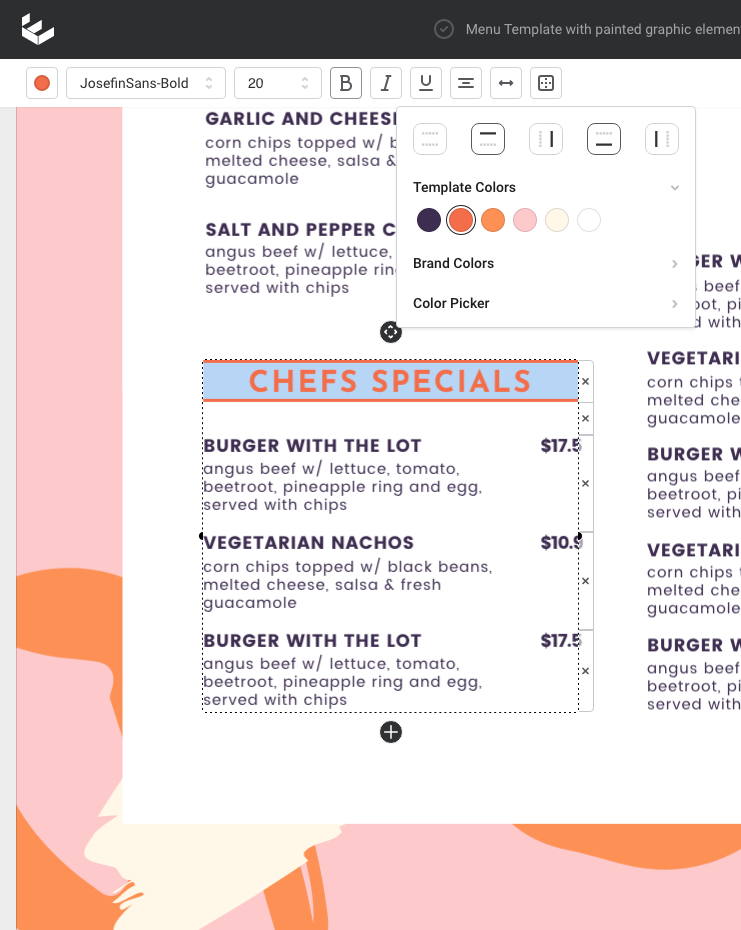
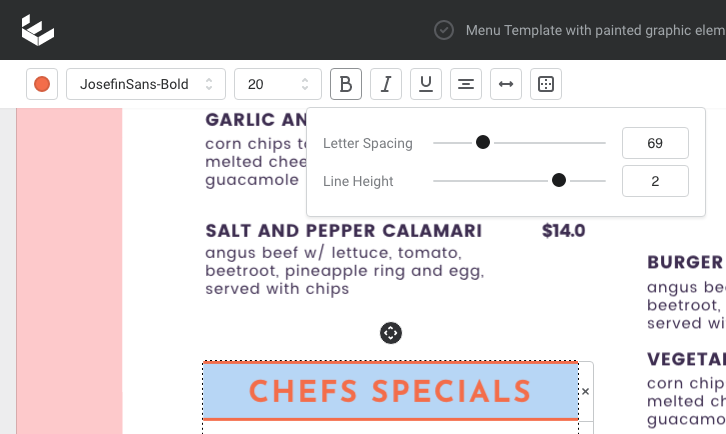
When you double click into a cell, you’ll notice an additional formatting option at the right end of the Actionbar editing options – Table Borders. This feature allows you to add a border to the surround of an individual table cell. We recommend starting with them on menu category headers, with our favorite styling options:
CELL UNDERLINE: This option is different from a standard text box as it spans the entire width of the table cell. Click on the icon that shows the underline showing on the bottom side only, and choose the color to apply.
CELL UNDERLINE PLUS OVERLINE: As above, this option spans the full width of the selected table cell. Select both the top and bottom options and apply your chosen color. Then use the line-height option to increase the size between the text and the lines.
OVER TO YOU
We’d love to know if you can achieve creating your new menu in 30 minutes or under! Let us know in the comments below, or send us an email!
And if you need any assistance, our friendly DesignAssist team are available in the Easil web application by clicking on the (?) button!