When you’re first starting out with Easil, choosing an existing pre-designed template is the easiest way to get your bearings with the platform. With thousands of templates designed by pro-designers, it’s also an efficient way to get started once you have mastered the basics!
In this first tutorial, you’ll learn the following Easil editor basics:
- Set a background color of a template;
- Editing existing text;
- Changing the color of text on a template;
- Updating the color of a graphic;
- Replacing a placeholder image with one of your own images; and
- Downloading Files.
We’ve included a walk-through that you can interact within Easil to learn the above six skills, as well as an additional overview of Easil including the Workspace, which includes My Designs, My Images, and other tools to keep organized.
Excited? Let’s get started!
MY WORKSPACE
The Easil Workspace (My Workspace), is the hub of your work-in-progress. Any design that you have started work on in your current session or previous sessions will be stored here.
You’ll also find the main navigation to move around Easil.
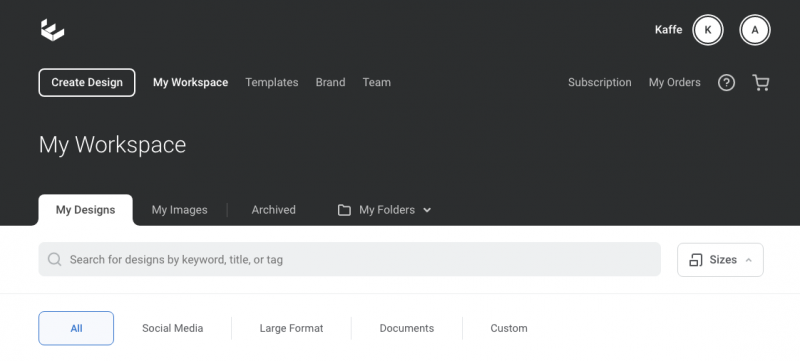
Starting with the fun part, creating a Design – just click on the Create Design button to open up the template range. To start off with, keep the toggle on ‘Easil’ Templates, as that is where you’ll find our templates to get started, and we’ll tell you more about ‘Team’ templates in further tutorials.
Using the dropdown category selector, you can look for designs by size, or you can simply enter a search query into the field underneath the design thumbnails:
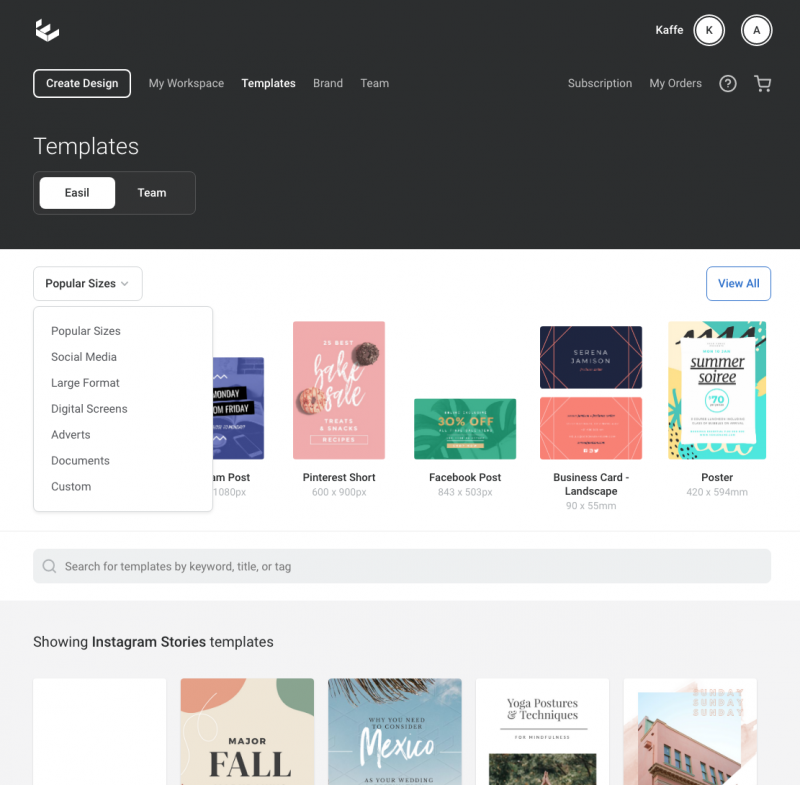
Once we’ve found a design we’d like to work on, we simply click on it to open in the Easil editor. Scroll down to read about that, or click on the button below to go to the Editor lesson.
MY WORKSPACE > MY DESIGNS:
In the My Designs section, you’ll find all of your previously edited documents, so you can return to edit them. They’re automatically saved here.
MY WORKSPACE > MY UPLOADS:
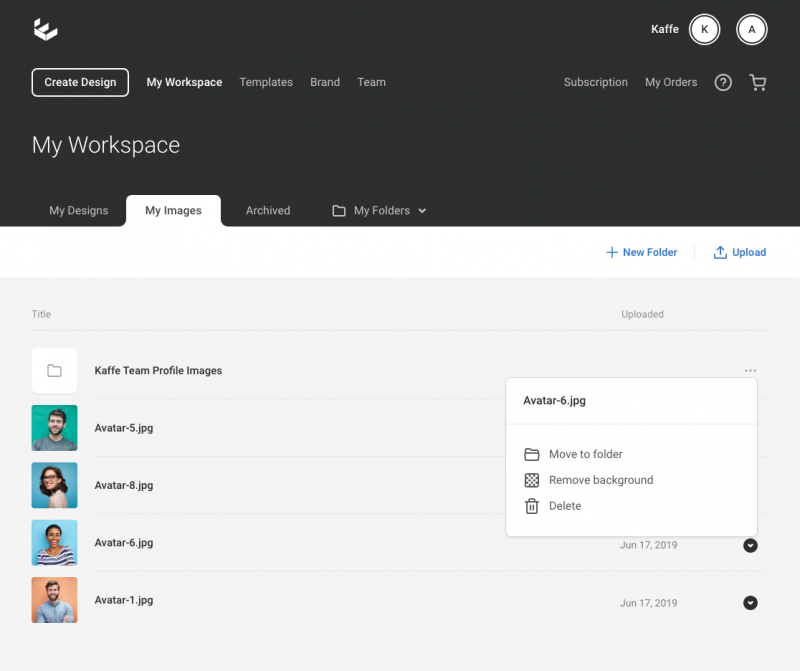
The next tab across is ‘My Uploads’. From here you can upload your own images (including GIFs), file them in folders, delete and even remove the background from your images.
MY WORKSPACE > ARCHIVED:
The Archived tab houses any designs that you no longer want to use.
MY WORKSPACE > MY FOLDERS:
My Folders is the organization system for your designs in progress.
THE EASIL EDITOR
To open the Easil Editor, click on any design thumbnail, or title.
Once in the Editor, there are two main navigation areas; the top Actionbar, and the right sidebar.
THE ACTIONBAR
The Actionbar is located across the top of your design. It contains easy to use tools that can be used to edit items already placed on your design, and provide you with editing options specifically for the type of element you have selected.
For example, if you have a text box selected, you will be presented with options for choosing your font family, the font size, and other text styling options:
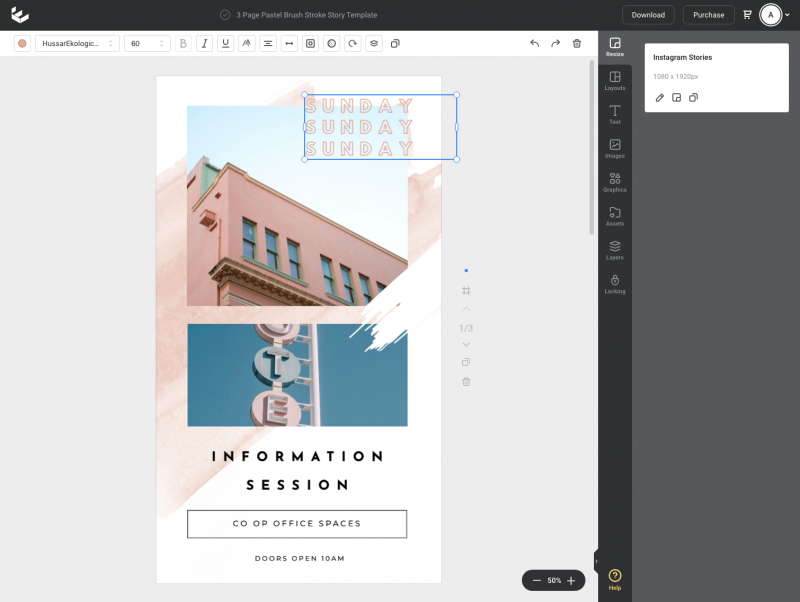
Likewise, if you have an image selected, you’ll be provided with the options available for image editing only:
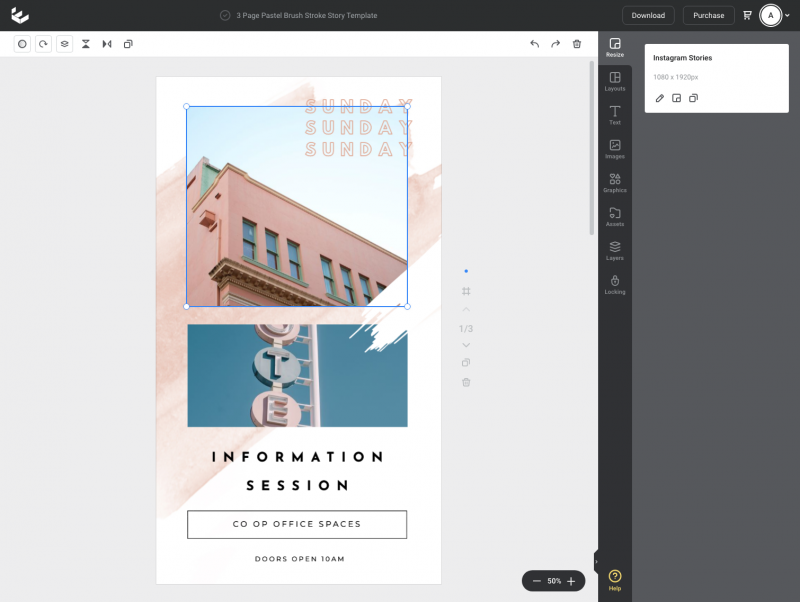
Each one of the actions can be applied to your design by selecting the appropriate option, eg choosing from the dropdown selector, or entering another input.
In the top bar above this, you’ll find the Document Title bar, and saving progress indicator. Your designs are saved as you work, and you’ll see the progress of that with this white tick flashing whilst it is saving.
THE RIGHT SIDEBAR
The right sidebar contains all the tools that you need to manage your file resizes, and for all the functionality to add elements to your design, such as image uploads, personal font uploads, and adding graphic elements. It’s also the area where all your uploaded Brand Kit imagery is available.
We’ll briefly cover each of them here:
Resize Tab: Create a new size of design from your existing design.
Layouts Tab: Browse layouts from Easil Templates, Team Templates or My Designs, that are the same size as your current design and import them into your current working file.
Text Tab: Manage your personal fonts, access brand fonts, and add text to your design.
Images Tab: Upload images, Search and use free and pay-per-use stock images, and add any existing uploaded personal or brand images into your design.
Graphics Tab: Illustration style shapes, boxes and grids that can be added to your design, and edited with colors and other options.
Assets Tab: Features the Favorites tab, and also Template Assets, which is a summary of assets used in your current design.
Layers Tab: Create groups of layers, drag and drop to re-arrange layers, or use the visibility icon to temporarily hide layers if you’re not sure that you want to delete them!
Locking Tab: This has primarily been designed for users to lock particular design elements, as well as document settings, from other teammates to prevent them from going off-brand.
We will dive deeper into each of these in further lessons!
The following 6 sections are all contained in our in-Easil lesson. Click through to interact and learn in the Application.
#1 CHANGE THE BACKGROUND COLOR ON A TEMPLATE
To edit the background color in a template, you need to ensure no other element is selected. The easiest way to do this, is to click off to the side of your design.
Then, click on the color chip at the top left of the editor, on the Actionbar, and the color options will expand. Once you click on a color option, it will apply to the background.
#2 EDITING TEXT
Editing text within an existing text is as simple as double-clicking to activate the box to edit mode, and then highlighting the section of text you would like to update. Then just enter your new text.
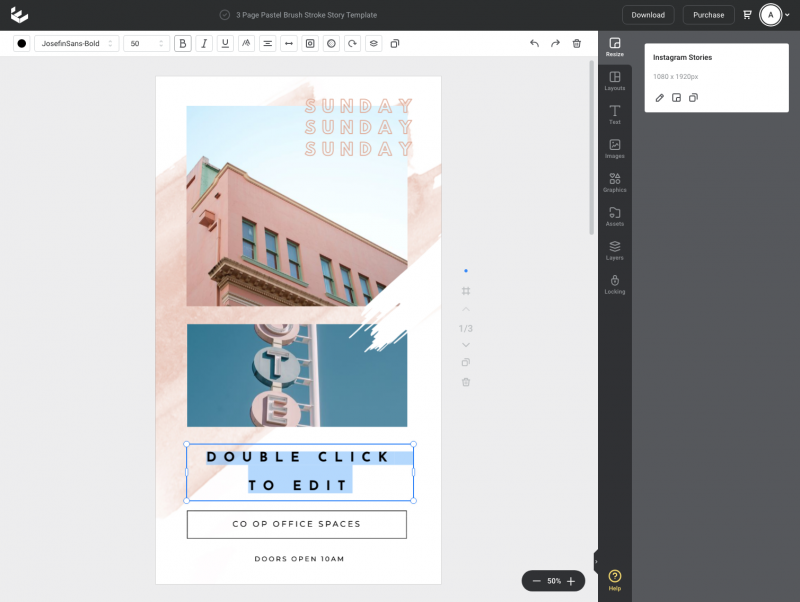
#3 CHANGING THE COLOR OF TEXT
To update the color applied to a block of text, simply single click the text box to select it, and then click on the color chip located at the top left of the top Action bar (tool bar). Single-clicking the text box applies the color to all text contained within the one text box.
To apply various colors to your text, double-click the text box and then select the text within that you’d like to apply the color to. Then choose the color to apply from the color picker pop-out.
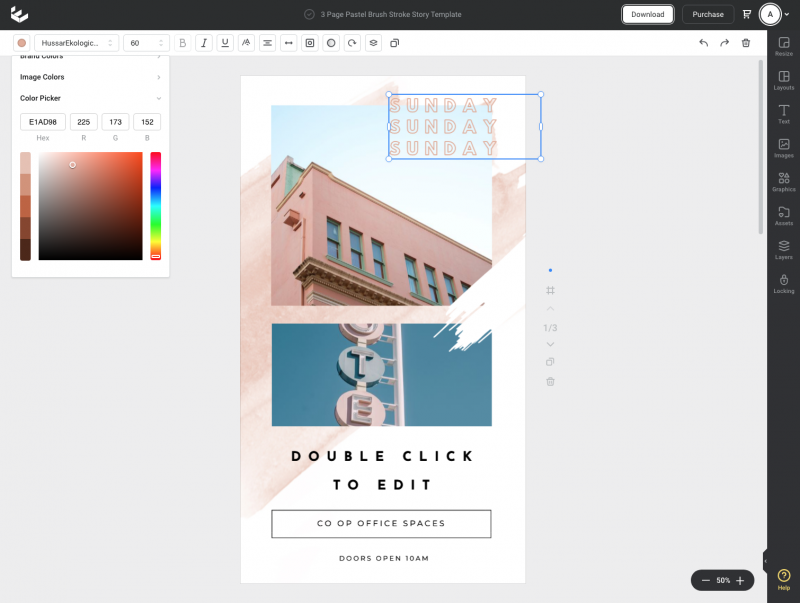
#4 UPDATE THE COLOR OF A GRAPHIC
Single-click to select any graphic element on your design, and the color chip will appear in the top left of the Actionbar. Click on the chip to expand the color options, and then click again on your chosen color to apply to the graphic.
If the graphic element contains more than one editable color section, you’ll notice that you can select which color section to change by clicking on the presented options.
#5 REPLACE THE PLACEHOLDER IMAGE
Click the Upload Image button at the top of the panel. Select an image from your computer to upload and confirm with the blue Upload button.
Your new image will be added to the Images tab, in ‘My Images’.
Click on the placeholder image in the template, and then whilst it is still selected, click on the Images tab on the right sidebar. Select your image from ‘My Images’, and then drag it onto the currently selected image placeholder. Alternatively, you can also click the + symbol that appears on hover over the image in the sidebar, and click to replace the current image.
#6 DOWNLOADING YOUR FILE
When you’ve completed a creation, it’s easy to download it to use on social media, emails or for print purposes.
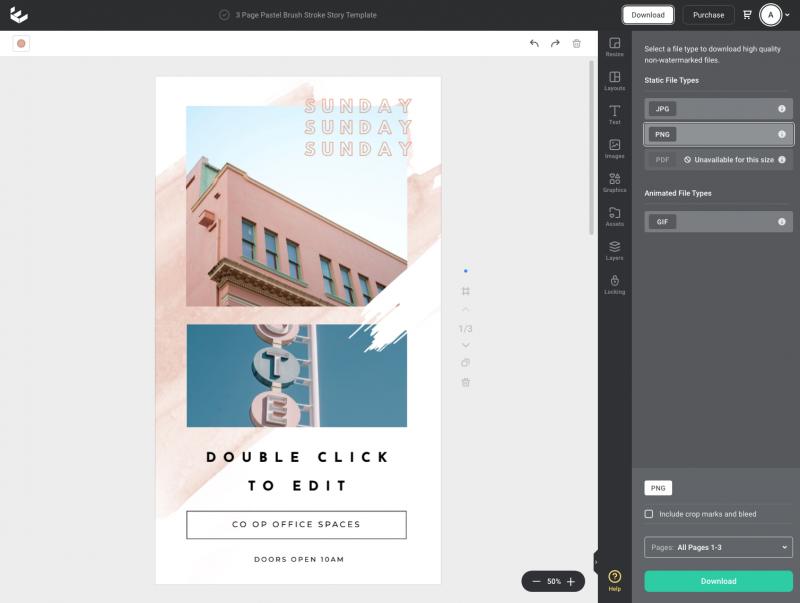
Click on the Download button located at the top right of your screen.
You’ll be presented with various file options, which are often specific to the type of design that you have created. Once you have selected your file download type, you can select the page range, if applicable, and then click on the green Download button to process the download.
OVER TO YOU
That’s it! We hope you’ve enjoyed the first basic lesson of Easil! These skills will get you through basic edits of any Easil’s pre-designed templates, but it’s worth checking out all the lessons as they are released to gain further design skills.


