
High quality photographic images are essential components of your marketing materials. You’ll need to use them and time again on everything from social media, through to blog graphics and printed marketing materials.
The following lesson will introduce you to a few key image editing and layout options that are available in Easil, to ensure your designs remain looking professional.
Watch the video walkthrough to get started!
HOW TO ADD AN IMAGE TO YOUR DESIGN IN EASIL
The images tab on the right sidebar presents multiple options for using pay-per-use stock imagery, and also adding to and accessing your own uploaded images:
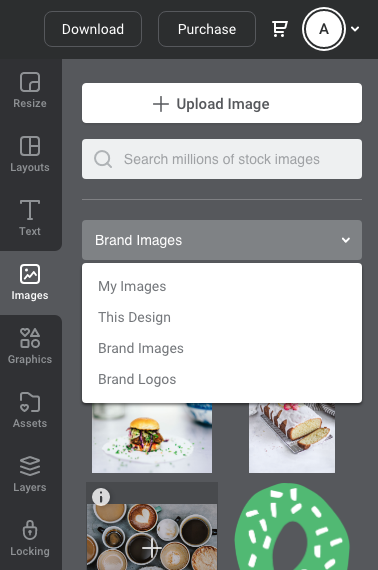
- Upload Image: With this top button, you can upload a new image into your Easil account, that will be available for your own personal use only.
- Search for Stock Images: The search field underneath the Upload Image button is designed to search the stock image range. Images range from free through to a small cost per download.
The next item is a dropdown selector with several options for viewing, searching and adding your own images:
- My Images: Access any of your personally uploaded images.
- This Design: View and access any images that have already been placed onto the design, on any page.
- Brand Images: Access any photographic images that have been added to the Brand Kit.
- Brand Logos: Access Logos that have been added to your Brand Kit.
Once you have selected any of the dropdown options, you can also use the Search field located underneath the dropdown to further search for images.
Then simply click and drag across to the design page.
BASIC IMAGE EDITING SKILLS IN EASIL
The following 4 skills can be learnt by clicking through to the in-application lesson.
- How to Search for an Image,
- How to apply a Filter to your Image,
- How to Crop your Image; and
- an Introduction to Photo Grids.
HOW TO SEARCH FOR AN IMAGE IN THE EASIL EDITOR
When you have a design open in Easil, click on the Images tab in the right sidebar.
To locate an image from the stock image library, enter your search term into the query box at the top, underneath the upload image button.
To locate an image that you have uploaded personally into My Images, ensure that option is selected in the dropdown option, and then either browse the files by scrolling down, or enter the search term into the field underneath the dropdown.
To add to your design, just click on the image, or click and drag onto your design.
APPLYING A FILTER TO YOUR IMAGE
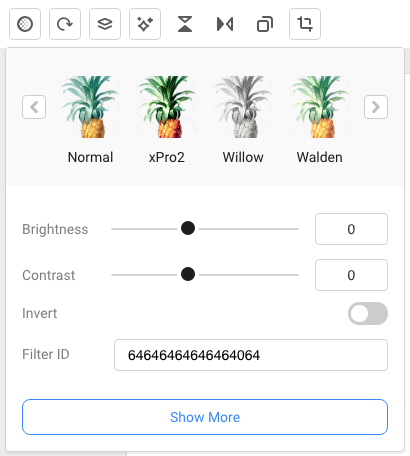
Easil contains a range of pre-set image filters that can be applied to your images with a single click, as well as more extensive customization options to further refine your filter.
- Click on the image in your design.
- Click on the Filter icon in the top Actionbar.
- When the dropdown is expanded, you can scroll through to view a thumbnail view of each pre-set filter as applied to your selected image.
- Click on your chosen filter to apply, and then you can also use the slider options below to further refine.
HOW TO CROP YOUR IMAGE IN EASIL
The cropping tools allows you to reduce the size of any photographic image by trimming of one or more sides into a square or rectangular shape.
- Select the image in your design by clicking on it.
- Click the Crop icon in the top Actionbar.
- Drag the corner handles to reduce the size of your image to the new cropped area.
- Click ‘Crop’ to complete the action.
Hot tip: Cropping is not a permanent action in Easil! This means, if you need to revert to a previous view or change the size of the cropped image, you can always do so by re-entering the crop functionality.
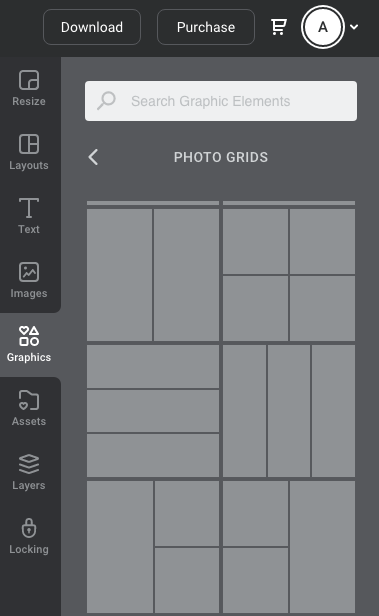
AN INTRODUCTION TO PHOTO GRIDS IN EASIL
Photo grids are a layout feature in Easil that allow you to group several photos together in a neat and professional manner.
To add an image grid to your design; click on the Graphics tab in the right sidebar, and then the ‘Photo Grids’ sub-category. Click on your choice of grid to add to your design, and then use the corner handles to stretch it into the size that you require.
To add images to a Photo Grid:
- Click on the entire grid.
- Select the images tab in the right sidebar, and drag across an image.
- Hover it over the cell you’d like to drop your image into, until it snaps into place.
- To adjust or resize an image within a cell of the grid, click on it, and then on the Crop tool in the top Actionbar. Use the handles to expand the size of the image, or click and drag to reposition, and then press ‘Crop’ to confirm the change.
Hot tip: You can also fill in any grid areas with a color from the color picker, instead of with an image! Simply click on the cell you’d like to change, and then on an option in the color picker to apply.
Check out some of our other Tutorials as below!


