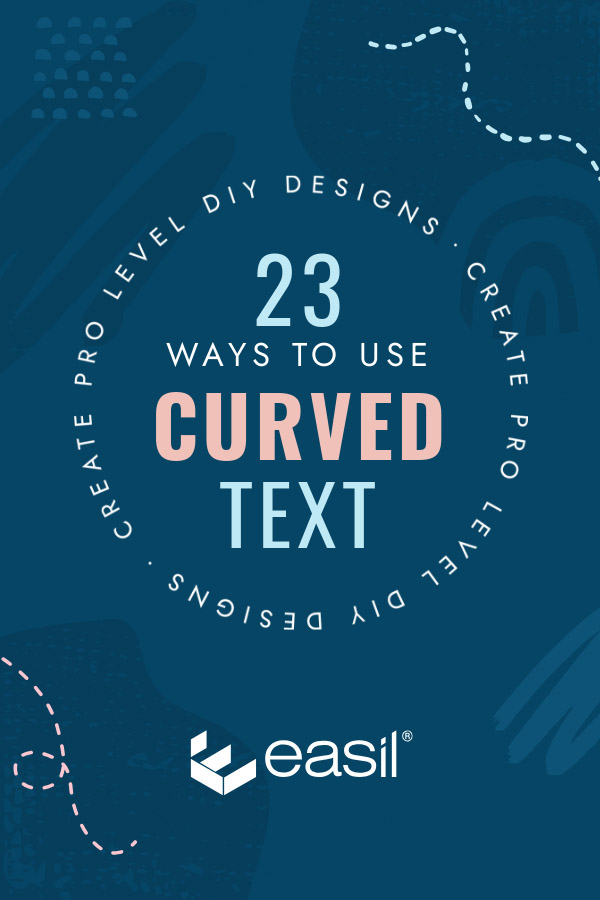
Want to transform the typography in your graphic design from standard, to stand-out? Adding a curved text effect, whether it’s applied as a full circle, or set in a partial-circle, is a simple way to achieve visual awesomeness in less than a minute!
In this article, Easil’s creative team has created TWENTY-THREE examples of cool curved text designs and also takes you a-round the steps of how you can create everything from arches through to squircles and spirals, all without any graphic design experience required.
So let’s dive in, and introduce you to this curvaceous effect that will change the way you design – for the better!
HOW TO USE THE CURVED TEXT TOOL IN EASIL
Firstly, ensure that you have an account with Easil. You can sign up for a free account, and we’ll upgrade you to our Plus plan for the first 30 days on us! Even after your trial is complete, you’ll enjoy this feature included in your Easil account, even if you drop back to our Basic option.
Curved text can be applied to any standard text added to your Easil design. Go to the right sidebar in the editor, and click on the ‘Click or drag to add text’ button at the top. If you have uploaded your own fonts, they’re also displayed in this area, and you can click to add those instead!
Then, typeset your text, and click on the Curve Text icon in the top Actionbar, and use the slider to adjust:

Some pointers to keep in mind:
- Drag the slider to the right to complete a circle of text with the text facing the ‘outside’ of the circle.
- Slide to the opposite end – the left, or negative degrees – to curve your text inwards of the circle.
- You can use ‘Letter Spacing’ in the top Actionbar to add space between letters evenly in your circle or arc of text.
- If your letters are too large on your circle, try adding more text, more letter spacing, or both!
- All upper case lettering is the safest choice for a perfectly symmetrical design when creating a full-text circle.
In each of the following examples, we walk through how to recreate the curves that the Easil DesignAssist team have come up with. However, you can also click on the image posted with each of the options and start editing the design for yourself!
1. CURVE YOUR TEXT AROUND TO CREATE A FULL CIRCLE SHAPE
Fitting your text around a circle shape is one of the most popular ways to use the curved text tool. In this method, the text at the top is upright, and as the text curves around the circle, it turns upside down at the bottom.
To achieve this look in Easil, typeset your text in a text box, and then click on the curved text icon in the top Actionbar, and adjust the slider to the right to 350-359 degrees. That’s it! Once your text is set to the circle, you can update the color, font, opacity, and even edit the text within the circle – adding more or fewer characters is no issue!

2. CREATE AN ARC OF CURVED TEXT AS A SUB-HEADING
Create a subliminal smile in your graphics by adjusting your text to form an arc turning up at the ends and sitting underneath your main text. To replicate this effect, click on the Curved text tool once you’ve added your text, and move the slider to the left, ’til it’s just under a semi-circle.

3. LOOP YOUR TEXT AROUND A GRAPHIC ICON
Try combining two semi-circles of text to create a wave-like text graphic. In our example, we’ve combined the text with an outlined icon and sent the ‘and followers’ arc of text behind the heart icon to create the illusion of it looping through.
Ensure the angle you use in both sections is the direct opposite to produce the perfectly even wave effect. You may need to play with the font size by enlarging or reducing the font to match the other half. You can do this by clicking on a corner of the curved text box and dragging it inwards or outwards to reduce/enlarge.

4. WRAP YOUR TEXT AROUND A CIRCULAR IMAGE
Unite a circle or semi-circle image with text by matching the curve on both design elements. In our example, we curved our text to 180 degrees and added some letter spacing. Our photo was a top view Poke bowl that we removed the background from, cropped in half, and rotated for a creative look. To finalize, we adjusted the rotation of the text to match the side of the bowl.
Click on the image below to inspect how we put it all together in Easil!

5. ANIMATE YOUR CIRCULAR TEXT IN A GIF
Spin your text around and round, with this effect that will take you less than a couple of minutes to achieve.
- Typeset your text in a regular text box.
- Click on the Curved Text option in the top Actionbar, and enter 359 degrees to form a complete circle with your text.
- Once you’ve positioned your text and any other elements on the page – you’re ready to create the animation!
- Duplicate your page 4 times, for a total of 5 identical pages in your Easil document.
- Scroll to the 2nd page, click on the rounded text, and then the rotate slider. Enter 73 rotation.
- Move to page 3, and change the rotation on the text to 146.
- On page 4, change to 219, and on the final (5th page), change to 292.
- This will provide 5 quick animated steps of the circle.
- Select GIF in the download options and Medium-speed.

6. CREATE A YIN AND YANG EFFECT WITH OPPOSITE COLORS IN TEXT & GRAPHIC
A split colored circle looks effective for graphics but can also be used as a simple logo for an event, as we have in our example. Make your own version of this by searching for ‘Two-Part Circle’ in the graphics library.
Once you’ve added it to your design, adjust the colors to two that have high contrast. Add a text box, apply your curve to the text, and then duplicate on the bottom section by creating the opposite curve degree. Update the font’s color to contrast with that section of the circle, and your yin & yang effect is complete!

7. WRAP YOUR CURVED TEXT AROUND THE END OF A HEADING
When you have several text elements to combine, and it’s looking a bit drab stacked one text box on top of the other (a la Microsoft Word), try making one of the wordier lines into a semi-circle and rotating it off the end of your text-box.
In this example, we:
- Typeset Bella script font in a standard text box.
- Applied a 355 rotation on it
- Repeated the angle on the sub-heading text, set in Montserrat Bold.
- Finally, we applied the curved text effect to our Day & Time details and then rotated it to join the two text lines into a heading lockup visually.

8. JOIN 4 ARCS OF TEXT TO CREATE A FLASHY ANIMATED GIF
In this example, we get a little fancy, combining curves with GIF output. Start by determining the text you’d like to repeat & flash in the graphic, and ensure you’re working on a social media or small-sized image to produce a GIF output.
- Typeset your text, and slide the curved text slider to approx 85-degree point to create 1/4 of your circle.
- Click on the text and then the duplicate button to create your 2nd quarter of text.
- Select rotate from the Actionbar and enter 90 to turn it to form a semi-circle.
- Duplicate the next section, and enter 180 in the rotation input field.
- On your final quarter, duplicate and enter 270 in the rotation input.
- Adjust and position your text quarters to join the circle.
- Once positioned, duplicate your current page 3 times, for a total of 4 pages in your document.
- On each page, select a quarter of text and update that text’s color to another highlight color. A feature color already within your design will usually work best. Work through clockwise, highlighting one section with the new color on each page.
- Download your file as a GIF. In our example, we chose a medium speed.

9. LAYER GRAPHIC ELEMENTS WITH YOUR CURVED TEXT
Try adding a boxed or banner effect to a text layer that sits above your curved text to separate the messaging. To achieve this style, typeset and adjust your curved text, and then look through the shapes and banner sub-categories in the Graphics tab on the right sidebar of the editing screen. Drag and drop your chosen elements onto your design, and then customize further with your choice of color.

10. PLACE A GRAPHIC RING BEHIND YOUR TEXT
Adding a graphic ring element is an effective way to separate your circular text from your design background. To replicate this look, you can find similar elements in the right sidebar of the Easil editor, in the Graphics tab. Add ‘ring’ into the top search field, and then drag it onto your design.
To customize further, you can change the ring’s color, opacity or even try offsetting another ring element to produce a layered or shadowed effect. Add your curved text to the top, and your effect is complete.

11. MIX UP YOUR FONTS
Try combining two different font families to form a complete circle, using one font for a semi-circle at the top and then a complimentary one for the bottom semi-circle.
We typeset ‘Super Sunday’s as one 180 degrees arc of text and applied DN Serif Display font. We then duplicated the curved text box, inverted the text direction, and applied Montserrat, also reducing the font size to fit the greater amount of text into the available space.
To complete the graphic, we added a vibrant colored icon that contrasted with the background colors and placed it in the center.

12. ADD A STARBURST ELEMENT
Starbursts and round elements with wavy edges are often used for certificates and endorsements. If you need to indicate a quality check or accreditation visually, consider adding your curved text to a shape like this!
Search for ‘starburst’ in the Graphics tab in the right sidebar, and then curve your text to 359 degrees to produce a complete circle. Add your graphic symbol to the center, adjust the colors of each part of your graphic, and place appropriately on your design.

13. LAYER A CUT OUT IMAGE USING THE BACKGROUND REMOVE TOOL
In this graphic, we’ll combine two of our favorite DIY design techniques. Removing the background from an image and applying a curved text.
To create the illusion of the drink coming through the ring of text, you’ll need to create 2 or more arcs to complete your circle so that one can sit behind the text, and the other/s will sit in front.
Start by selecting an image, and remove the background from it. Then, typeset your text and add the circle effect, joining each ~85degree piece in position to make a full circle. Then select a section of text in front of the graphic image, and send it to the back.

14. ADD AN ARC GRAPHIC SHAPE TO MATCH YOUR SEMI-CIRCLE TEXT
Sometimes just a slight curve is enough to impact your design, especially when you’re combining with other graphic elements and a small amount of text. To create a similar effect, typeset your text and move the curved text slider slightly to the right. Search graphic elements in the right sidebar for a banner, add it to your design and then fine-tune your text to match the curve.
Click on our design below to get started with our pre-made option:

15. OFFSET OPPOSITE ARCS OF TEXT
Create a wave effect by combining two textboxes with opposite degrees of curvature applied. In our example, we applied similar fonts and kept the number of characters in each text section as close as possible to keep the design balanced.

16. DOUBLE IT UP
This graphic idea combines two circles of text with varied font sizes to produce a cool effect. To replicate this effect, typeset a single circle of text filling the 359 degrees and add a slight amount of letter spacing to loosen up the type a little. Then, duplicate the circle, double click to edit, and add the new text content. Then click on a corner of the text and drag inwards to reduce the size and place within the original text center.

17. ADD CURVED TEXT TO A MONOGRAM OR PERSONAL BRAND LOGO
A classic monogram logo is the perfect addition to a personal brand and can easily be applied to designs ranging from digital to print. Sticking to a two-color palette will keep it versatile yet timeless, as long as you keep to those classic font choices.
In our example, we start by adding a circle element to our design canvas. (Click on the graphics tab on the right sidebar, then the Shapes sub-category, and drag across a circle).
We then added our text, added some letter spacing, applied the curve to 359, and placed it above our circle element in a contrasting color. To customize further, we rotated the circle element so that the name started from approx the top center. Finally, we added the monogram letters in lower case and centered above the two layers.

18. WRAP TEXT AROUND A SQUARE CORNER
Add an interesting effect to an otherwise standard layout by joining two standard text boxes with a single additional quarter circle of text around the corner. Click on our template to grab the pre-designed elements to make it easier!

19. INCLUDE SPECIAL CHARACTERS IN YOUR TEXT
Using a repeating quantity of special characters in your curved text can create a unique look. Try using multiples of these characters between sections of your text when set to a full circle:
- Dashes —————–
- Equals ==========
- Colons :::::::::::::::::::
- Asterisk **********
- Bullets •••••••••••••••
- Tildas ~~~~~~~~~~
Don’t forget – you can double click and place your cursor within the circle to edit sections of your text once it’s set in place, adding more characters if you want to adjust the look.

20. CREATE A RAINBOW OF LAYERED TEXT IN CURVES
Build a cute social media graphic by layering 3-5 semi-circles of text and adjusting both the font size and then changing the colors to match a rainbow!
We chose Staatlitches regular font for our graphic and applied it to each of the text boxes, adjusting the font sizing on each by dragging a corner inwards to reduce and keeping the letter-spacing consistent. Then we stacked them into a rainbow-like position, changed our colors, and we’re done. Click on the template below to adapt it for your own use!

21. ADD CURVED TEXT TO YOUR SOCIAL MEDIA PROFILE IMAGE
Unable to choose between displaying your personal photo or showing your logo/brand? Why not have both?!
In this example, we combined 2 arcs of text with an image with the background removed. We layered them above the background elements in the following order: Top curved text, add a photograph on top, then add the bottom curved arc text.
When you add to your social media channels, it will fit nicely within the circle cropped area!

22. CREATE A SPIRAL EFFECT WITH YOUR CURVED TEXT
Ever thought about creating an image purely out of type? By adding curves, you can create smiles, waves, and even spirals. To replicate our typographic swirl, typeset 3 individual boxes of text, apply curves to each section according to the amount of text, and then use the corner handles to squeeze down each section. Finally, use the rotate function to move each piece of curved text into place.

23. MAKE A SQUIRCLE
We might have left the best until last, in terms of titles anyway!
A square with rounded corners is known as a squircle and is another fun way to display your text that is different from the norm. It works best with repeating a message four times and consists of standard text boxes with quarter circles placed in the corners to complete the shape.
We used our text mask tool to finish off this graphic with a rose gold metalic finish. Click through to the graphic to see how it’s all put together, and update to make it your own!

OVER TO YOU
Are you as excited about using curved text in your designs as we are? 🙂 It’s definitely one of our favorite text formatting tools, and we’d love to see what you create with it. Tag your designs with #madeineasil so we can take a look!