Do you want to increase blog traffic and get more eyeballs on your content? More shares? More leads?
Let’s take a look at 10 super simple ways to skyrocket your blog traffic for more traffic and shares.
Some of these strategies take no time at all! With a few simple tweaks, you can attract more eyeballs to your content.
When it comes to blogging and ways to increase blog traffic, true success in found in more than just writing the post. It’s about a number of actions, that when working in unison, will attract more (relevant) traffic and shares for your blog.
These actions or tasks can be considered at 3 levels:
Increase Blog Traffic – 3 Levels to Consider:
1 Planning Your Blog Post – Before you start writing there are a few things you can do to make sure the blog content you write hits a home run with your audience. It’s all about checking that you are actually writing content they are interested in or that helps them in some way. We’re not necessarily talking about how you lay out your blog post in this article, but moreso how you can ensure that that story or message is optimised for traffic and shares.
2 Writing Your Blog Post – “Writing” is just one part of the challenge. You need to make sure the post is written in a way that will allow your perfect reader to find you (think SEO and Search!). To increase blog traffic you also need to consider other factors like images, heading/title and how your content will be shared, when writing the post.
3 Promoting Your Blog Post – This seems like a no brainer but, unfortunately, it’s where most people stop! Writing is just part of the battle when you are aiming to increase blog traffic. If you don’t promote it, nobody will see it! It’s tempting to write the following statement here “If you write a blog post in the forest will anyone read it?” …. but you get what I mean, right?
So, with these 3 “stages” in mind, let’s take a look at some of the (surprisingly simple) things you can do to increase blog traffic, and shares of your blog content.
PLAN Your Blog Post
#1 Survey Your Audience
There are millions of blogs online. It can seem impossible to cut through the noise with your content, but I have a trick for you.
Ask your audience what they need, what they want, what their challenges are. What’s in it for them?
If you do this early on, even before you start blogging, you’ll write the right kind of content for your audience.
There are plenty of ways to survey your audience. Survey Monkey is a favourite tool for this but you can check out many other options (including free ones) right here.

Start out by asking the right questions and you will be more likely to increase blog traffic later on.
#2 Answer Your Customer’s Questions
Marcus Sheridan from the Sales Lion calls the simple premise of answering customer’s questions: “They Ask, You Answer”.
Watch this video to see how his approach works:
You can check out his book “They Ask, You Answer” here. Again, this doesn’t sound like rocket science but it’s so easily missed.
One of the big premises of Google and search, is that people are searching on how to solve problems and answer questions. Use the intel you gained in #1, to answer those questions like a BOSS. And in doing so, be found at the end of a Google Search by providing the right blog post that “answers” what your audience is “asking”.
We don’t just search by using keywords and phrases. We search with questions: “How do I….” or “How much does X cost” or “what is the best family Hotel in San Diego?”. Google looks for articles written by people, that will help people. It’s that simple.
One way to start out with this is to write down two lists of questions (followed by the answers):
1. Your Frequently Asked Questions (FAQs)
These are the questions that you and your team receive from your ideal customers and potential customers.
2. The Should Ask Questions (SAQs)
These are the questions that your potential customers don’t always ask, but you always end up answering for them anyway. Start writing content that answers these questions on your blog. You’ll end up with two main benefits.
1. You are putting content out there that is more easily found by Google. This gives you a better chance of helping your customers.
2. You’ll build a library of content that your team can use to help answer customer questions.
Use these tips to help you do this more effectively and you will be well on your way to being able to increase blog traffic and skyrocket your shares (and your sales!).
WRITE Your Blog Post
#3 Use Yoast SEO
Ask anyone who is blogging for business and they will tell you the same thing – that their first blog posts literally sucked compared to more recent ones.
Yes, yes, it sounds harsh, but it’s the truth.
Over time your blogging skills improve, like the flexing of any muscle. Most bloggers will say that they wish they installed Yoast SEO for WordPress earlier than they did – along with paying more attention to SEO (Search Engine Optimisation) to increase blog traffic. ie getting Google to notice you because of the way you optimise your content.
Paying attention to SEO early will help you to shape better content and will help Google to “read” your content better. If Google can “read” your content you have more chance of it being ranked and seen.
Yoast for WordPress is a simple tool that analyzes your blog post and gives you a rating for SEO and Readability. It also identifies problems and gives you suggestions for improving them using a color-coded system that’s super easy to follow. Here’s an example of how the results looked on this blog post before “fixing it up”.
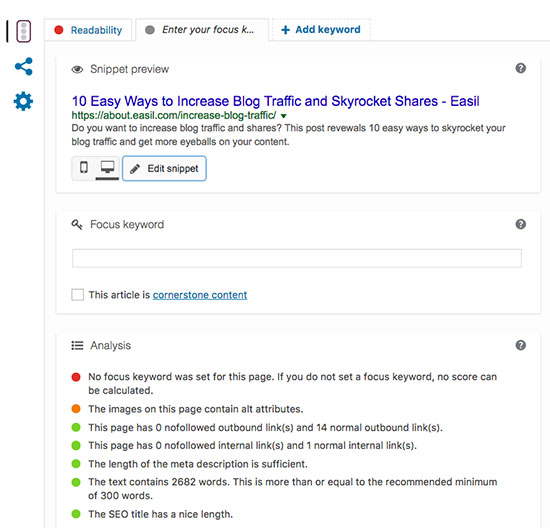
You can see that Yoast has suggested a few changes we can make to improve SEO on this post including:
- Adding a focus keyword or phrase
- Adding images with Alt Text Descriptions
As you go about correct the suggested items, you will notice that the ratings change. Yoast recognizes your edits in real time and is always tracking things like your post word length, the links on the page and how often your keyword is mentioned. In the above example I have already added my meta-description and some inbound and outbound links, but if I forget… Yoast reminds me!
A good practice is to check in with Yoast after the initial draft of your blog post is finished, and then make changes based on the recommendations.
The goal is to turn the majority of the rated items to “green”. As you can see below, Yoast is now happier with our efforts after a little editing. This post now has an overall green rating in the Yoast summary which sits on my sidebar.
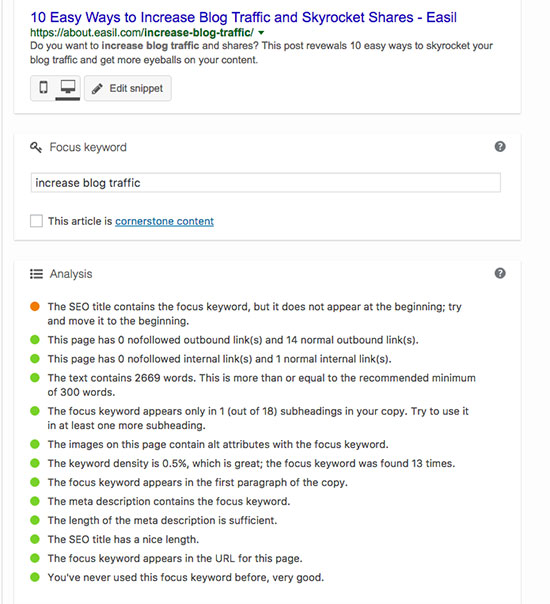
Yoast helps you to become a better blogger, as it helps you to think about SEO at the same time as you write your post.
Note: Let’s be clear. We are not talking about keyword stuffing and other dodgy SEO practices. Don’t be dodgy. We are talking about things like including your keyword phrase in a natural way within your blog post… or ensuring your images are in place and optimized, ready for Google!
We could go on and on about how important Google is, but you get that by now, right? This post is not about giving you an SEO lecture. It’s about doing SEO right with a few quick and easy tools. And Yoast for WordPress is the best tool for doing just that, in order to increase blog traffic.
#4 Tweak Your Title
The great thing about blogging is that the title (or headline) is not set in stone. You can test it and change it. And there are fabulous tools to help you do it!
When you create a new blog post or anything that requires a title (including emails), simply run the title through one of the following free tools. You’ll get a rating, and suggestions about how to make the headline more eye-catching and appealing. Why wouldn’t you leverage that information to help skyrocket your blog post’s shares and traffic?
Here’s how they shape up:
1 CoSchedule’s Headline Analyzer

Co-Schedule Headline Analyzer is a free tool!
Simply enter your headline into the tool and you will be given a complete report on that headline including:
- Grammar, structure and general readability of the headline
- A breakdown of the language/words you are using and how you can improve them. It shows you how many common, uncommon, emotional and power words you have used in your headline. You can read more about this here.
- Bonus points if your post is a list post or another type of engaging post.
- Word count length for your headline and it is too long/short for SEO purposes. This is really helpful when making last minute changes.
- A list of all previous title checks, so you can choose the best result!
Here’s what some of the feedback looks like for this post as we check the title. Anything above 70 is considered to be a high score!
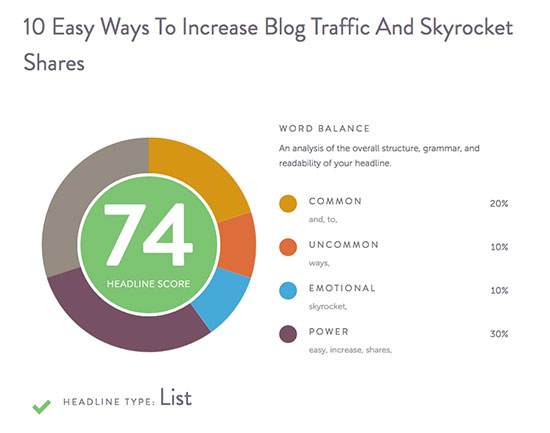
2 Advanced Marketing Institute – Emotional Marketing Value Headline Analyzer
This is another handy tool for checking your headline effectiveness:
- It restricts your headline to 20 words which immediately sets you up for success with a punchy headline.
- You’ll be given a percentage rating out of 100 with 30-40 being a great headline at the standard of a professional copywriter and 50-75 being the score of an exceptionally gifted copywriter (and much harder to achieve).
- It gives a great breakdown of the Emotional Marketing Value of your headline in the categories of intellectual, empathetic and spiritual.
Here is how it looks:
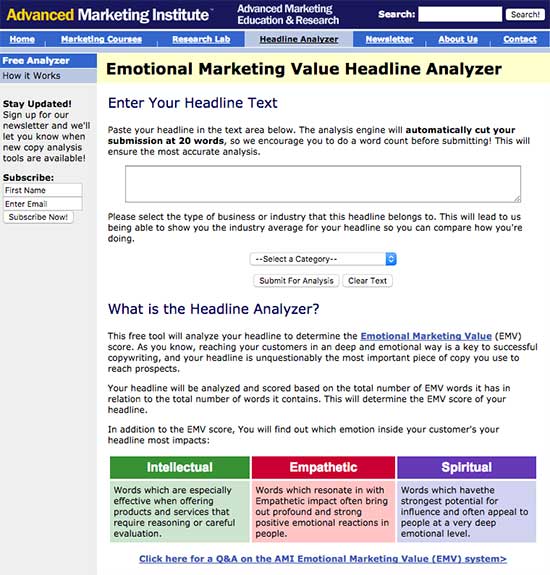
The score for this post is a 40 by the way, so …not bad. Perhaps I have a copywriting career ahead of me.
There’s a lot that goes into a great headline and these tools have de-mystified it for all of us. With tools like this in your blogging arsenal you are likely to increase blog traffic by getting your post noticed in the first place.. by real humans and by Mr Google.
#5 Add Shareable Images
Blogging is more visual than ever before. For example, your post can be shared to Pinterest with a saved image, tweeted on Twitter with a featured image, shared to Facebook with an embedded image.
If you don’t have images in the right sizes, ready to share on your blog, you’ll miss out on this “free marketing” from your readers.
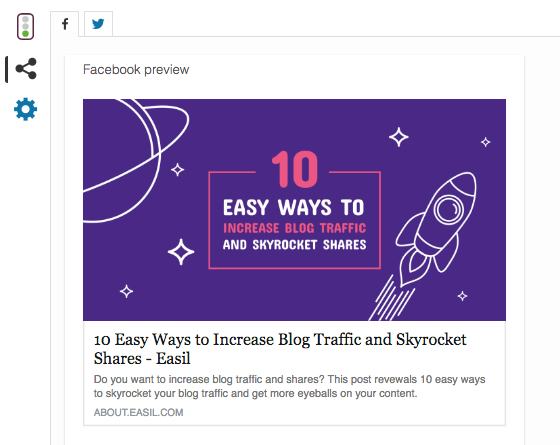
Start out by adding a shareable image that works across at least 1-2 of your key social media platforms. It might be that you have a landscape image on your blog like this one:

Landscape images share well to Facebook and Twitter. You can also use the Yoast plugin to nominate a “preferred image” in the social sharing section. This way, when someone shares your blog on Facebook, for example, Yoast will direct Facebook to pull in the landscape image you have nominated. Here’s how it will look in Yoast:
Likewise, square images share well to Instagram and Facebook.
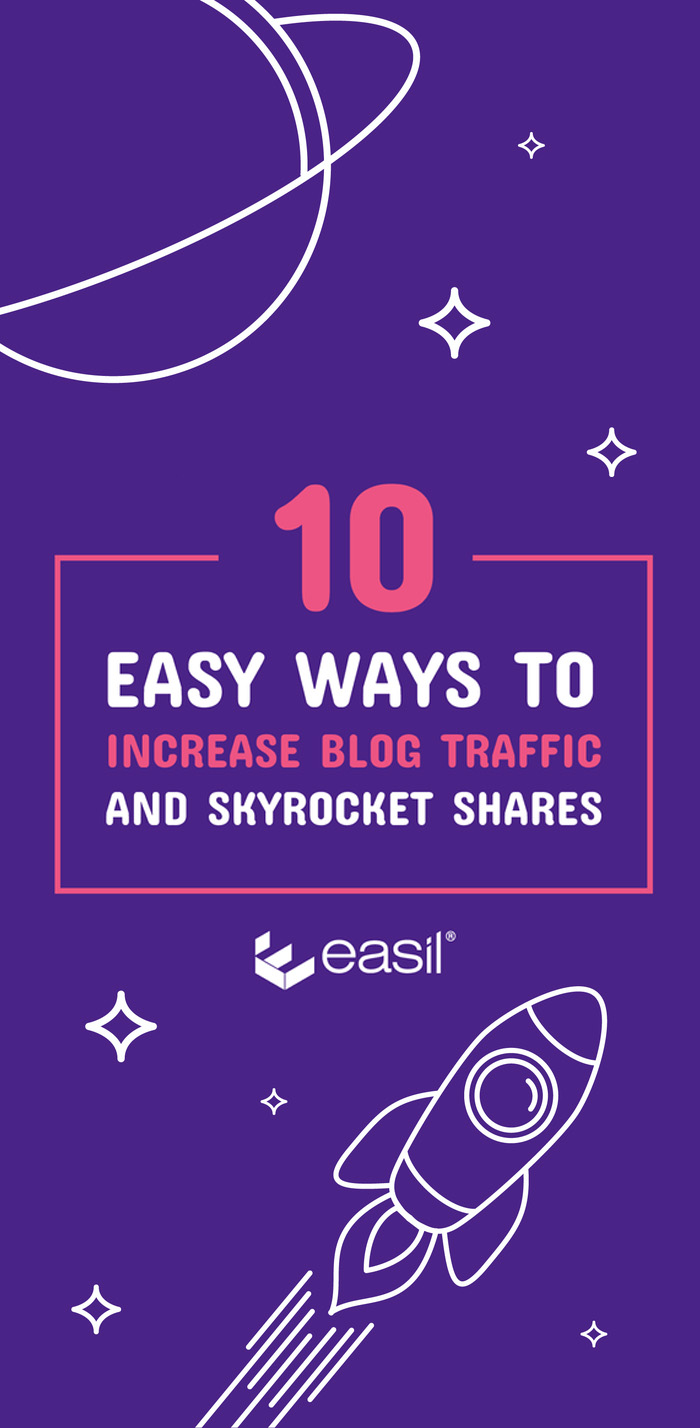
It’s a smart idea to also have a great Pinterest-sized (portrait) image for sharing on your blog. Pinterest users will often opt to pin/share to Pinterest.
Here’s one we have created for this post (hint hint, why not save it to Pinterest now, so you can refer to this post later!)
Mix up your shareable images on the blog post to catch attention. Here are some ideas for image types to consider.
#6 Use Social Warfare to Power Up Your Shares
Another tool you can use for this is Social Warfare, and the best part is that you can get started for free with this plugin. The social share buttons you see here on this blog are Social Warfare buttons.
Social warfare adds funky (and sleek) social sharing buttons to your blog that have awesome functionality for sharing content from your website. It also has a number of extra features if you upgrade to Pro, including:
- Click-to-tweet functionality – a great way to promote your blog post and increate blog traffic
- the ability to lock in a Pinterest specific image on your post, so the right content is always shared!
- a widget for displaying your most popular posts
- shareable quotes in your blog post… and more functions that help you to increase blog traffic.
Here’s what Social Warfare looks like for this blog post. All we have to do is add in any social media descriptions we want to pull in. ie the Pinterest Description allows you to add a Pinterest description that is separate to your Alt-Text so that you can include a longer description, hashtags etc.
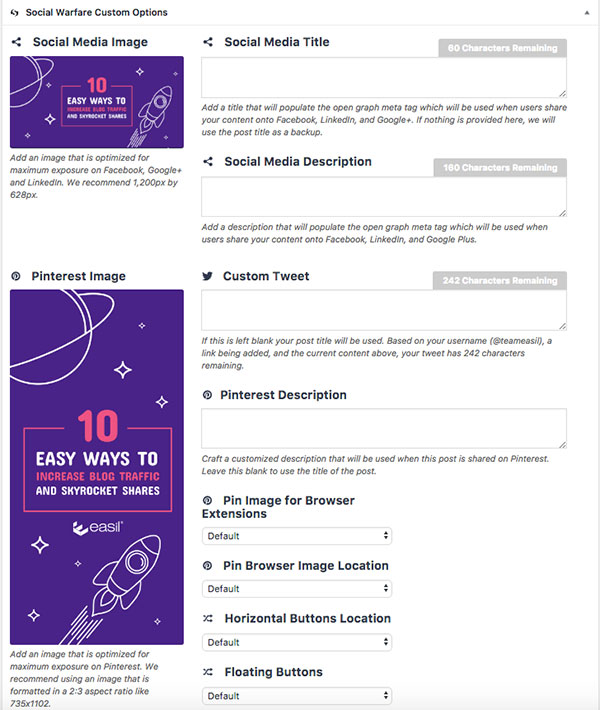
Social Warfare is a great tool for your blog arsenal!
#7 Add an Infographic or Key Visual Asset
There’s no doubting that infographics catch attention and get shared. The more useful and helpful you can make them (or entertaining or fun) the more likely they are to get shared.
But most businesses stop in their tracks when it comes to creating infographics, thinking it’s too hard or expensive.
If you don’t have the budget to get a designer to create one for you, consider using a quality DIY Infographic Template. At Easil we have mid-length infographic templates that are super easy to use and customize. Here are just a few of them:
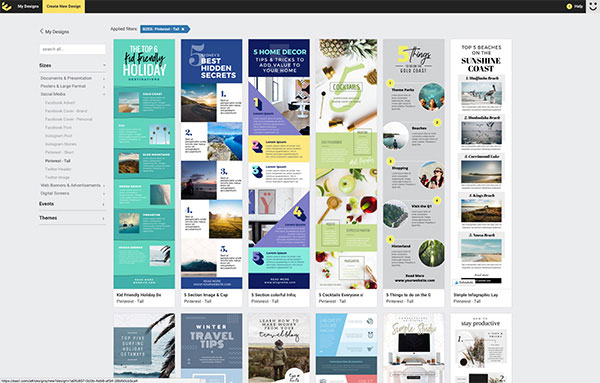
In a matter of minutes, you can change out text, images, color-schemes and boom… you have yourself an attractive infographic.
PROMOTE Your Blog Post
#8 Email the blog post to your list
I know, I know, obvious right? Yet so many businesses forget to promote their blog post after they write it!
If you have an email list, even a small one, send a quick email to your subscribers, encouraging them to read your blog post. You are giving them VALUE. And if you follow the advice in items #1 and #2 in this post, they’ll appreciate you for it.
#9 Promote Your Post on Your Email Signature
There’s a free, untapped marketing platform that many of us forget to use. It’s called our “email signature”.
Instead of just including your address, phone number or website, consider adding a link to read your blog, or even better, updated it regularly to share your latest blog post. We email people sooooooo many times per day, it makes sense to leverage it, right?
You can add the email signature to your email manually, or use a tool like Wisestamp. Wisestamp allows you to use the same email signature across multiple emails and easily swap out the content on your template any time. Super Simple.
#10 Share your post on social media (more than once)
Don’t fall into the trap of posting once, then forgetting about your blog. You need to share it on key social platforms… and more than once!
This involves scheduling repeated Tweets, Facebook posts, pins on Pinterest, to go out at suitable times for your audience (especially after your post goes live). Over time your social sharing can be pulled back for a new blog post, but if your content is evergreen, it’s worth sharing on a consistent basis to keep encouraging visits to your blog.
Use a tool like Agorapulse, or Co-Schedule to share “evergreen” content and re-queue it for extra shares.
Use Easil to create a series of social media graphics to promote your post across platforms.

Give it time.. and check your analytics!
There’s one thing that is a constant with content marketing… time.
You need to give your content time to take effect. Massive blog traffic won’t come immediately but it will come when you give it time.
Check in on your analytics (on each social platform as well as Google Analytics) and take time to get to know where you are at and where you are seeing results. If you see something working well – do more of that type of content.
And if you start with some of the tips in this post, you should see movement in the right direction!
Over to You
What has worked for you to increase blog traffic? What new ideas will you try?


