Creating a brand is marketing 101. However, using that visual brand consistently amongst a growing business can present a challenge. And keeping control of brand consistency amongst a team can be downright impossible.
That’s why we built a suite of brand locking tools right into Easil. We believe – If you like it, you should put a lock on it.
Adding these restrictions to your documents should be simple. No coding required. The huge benefit of this is that you can provide your non-designer teammates with the ability to create marketing materials without fear!
Empower them with a catalog of designs that they can use to build the company brand, and rest assured that what they will produce will always be on-brand, without the worry about font pairings, design rules, and color combinations.
Exciting right?
Getting started with Brand Restrictions and locked Templates
Prior to getting started, it’s worth working out a plan around how you would like your team members to use the designs, and what you would like to lock down and what options you would like to leave open.
You’ll also want to work out what roles will be applied to each person in your team. Will you require them to be able to create templates to share with the team, or will you simply want them to edit their own copies of designs, within the design boundaries that you place?
Once you have that planned out, you’ll be able to note down the roles you will assign when you send your team invitations. Keep that aside for now, as we recommend inviting your team after you’ve got your designs ready to go!
How to use Easil’s Brand Locking Tools
To access Easil’s brand locking and controls functionality, you’ll need to be assigned a ‘Designer’ Role. As a Designer, you have the freedom to create new templates using either Easil templates as a base or create from blank templates, and then add your restrictions before you unleash them onto your non-designer teammates.
To get started with applying a restriction to a design, open any completed design that you’ll be converting to a template. Click the Lock icon at the bottom of the right sidebar to access the Restrictions Control Panel.
Here you’ll find two levels of restrictions; element controls, and also document level restrictions which are separated by tabs at the top. We’ll get to the differences between the two in more detail shortly.
A restricted editing option on an element is set to the closed padlock icon and shows that that editing option will not be available by team Members who do not have the ‘Designer’ role applied when invited to your team.
An available editing option is shown with an open padlock icon. This results in any user being able to freely apply that editing option to a copy of the template in their Workspace.
Applying Brand Locking Restrictions to your Designs
Applying, or removing the restriction to an element is as simple as clicking on the lock. Click again to remove the restriction.
- Select the Element by clicking on it on your Design.
- Click on the Padlock icon – Locking Panel.
- Click on the Lock icon to the right of each item you would like to restrict from being available to your teammates when using the template.
As you apply these restrictions to your document, you will notice that the user interface visually updates as you work.
In the video above, you’ll notice at the top left of the Easil user interface adjusts by removing editing options from the Actionbar. This instantly provides a restriction to that type of editing, as the option will not be visible to select.
ELEMENT LEVEL RESTRICTIONS FOR BRAND LOCKED TEMPLATES
Each element in an Easil design, whether it be a photo, a text box, or a graphic, can be protected by the creator with the locking functionality.
Work through your document, element by element, locking down any that you would like to prevent editing of some kind on.
With the lock tab active in the sidebar, selecting an individual element will activate that elements lock settings. Any changes you make to an individual items lock settings apply only to the currently selected element.
Hot tip: Clicking the Select/unselect all option at the top of the permissions list will toggle on/off all the options.
GRAPHIC & TEXT RESTRICTION OPTIONS
When you have a graphic, or a text item selected, you will be able to restrict the following editing options:

Removable:
In a locked position, the selected element will be unable to be deleted from the design.
Visibility:
When locked, the element will be unable to be hidden from visibility via the layers tab.
Opacity:
Within the locked state, the element will be unable to have its opacity settings changed via the slider or entry input.
Angle:
When it is locked, the element will be unable to be rotated or have its angle changed.
Duplicate:
When a lock is applied, the element will be unable to be duplicated, copied or cloned.
Size And Position:
When locked, the element will not be able to be resized, stretched or repositioned.
Color:
Within the locked state, the color of the element will be unable to be changed.
TEXT ONLY SETTING OPTIONS
The following editing restrictions are available to be applied to Text boxes in your design only:
Text Edit:
When locked, the content in the text box will be unable to be edited/changed.
Position:
When locked, the position of the text box will be unable to be updated on the design.
Font Family:
Within the locked state, the font of the text box will be unable to be updated.
Font Size:
When locked, the font size applied to the text box will be unable to be changed.
Text Decoration:
When locked, the bold, italic and underline styling options of the text within the text box will be unable to be updated.
Text Shadow:
When locked, the soft and hard text-shadow and glow settings of the text box will be unable to be edited.
Text Mask:
Within the locked state, the text masking features of the text box will be unable to be accessed.
Letter Spacing:
When locked, the letter spacing settings of the text box will be unable to be changed.
Line Height:
When locked, the user will be unable to adjust the height of the spacing between lines of text, within the selected text box.
Text Align:
When the text-align setting is locked, the text within a box will not have the option to change its alignment.
IMAGE ONLY SETTING OPTIONS
These locking restriction options are only available on image boxes (photographic images):
Filters:
When locked, filters will not be able to be changed on any images within this element.
Flipping:
When locked the element will be unable to be flipped.
Cropping:
When locked, the photographic image (or images within this element) will be unable to be cropped.
Image Replace:
When locked, the image (or images within this element) will be unable to be changed/replaced.
Set As Background:
When locked, the image will be unable to be used as a background image.
DOCUMENT LEVEL BRAND LOCKING & RESTRICTIONS
In addition to each element level restriction, there are a range of document level restrictions that may be applied to your Design. We recommend applying these as a final step to your document, after you have locked all elements individually.
These include:
Brand Color only:
When this option is selected, a user will only be able to select from and apply colors from your Brand Kit to elements that allow colors to be applied.

Background Color:
Locking this option will prevent a user from adjusting the color of the background, including the option to make the background transparent.
Add Text:
This option disables the ‘T’ Menu located on the right sidebar and prevents a user from being able to add any new text to the design.
Arrange Layers:
With this option in the locked position, a user will be unable to re-arrange the order of layers within a document.
Photo from Library:
Locking this option will disable the user from adding any images to the design, from the Easil image stock library.
Graphic from Library:
This option will prevent users from adding graphic elements from the Easil library to the design.

Resize & Copy:
Disabling this option will remove the ability for users to duplicate the Design, or to create a resize of it.
Custom Colors:
This option prevents users from accessing the Color Picker to choose custom colors for elements.
Assets Templates:
This option controls whether a user can access Assets from the Assets > Templates tab, enabling them to re-use elements on the design.
Assets Favorites:
This restriction prevents or enables a user to access Assets saved to the Assets > Favorites tab.
Save to Favorites:
This option prevents a user from being able to save any elements from the current design into their personal favorites tab.
Layouts:
Enabling this editing restriction prevents users from adding new design layouts into the current document.
New Page:
Setting this restriction will prevent users from being able to add a new blank page to their document.
Text Tables contain a unique set of lockable features that are perfect for controlling various elements of design for menus. You can read more about those features here.
HOW TO TURN A DESIGN INTO A LOCKED TEMPLATE
When you’ve completed applying the restrictions to your document, you’ll need to convert it into a Team Template so that your teammates can access the file:
- Return to ‘My Designs’ in your Workspace.
- Locate the template that you would like to share, and click on the chevron in the bottom right corner of the design thumbnail.
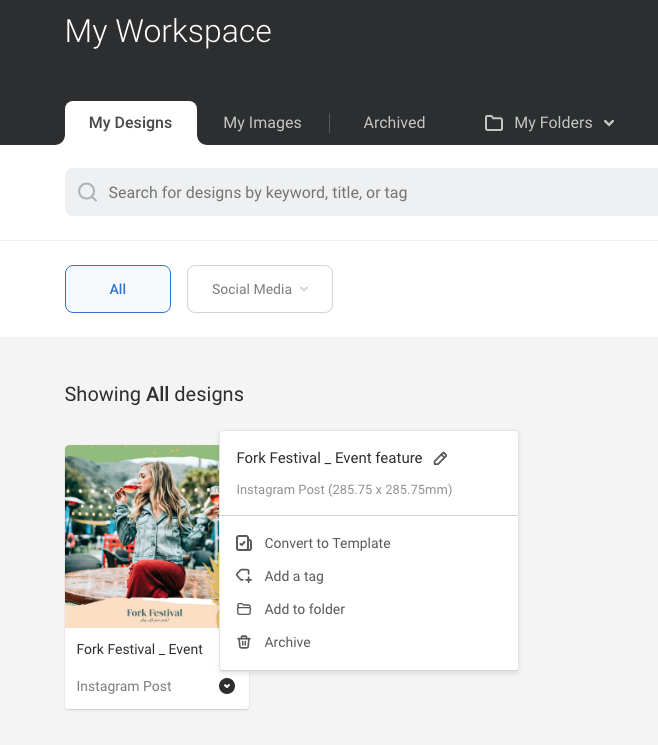
- Click on ‘Convert to Template’.
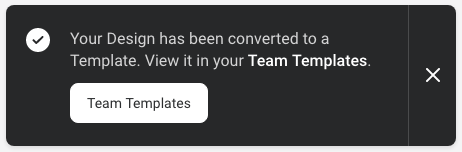
- You’ll receive a notification that your Design has been successfully converted to a Template, and it will be moved to your Team Templates, and appear at the top-left position.
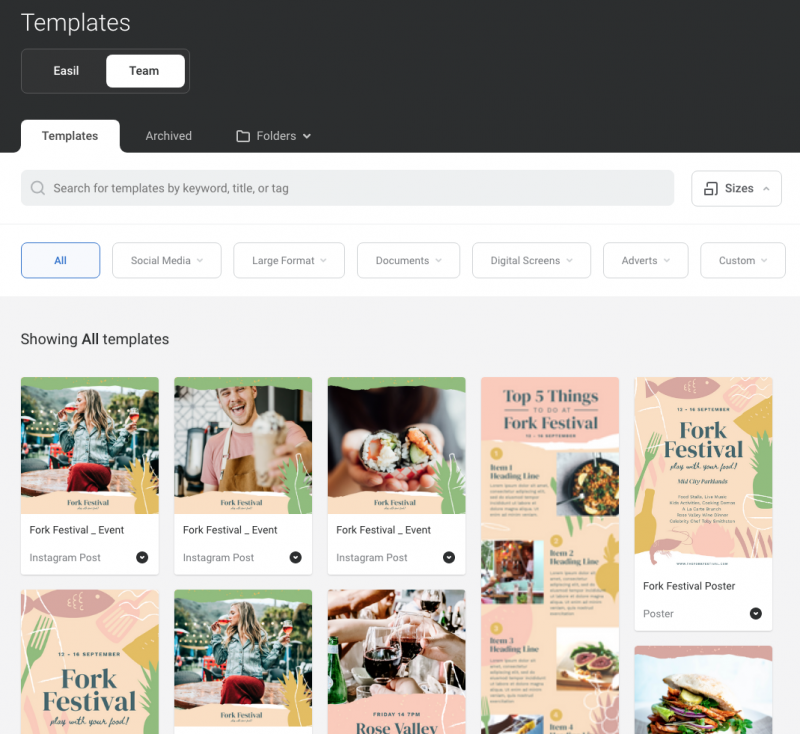
Your Template will now be available for your team to access. Any teammates will the role of ‘Member’ applied will only be able to work on their own drafts of the designs, working within the restrictions that you have applied to the Template.
Hot tip: If you want your Teammates to only access the designs you have created, and not the Easil catalogue, you can set this by visiting the Brand page. At the bottom of the page toggle ‘Hide Easil Templates’ to the right. Upon login, your non-designer members will only access templates in the ‘Team’ section of Templates.
GETTING YOUR TEAM ONBOARD
With all your locked templates loaded, it’s time to get your teammates invited into Easil. You’ll need to be assigned Admin role in order to invite users to your team.
- Click on Team in the top navigation of Easil.
- Click ‘Invite Now’ to open the team invite modal.
- Add your Teammates Name, Email, and Roles to assign. In most cases, the Member permission only should be applied.
- Press ‘Invite’.
- Your Team members will have access upon accepting their email invitation to join the Team.
OVER TO YOU
We haven’t skimped on the options available for restrictions in your Team templates! Keep this blog bookmarked for reference when you need it, and let us know by DM how you’ve used your locked templates!