Pinterest is a powerful visual search engine for brands and marketers alike. Pinterest’s algorithm favors fresh pins, which means that Pinterest will promote your pin if the content is new to Pinterest – either in the form of an image or video. However, these pins can point back to the same URL over and over again, so make sure you use this strategy carefully when you create Pinterest Pins and share on the platform.
Before we dive into the ‘how’, let’s start with the ‘why’. Why does Pinterest prefer fresh pins over duplicate pins?
Dedicated to providing the best user experience and in turn maximizing the amount of time that a user is on the platform, Pinterest wants to ensure things don’t get stale. Like any social media platform, if you’re scrolling through and see the same old visuals, over and over again, you won’t be likely to head back in a hurry [if ever].
With new visuals, AKA Fresh Pins, users are more likely to save pins or view further information/click through, than with pins they’ve already previously seen. But pushing a pixel here, and moving some text slightly somewhere else – is not going to cut it in regards to the definition of ‘Fresh Pins’. Each pin needs to be substantially different, and that’s where the challenge comes in for most non-designers. That means you’ll need to change up the layout of each of your pins, varying the text and its positioning, and even swapping out the image/s for an alternative view of the product.
So how do you create fresh Pinterest Pins for each piece of content that you want to promote when you are not a trained Graphic Designer?
There are 2 things you need to do:
- Batch your visual content production, and
- Use a graphic design template tool that will help you to create multiple pins in no time at all!
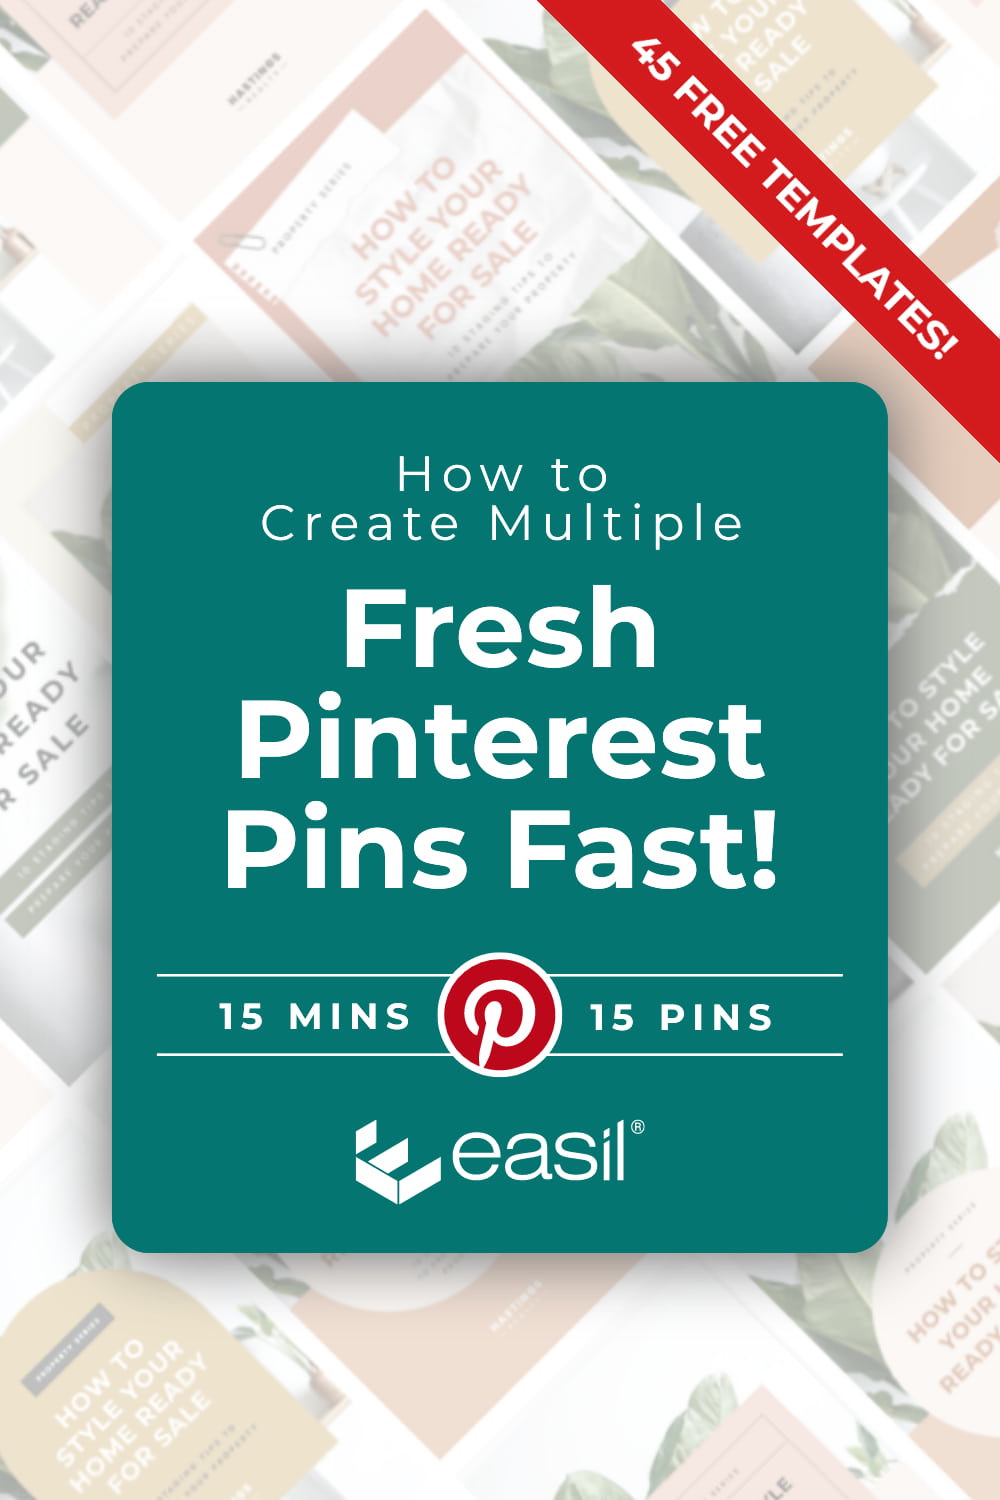
In this article, we’ll let you in on a magic feature within Easil that will save you tons of time, and help you create professional-looking pins with the help of professionally pre-designed drag-and-drop templates, that you can schedule out over time. Plus, we’ve got 3 sets of 15 pin freebies – that’s 45 FREE templates!
Note: The functionality outlined in this article is available to Plus and Plus-trial users, as well as Edge subscribers. If you’re a FREE level Easil user and would like to try this out, email us for a 14 day additional FREE trial! [Mention 15 Pins in 15 Mins in your email!]
15 pins = 15 Mins [or less!]
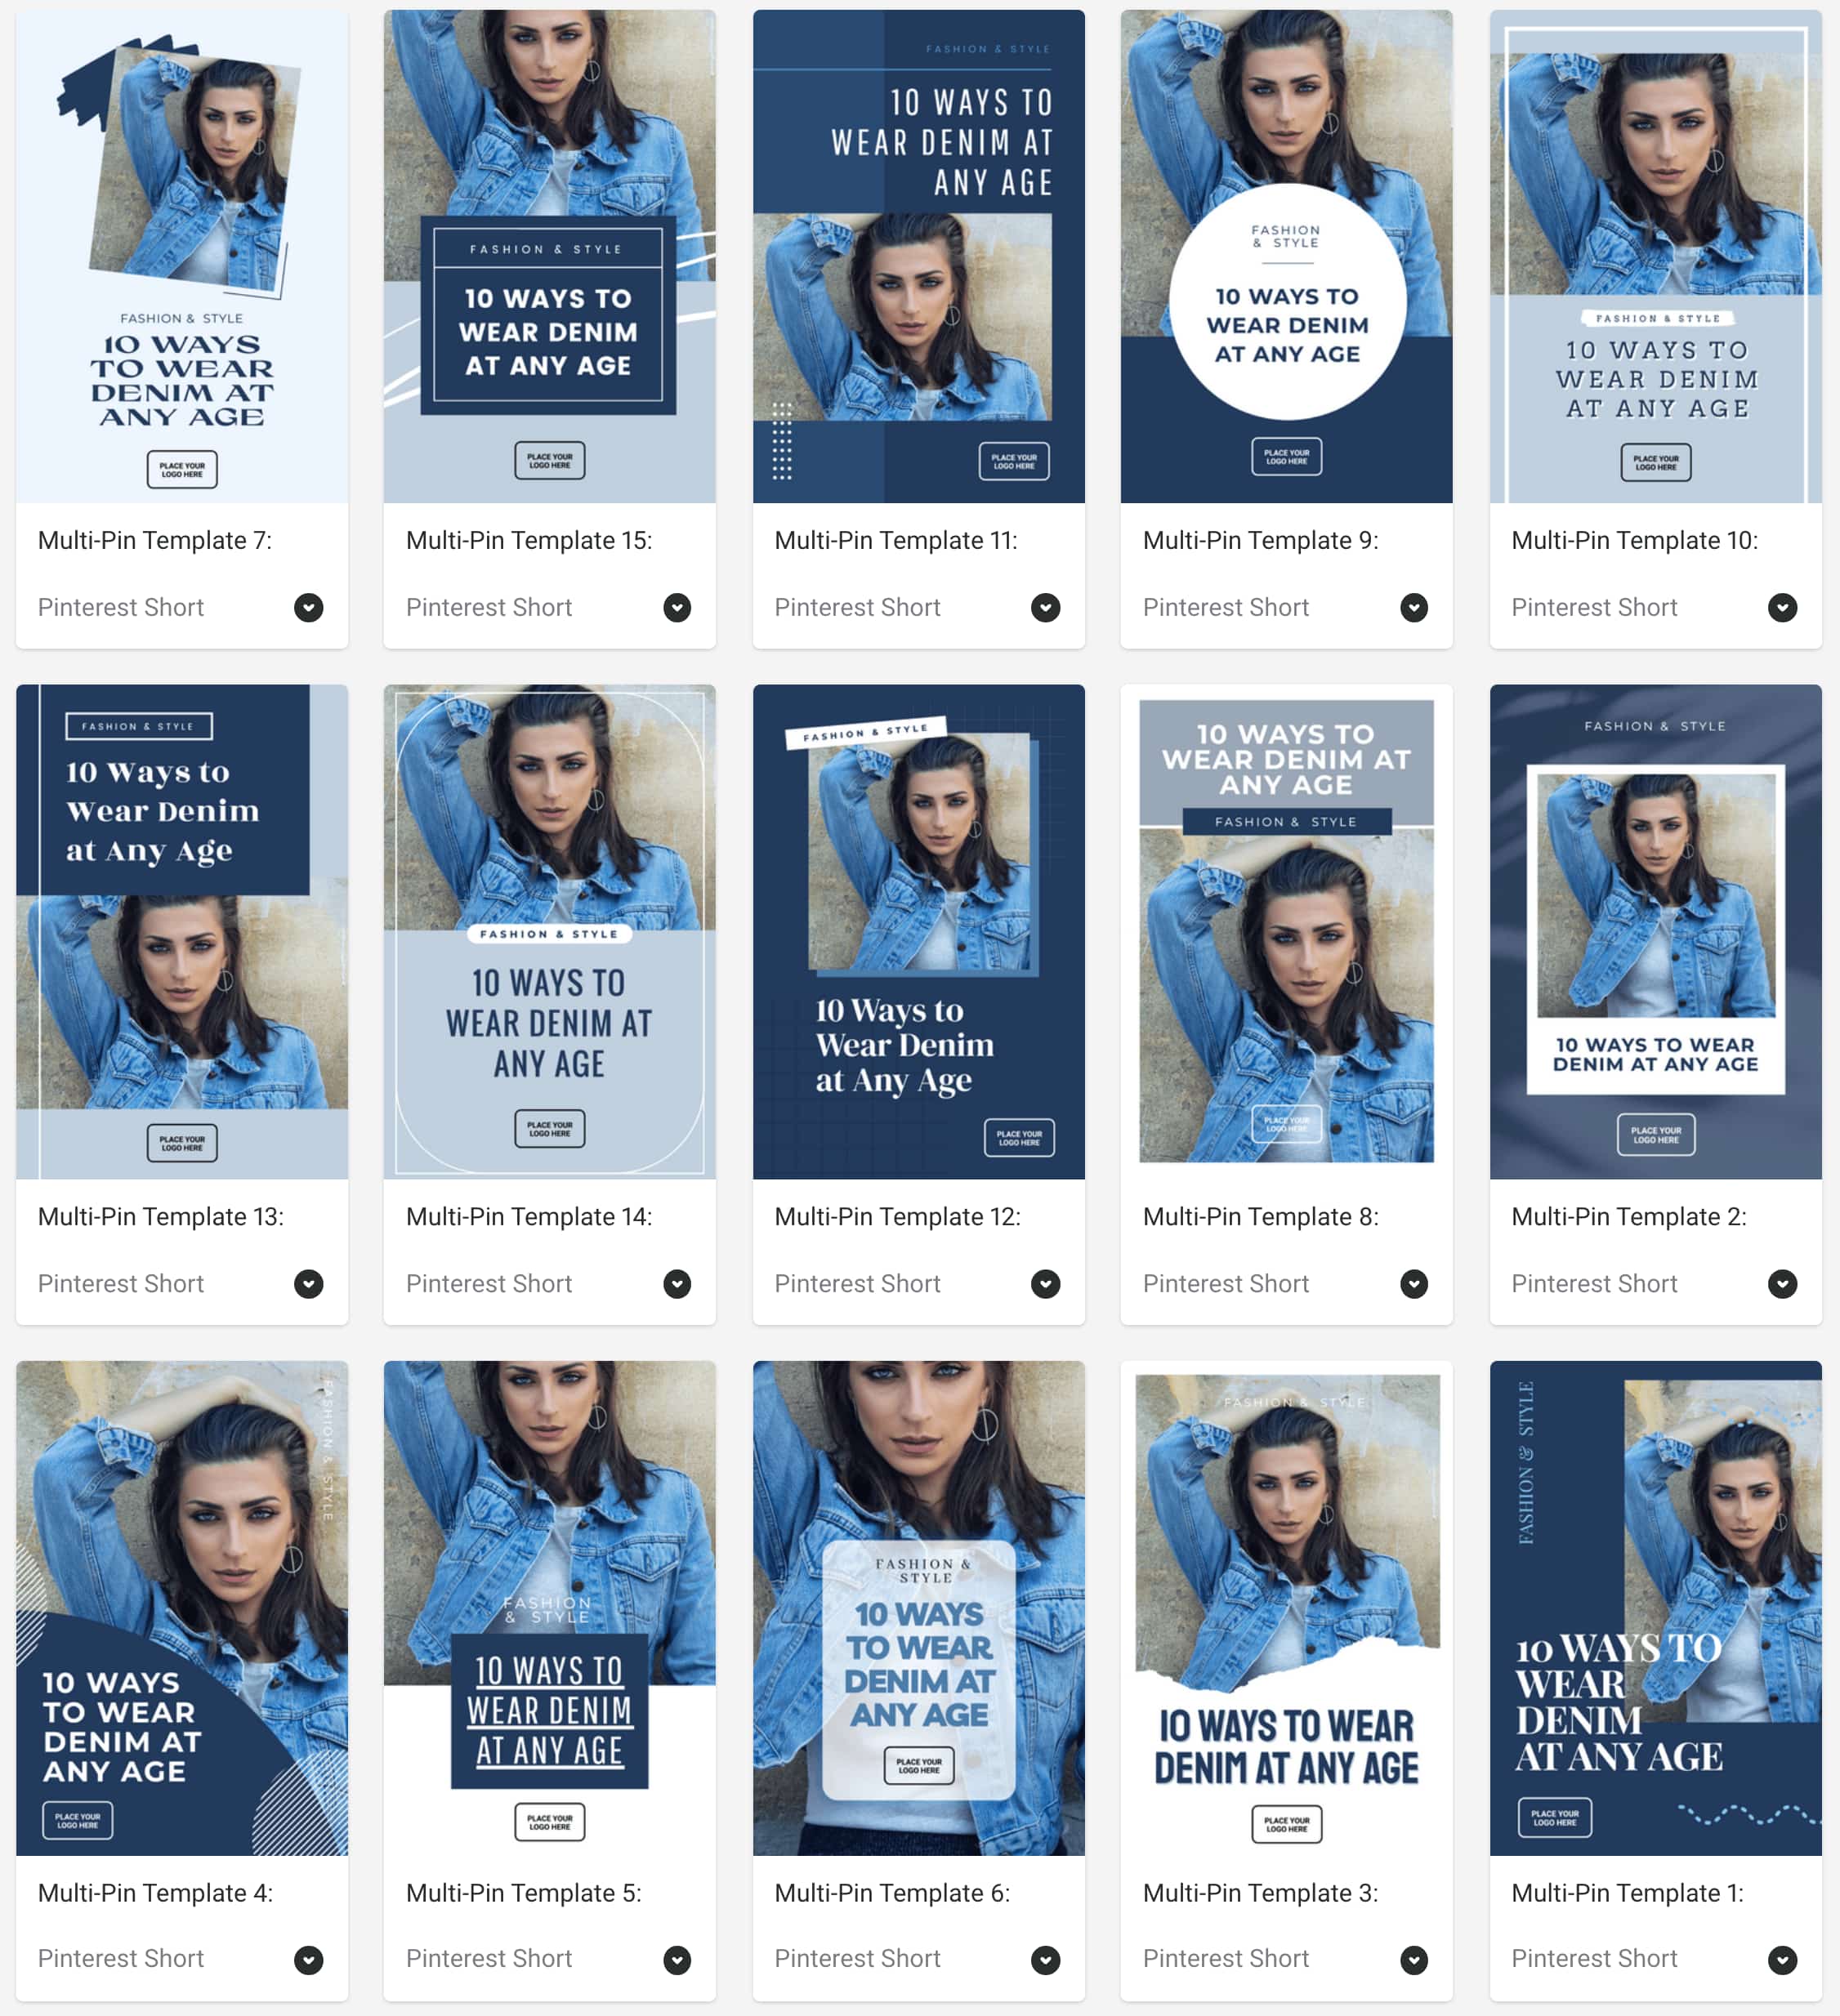
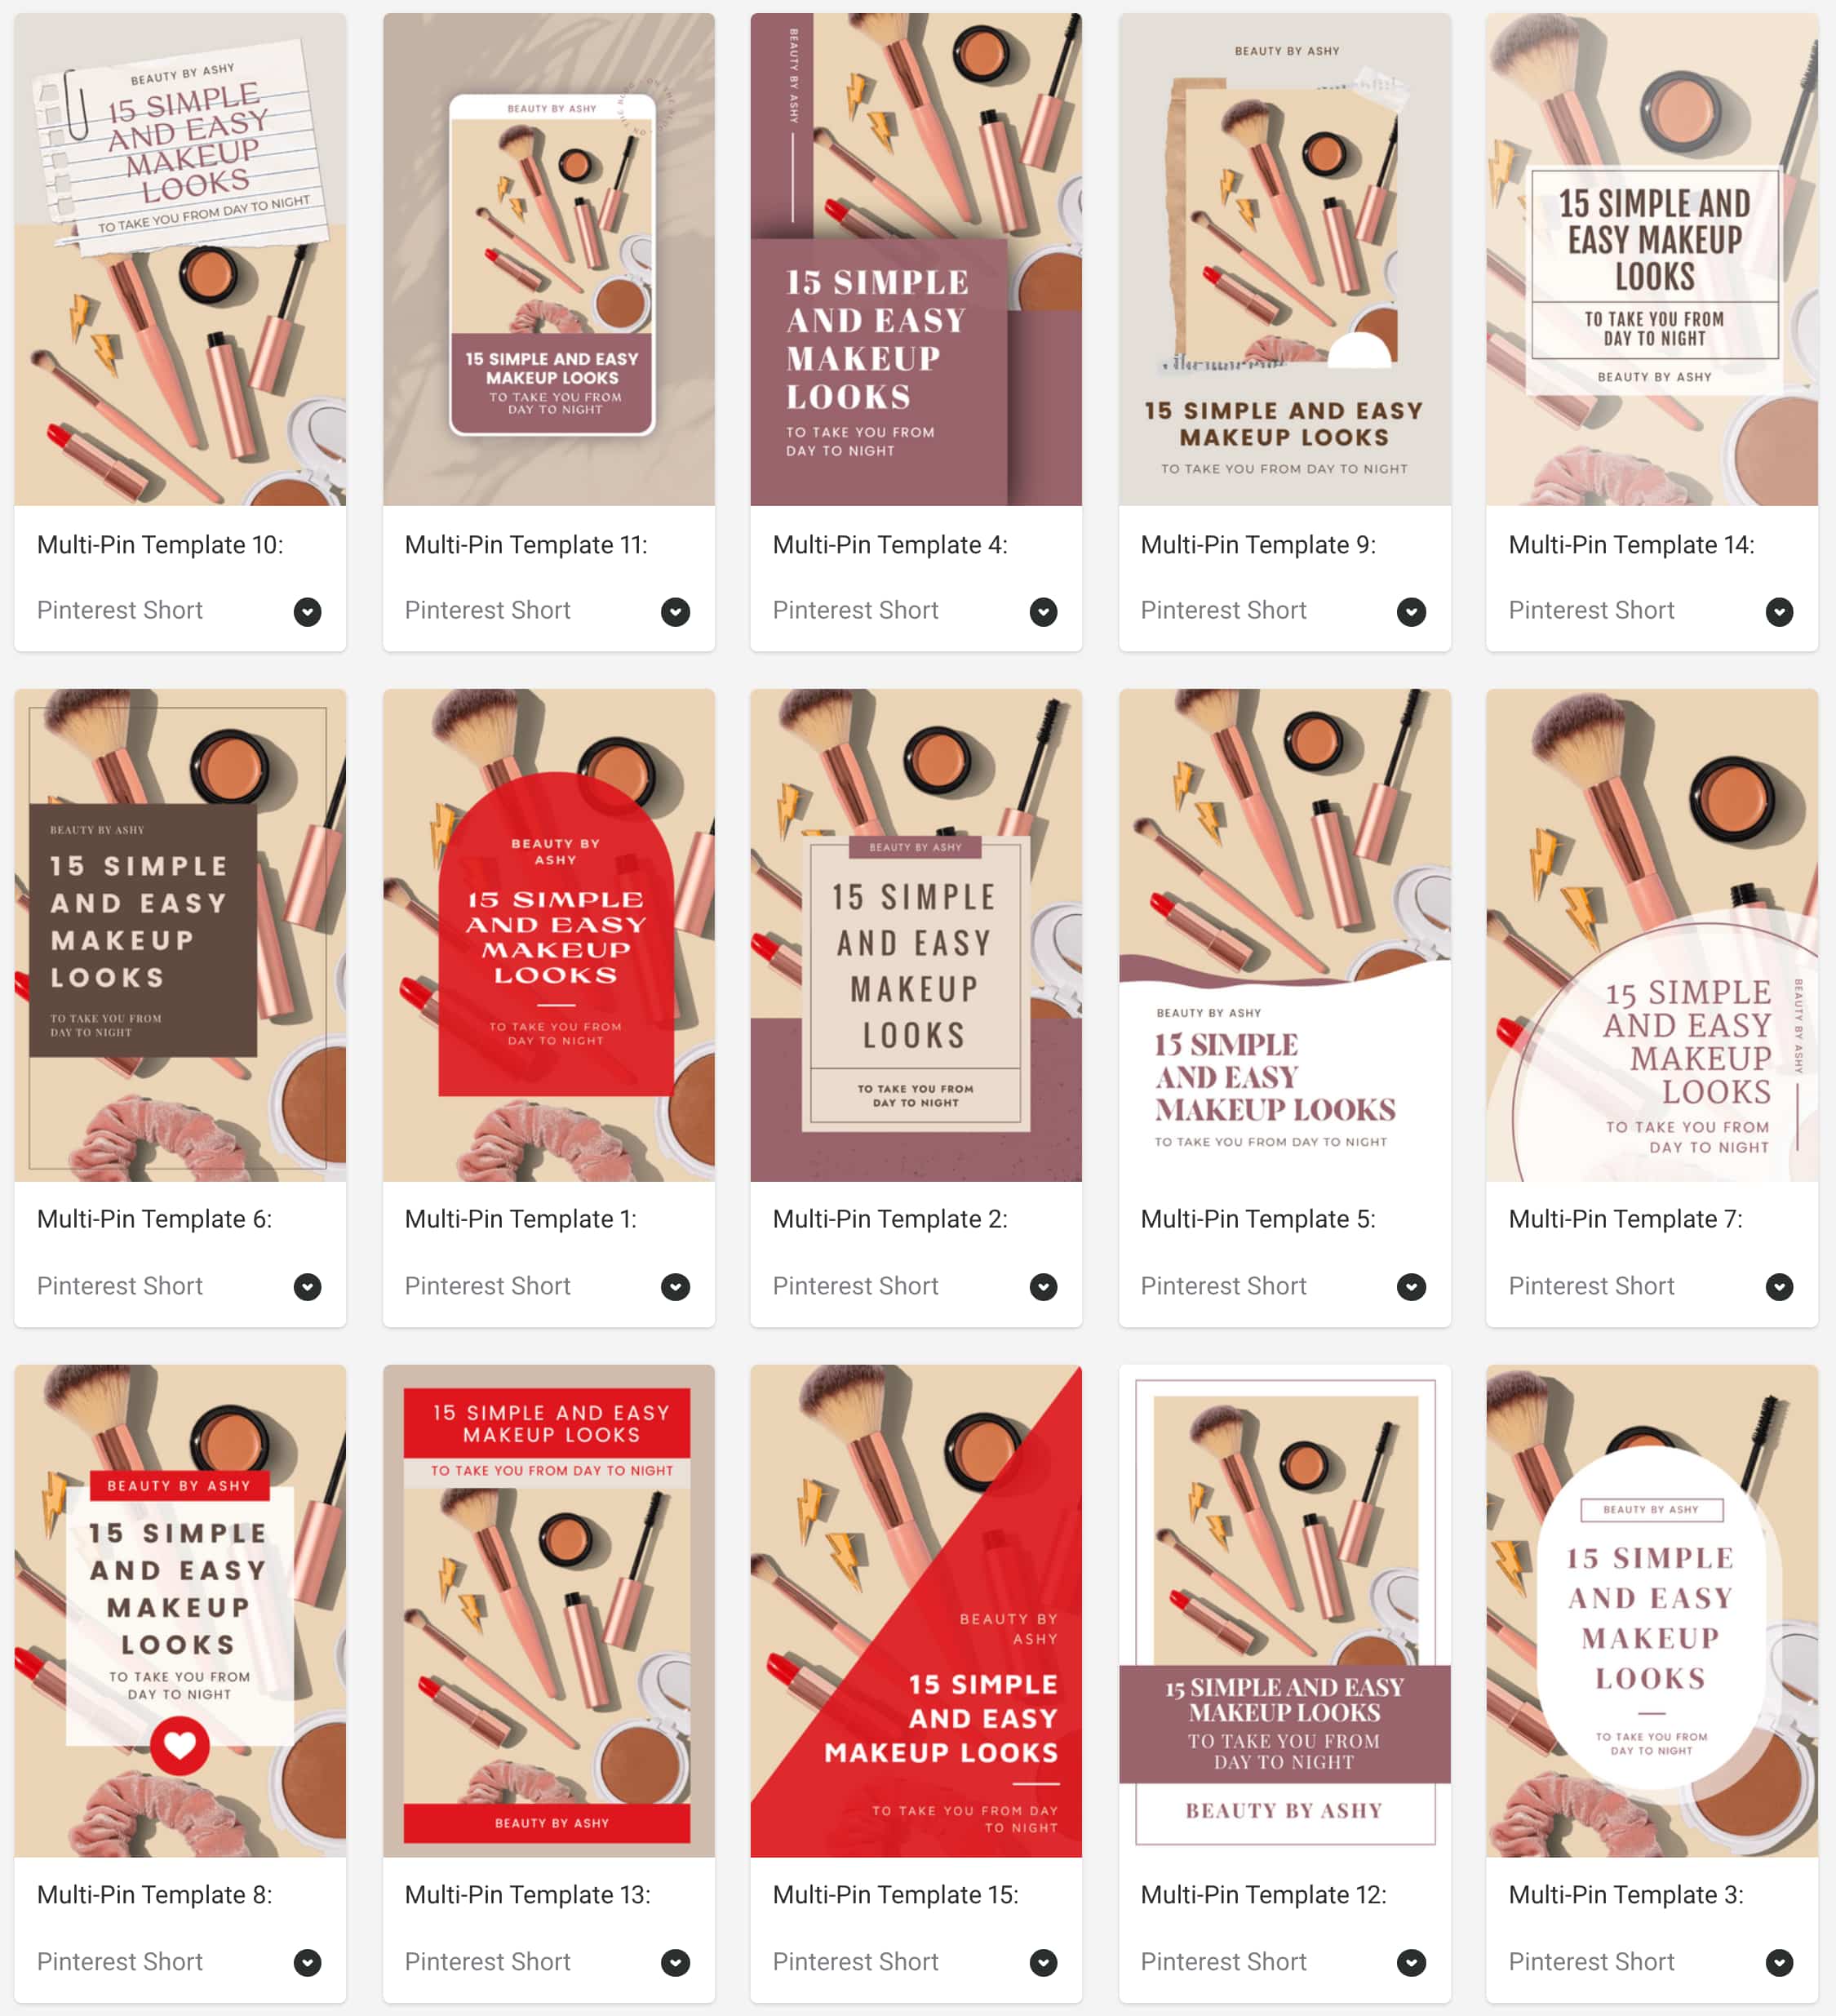
Here’s the secret sauce to being a Pin-creating Ninja: Easil Collections.
Collections are related groups of design templates that have several elements linked between them. They allow you to make an update on one template, and then quickly re-populate that same updated content across all other linked templates with just a couple of clicks. Say goodbye to opening multiple tabs and designs to update sizes for various social channels!
Watch the video below, and follow these steps:
- Click on the image placeholder, and then the Images tab to find your new image. Click to update. Then right-click on your mouse, and select ‘Update Collection’. (If you’re not using a mouse, click control+trackpad tap on Mac, or Shift+F10 on PC laptop).
- Double-click on a text image, and replace the content with your new text. When you are complete, right-click and click on ‘Update Collection’.
- Repeat for any other text boxes, clicking after each update you want to populate across all sizes.
- Click on the ‘Sizes’ tab on the right sidebar, and adjust the colors within each template to your liking.
That’s IT! Once you are ready to download, simply select PNG or JPG format from the Download button at the top right, and start scheduling your Pins to Pinterest! [Learn how schedule Pins for free, here!]
Tips: How to create fresh Pinterest Pins fast!
- Replace like for like. Try to keep your text character count similar to the amount included in the supplied templates. This way, as you update the text – automagically – throughout the series, you’ll have less tweaking to do with each of the related sizes.
- Start with updating one image, and update it across all 15 images in the multi-pin collection. Then go into each individual pin and check if you want to replace any with alternative product images. If you add a new image to a single design, and don’t hit the ‘Update Collection’ functionality, it will only stay populated on your current design.
- Remember to right click and hit ‘Update Collection’ whenever you’ve completed a change that you’d like to carry across to ALL Pinterest Pins in your Collection.
- If you have multiple text boxes within a single design, you can update each of them, then select them all, and then right-click to apply all changes from those selected boxes, across your Collection.
- Once you’ve updated your design collection with your own brand logo, and colors, save them as a Collection Template that you can re-use over and over again, and even faster!
- Click through each of your designs via the Sizes tab, to make any tweaks and enhancements such as adjusting the cropping, changing font sizes and colors, or swapping out new images.
- Use the Color Palette Generator to provide you with colors from the images you have uploaded into your design, to make perfectly cohesive designs.
What design elements can you update with the Update Collection functionality?
As the feature is currently in beta, we’re rolling out more and more options all the time. To date, these are the quick-update elements that you can update within the following design collections:
Text content update
Double-click on a text box and update the content within it. Immediately after updating, right-click on your mouse, and then the Update Collection option.
Font selection update
Single-click on a text box, and choose a new font from the fonts dropdown menu. Immediately after it’s updated to the new font, right-click the text box and then the Update Collection option. Hot tip: You can also update several boxes of text to a new font, then click to select them all, and then apply via the Update Collection right-click function!
Text formatting update
Single-click a text box and apply bold, italic or underline styling to it, and then right-click to apply the magic transformation across all! (Note: More coming very soon to this option!) 🙂
Image replace update
Click on an image placeholder within the design, and then whilst it’s selected, click on the Images tab in the right sidebar. Locate your new image, and either click on the ‘+’ button that appears when you hover over your own, or drag-and-drop onto the placeholder to replace it. Then repeat as per usual, right-click, and Update Collection!
Add New Image
You can also add new images to your templates, and then adjust the placement on each of the linked designs. We only recommend this if you’re comfortable with graphic design and layout, as you will need to re-position the new image to work with each layout.
This feature is in Beta release at the moment, and our development team is adding more functionality to this amazing feature, regularly!
Getting Started with Easil
If you are ready to start creating your Pinterest Pins faster than ever before – let’s get you started! Click on any of the design templates to start editing them in Easil, and follow the instructions for super-fast collection updating!
- Sign up for your free Easil account, and we’ll upgrade you to the Plus plan for 30 days! (No credit card required).
- Click on the Pinterest template collection button that you’d like to start editing. Each of the linked templates will open in the Easil editor and are visible in the ‘Sizes’ tab on the right side bar.
- In the editor, click on the elements you’d like to update – double click to edit any text boxes. SIngle click to select to update images. Follow the tips above or visit our beginner design tutorials for in-Easil walkthroughs.
- When you’ve completed your Pin designs, you can download each by clicking on the ‘Download’ button at the top right of the editor screen.
Multi-Pin Collection #1:

Multi-Pin Collection #2:
Multi-Pin Collection #3:
Don’t want to stop at 15 Pins? Automagically link more!
It’s easy to extend our collections of 15 to include even more options!
- Click on any existing design in the Collection.
- Then click on Sizes in the right sidebar, and then select the Resize button.
- To make additional identical sizes, click the Duplicate button. Your new copy will be created and you’ll land on the latest design version.
- Make adjustments to your design, ensuring that you keep the text boxes and image boxes that you want linked from other designs, on your new creation. Removing them and placing a new image box will not keep them linked.
- Continue adding new Duplicates and adjusting for more layouts, and remember to test them as you go – try replacing text and right-clicking > Update Collection, and then toggling through the templates in your Sizes tab to check everything is working as expected!
- Once you have added more, consider turning the Collection into a Template that you can re-use over and over. Head to the Workspace, locate any design in the Collection and click on the black arrow in the bottom right corner, and then Convert to Template. When the pop-up appears, select ‘Convert Collection’, and then each time you open the design, all of the linked designs will also open.
Over to you
Have you got fifteen minutes to spare now? Why not challenge yourself to batch create fresh Pinterest Pins for some existing content, and monitoring how that improves your organic traffic back to your blog?