If you haven’t discovered the match-made-in-heaven of Planoly and Easil for planning, creating and scheduling Instagram stories then listen up. We’ve got something for you that you will love.
In this post we share how to use the tools Planoly and Easil to plan then create and share stunning Instagram Stories.
Why Instagram Stories?
Instagram Stories are hot. The growth of Instagram Stories has been quite exceptional and it’s the perfect place to tell your brand story visually.
How relevant is the story format for businesses on Instagram? Let’s take a look at some stats about Instagram Stories that we just can’t ignore:
- Instagram Stories has 300 million daily active users (as many as Whatsapp) and it’s growing exponentially.
- Over 1/3 of Instagram users are using Instagram Stories (Instagram has 800 million daily active users, so you do the math!).
- Instagram has reported that Instagram stories have significantly increased the amount of time that users spend on the platform.
- Over 70% of Instagram Stories are watched with the sound on (which is a stark contrast to Facebook where the majority of video is watched with the sound off).
- 80% of users follow a business on Instagram and 1/3 of the most viewed stories come from businesses.
Businesses are on Instagram and users on Instagram are engaging with Businesses. So it’s a great opportunity for all of us and a no-brainer to consider using stories for business when you look at these stats.
Instagram Stories made Easy with Easil
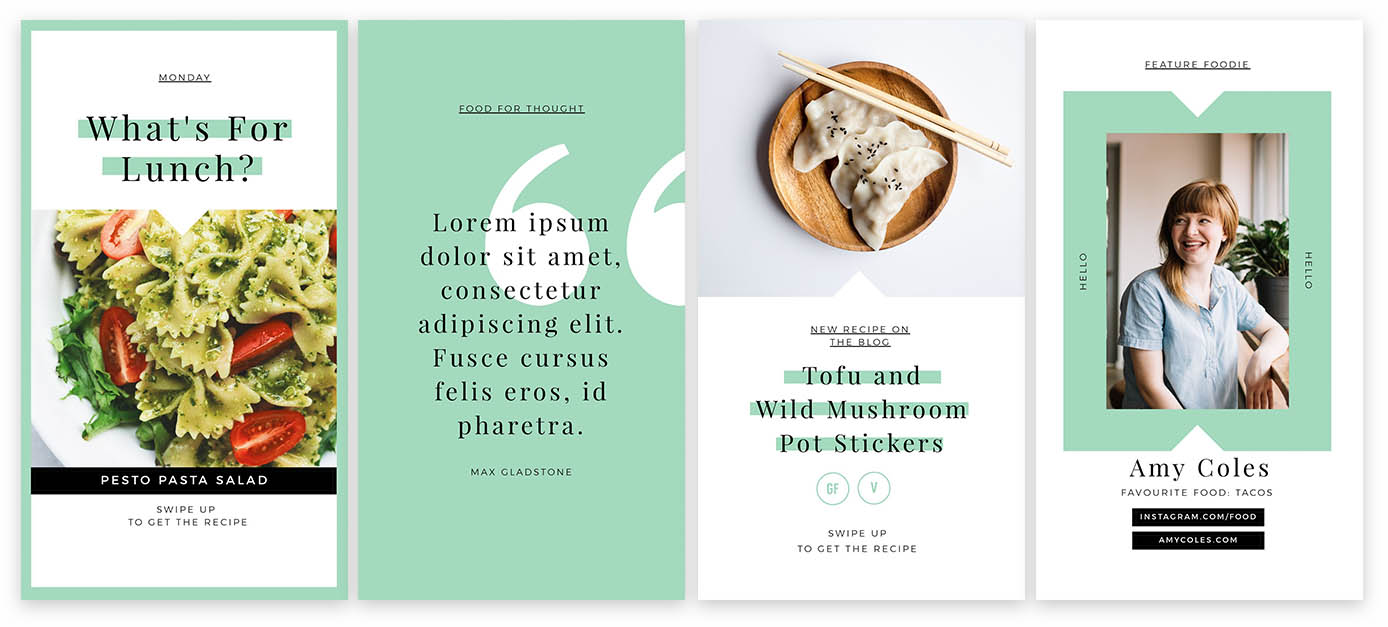
Can you see now why we are excited about Instagram Stories? It’s why Team Easil has been working away on creating some awesome Instagram Story Templates for you. Here’s a snapshot of some of our story templates:
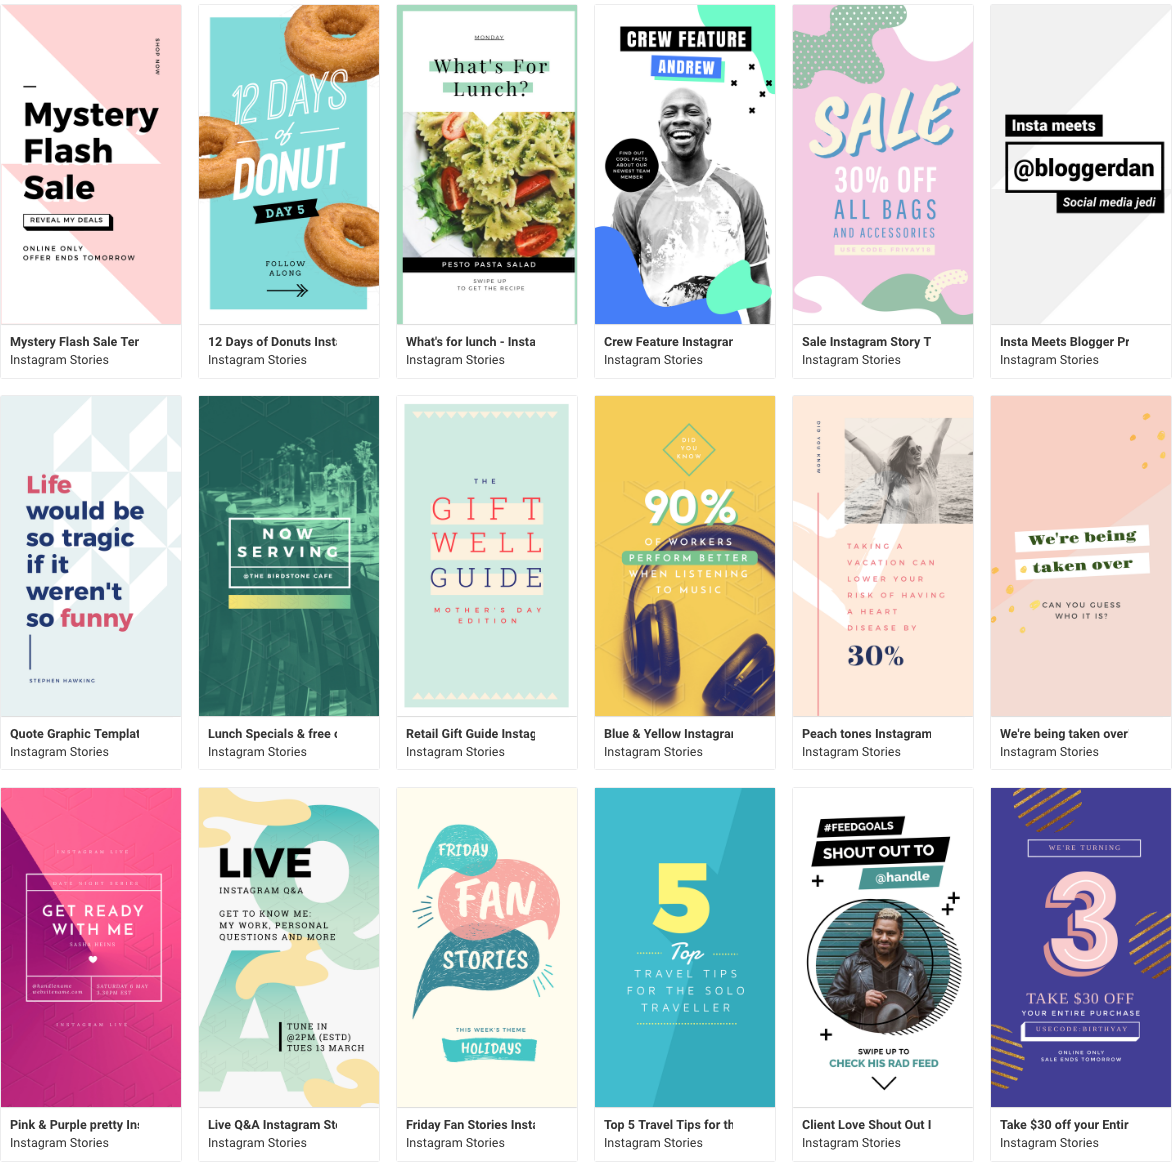
You may have seen some of them here in this post with our series of free templates.
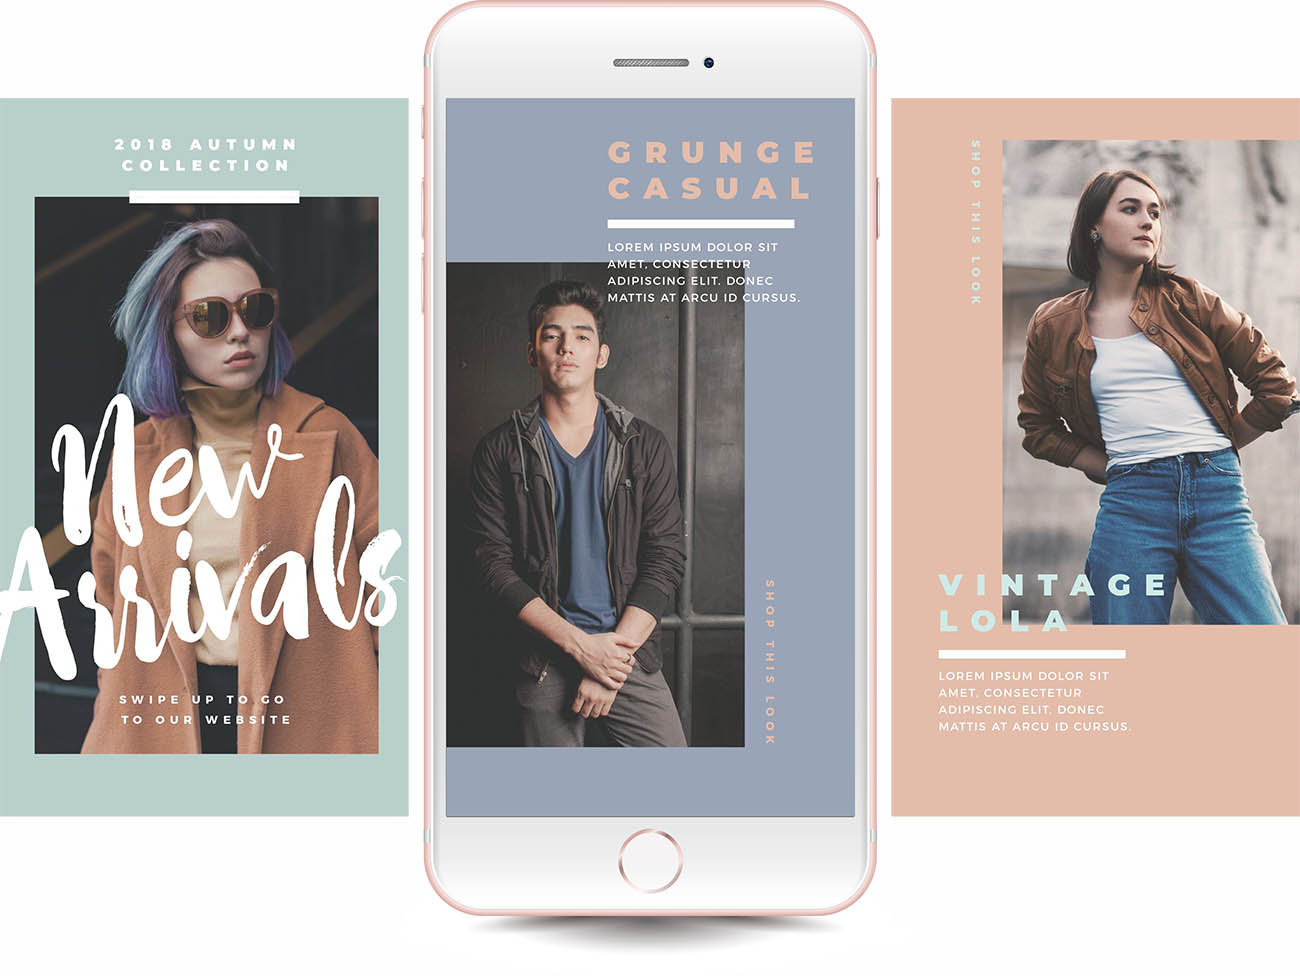
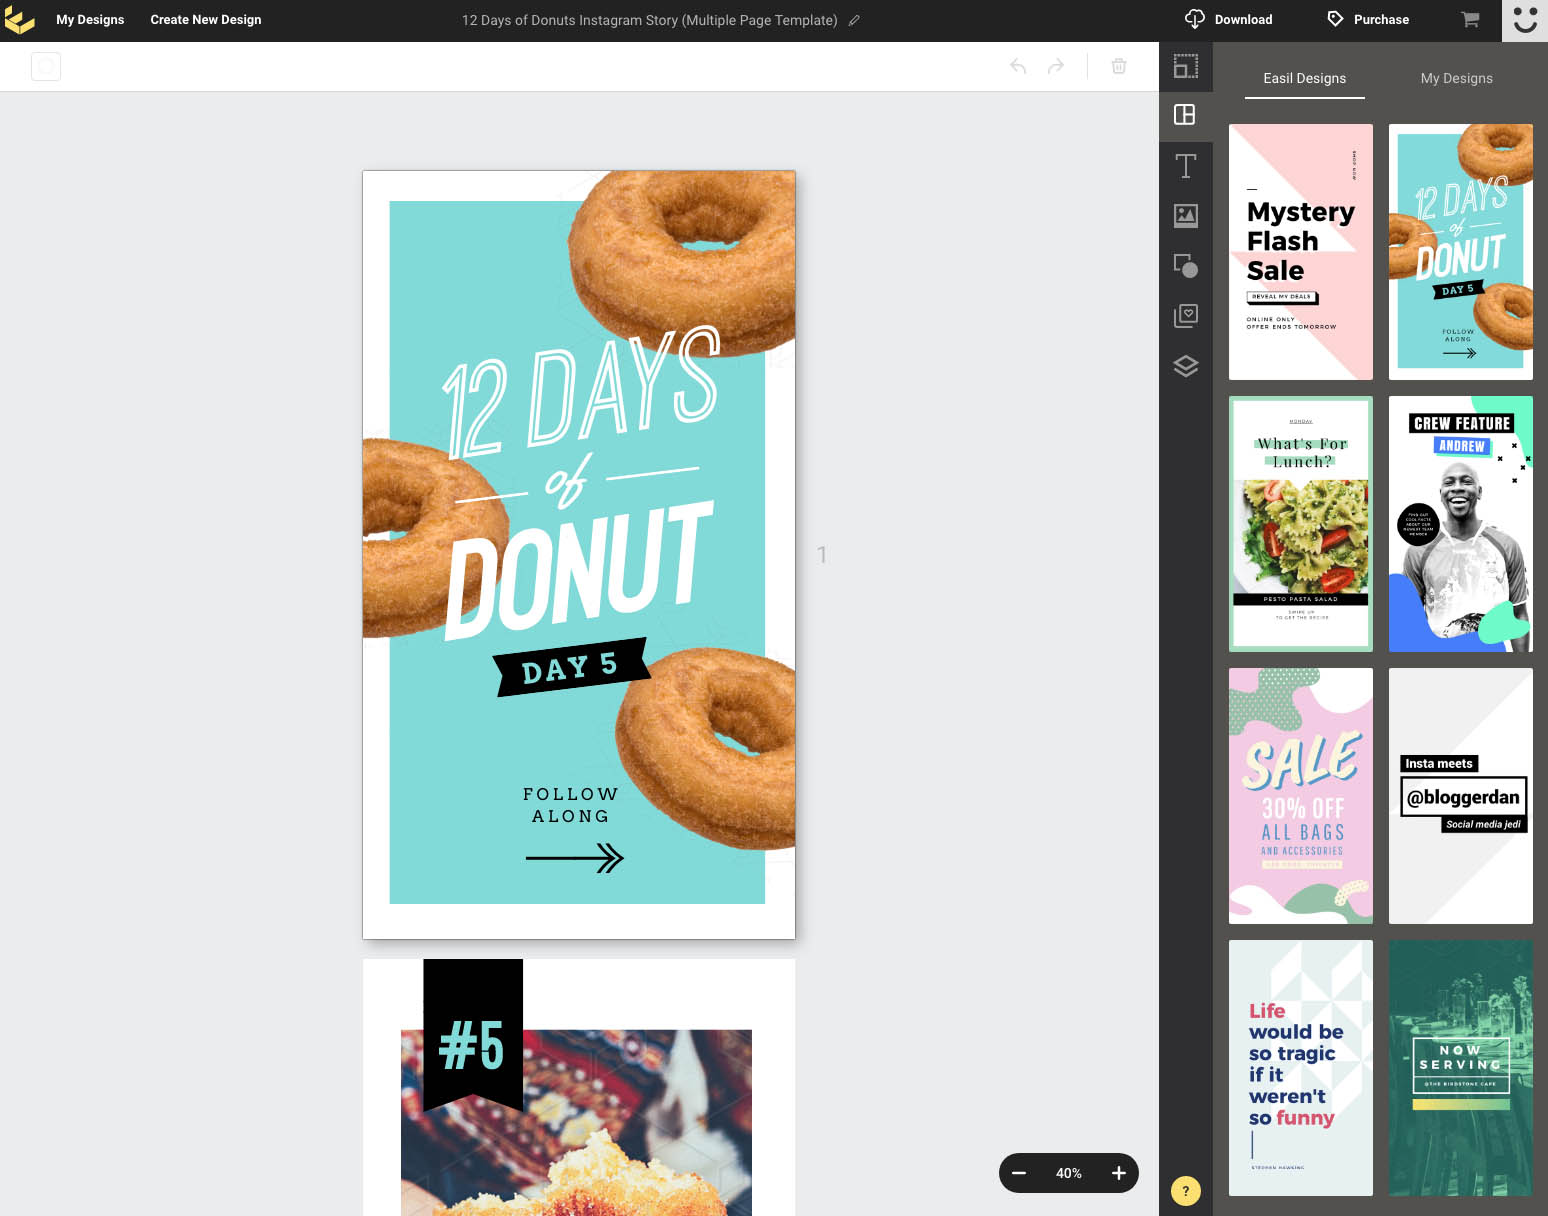
And we are creating new Instagram Stories templates every day, including multi-page templates. Like these:
So, What’s the Challenge?
There is one thing that can challenge our ability to create and share stories.
Time.
Time to plan them. Time to create them… and time to share them.
We’ve got the creation part sorted – Easil helps you to create stories easily and quickly (that look so good you’d think a Pro designed them).
But who has time to sit on their phone all day posting stories ad hoc? We certainly don’t. It can be a challenge to keep up if you want to post stories regularly.
Sure, behind-the-scenes content is great for posting on the fly, but for most businesses it’s important to stay on brand with your message, your content and your visuals.
And now we have a new secret weapon. Planoly.
We discovered Planoly recently and it has been the missing link we needed to be able to plan, create and share stories easily and quickly (and stay on brand).
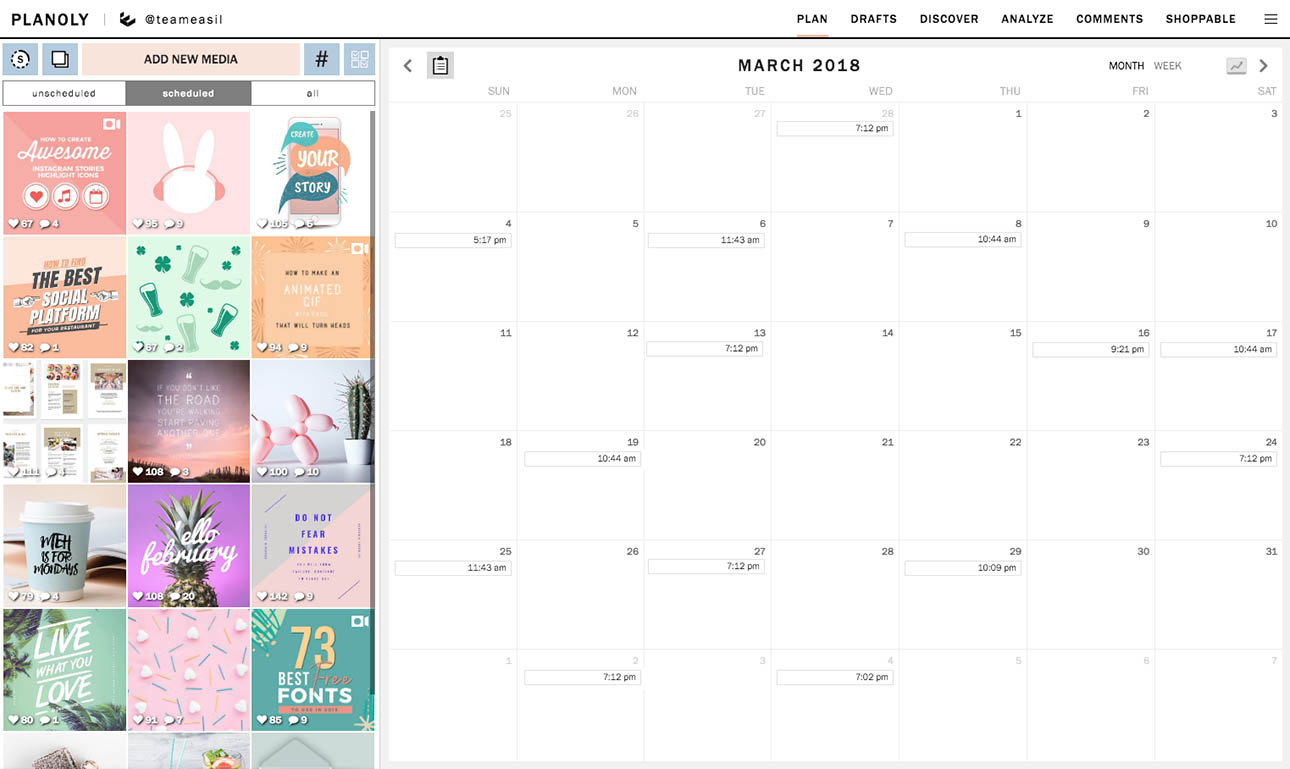
What is Planoly?
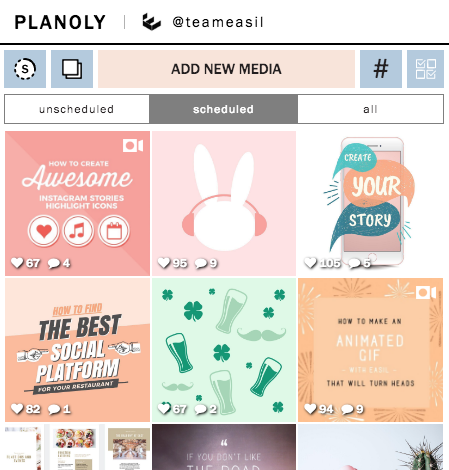
Planoly is the first visual planner for Instagram. It’s first and foremost a visual planner, so it’s designed to help you map out your content on Instagram in an aesthetically stunning way. But it’s also a scheduling tool, so you can schedule and post to Instagram:
Planoly is also one of the first Instagram Partners, which means they are fully approved by Instagram (ie your content and account is in safe hands) and they are one of the first tools to allow auto-scheduling to Instagram too.
But there’s one thing that Planoly does that other Instagram Scheduling tools don’t do.
They have a planner for Instagram Stories.
Yasssssssss. You heard us right. This is why we are excited about the combination of Planoly and Easil. You can create your images and then plan and schedule your Instagram stories using Planoly.
Planoly allows you to:
- Add your story images.
- Add notes about captions that you will add “live” in Instagram Stories when loading up your story. This takes the pressure off later as you then have some approximate idea of the stickers, types of GIFs, hashtag stickers, location stickers and tags you intend to add to your story.
- Schedule a time for your story to be posted (you will receive a reminder from Planoly to click to post using your camera roll).
Stories are not able to be auto-posted like images can be in Planoly. However, this is actually not such a bad thing, because you do need to add some elements “live” when you are adding content to your story. This includes text, GIFs, tags, hashtags and more. However, you can schedule them for posting manually. See below for how this works.
How can you leverage Planoly and Easil?
Planoly takes a lot of the pressure off of the story-posting process, as you have all the content in one place, ready to start adding to your story.
Here are some ways you can leverage Planoly AND Easil. Just like Team Easil is doing, now you can:
- create your stories in Easil (even multi-page stories… but we will get to that in a moment).
- upload them into Planoly and lay them out in the order you want to post.
- Schedule them for posting.
This way, you don’t have to be thinking about stories 24/7. Instead, you can create your story, or even a series of stories, and then schedule them out over time.
Note that you can upload, plan and schedule Instagram Stories from Planoly’s desktop app as well as the mobile app. This video shows the mobile app in action:
Wouldn’t it be great if you knew that your stories were ready to go and all you have to do is wait for the reminder to post it and add a few stickers, tags and text?
You betcha. With Planoly and Easil, you’re all set! So let’s make this visual and break it down, step by step:
Planoly and Easil – Step by Step
We’re going to walk you through the steps for using Planoly and Easil. Easil let’s you create a fun Instagram Story, then you can use Planoly to plan, schedule and post it:
Step 1 – Choose a Template in Easil
Depending on how quick you are at making a decision (we get it, there are some great choices in our templates hehe) this should be relatively quick. You can choose between single page templates in Easil, or multi-page templates like this, that tell a story over a series of images or “pages”:
Easil has templates for many types of Instagram Stories including:
- Top Tips
- Fan Photos
- Instagram Story Takeover
- Behind the Scenes
- Instagram Story Live
- New Product or Service
- Discount or Exclusive offers
- Breaking News or Event Announcement
- Tease New Blog Content
- Call to Action
- Introduce or showcase a new team member
- Quotes
… and many more.
Our team keeps a close eye on the latest trends and ideas for Instagram Stories and we design new templates as soon as we have ideas. This way, you can be sure you’ll always see fresh templates to choose from.
Step 2 – Edit templates to create Core Story Content
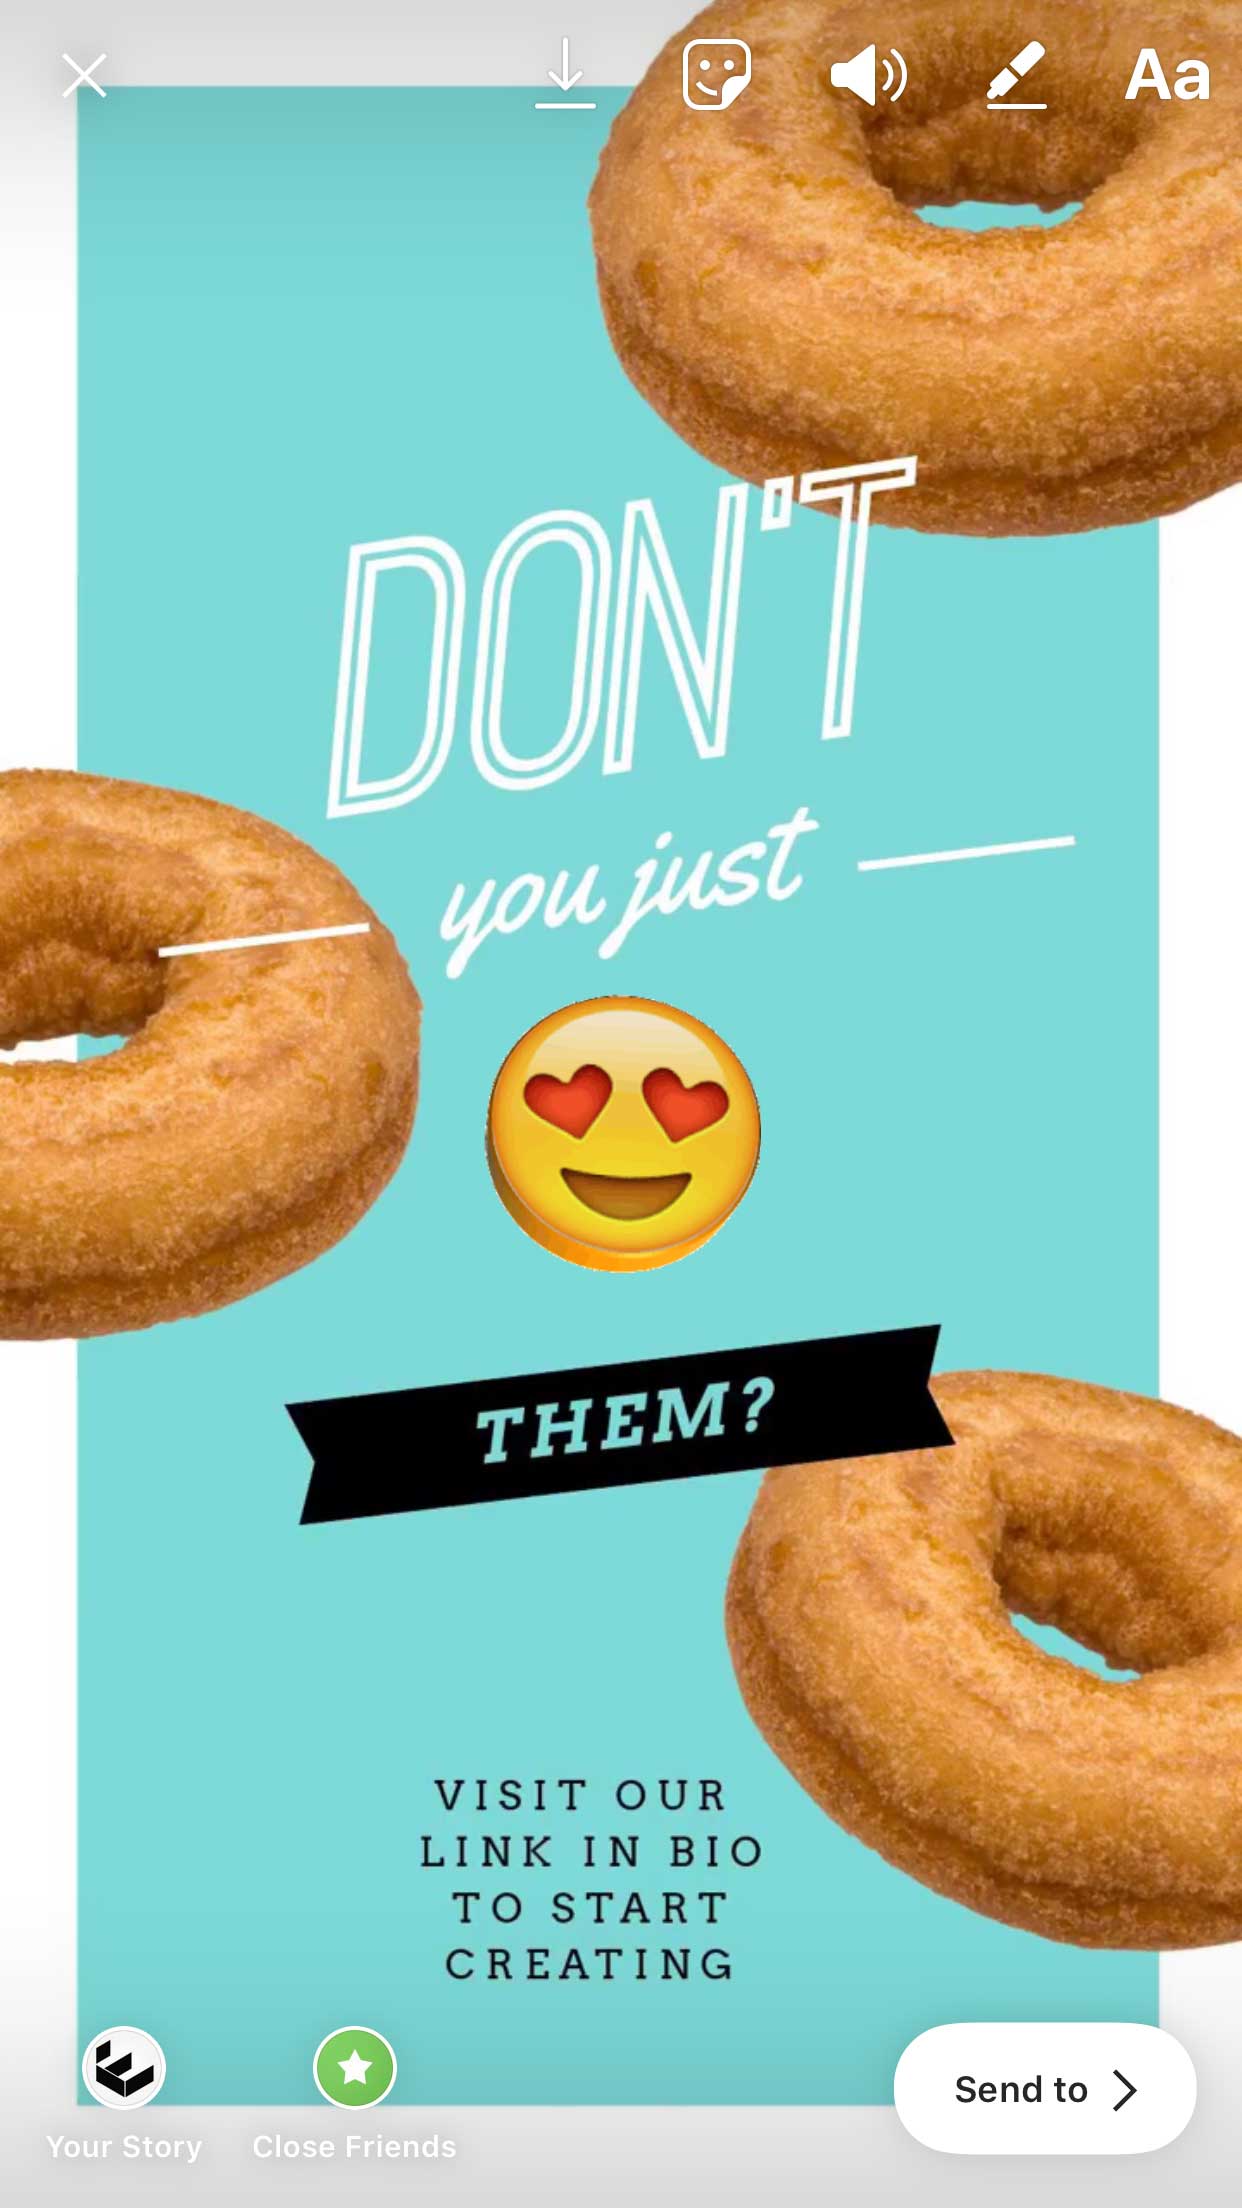
In this case, we chose the Donut template to create a fun story. The idea was to share a story about our new multi-page templates, so it made sense to use one of those multi-page templates to show them off!
It’s very meta. Donut you just love it? Sorry, couldn’t resist.
Here’s our creation process in Easil. From this:
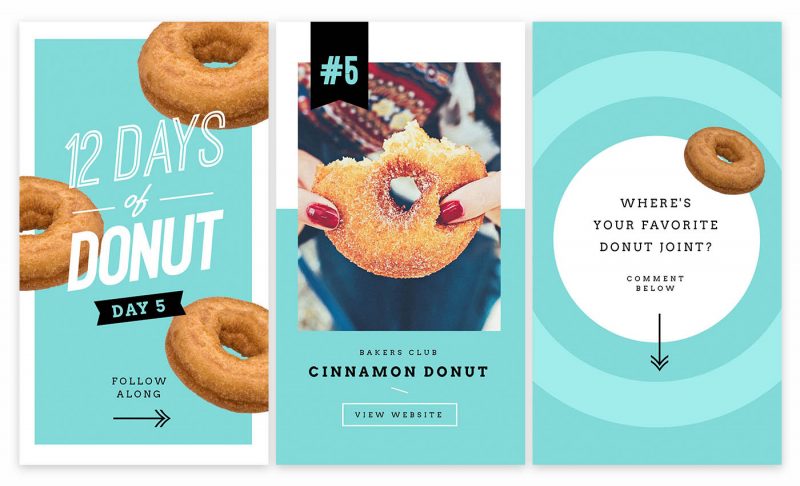
to this; in just a few minutes:
Step 3 – Download Your Templates
Once you’re done editing in Easil, simply hit download to publish your images ready to schedule. Choose either jpeg or png to download your images as a zip file.
We like to use png format for crisper images but it’s up to you. Facebook and Instagram will sometimes reduce resolution in Stories, so the higher quality, the better.
Step 4 – Upload into Planoly
Once you have your Planoly account set up and running, adding stories to Planoly is super easy. Simply click on the “Stories” (S) icon in the top left hand corner
Your “Stories” Planner dashboard will open in Planoly. To upload your images, just drag and drop the images into Planoly.
The images will usually upload in the order you had them in the folder or in the order you added them.
If you need to re-order them you can simply drag them-and-drop them into a new position/order.
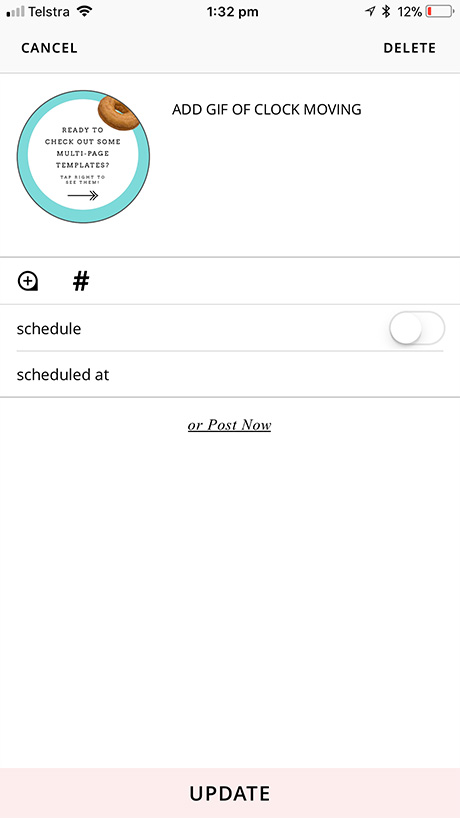
Step 5 – Add your Captions
Once your content is uploaded into Planoly, it’s time to add captions. Open each image and add a caption for that image, as follows:

So, for the following examples, we’ve added text that can be copied into the story, as well as notes about the stickers and GIFs we want to add to a particular image.
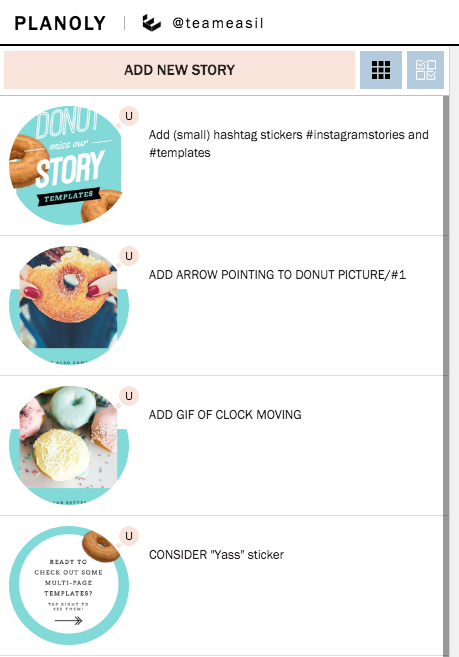
Captions are not automatically posted on your story, so the space to plan your captions, additional images, stickers or text in Planoly can be used in a number of ways, depending on your needs:
- Write yourself a note about what you need to add to your story when you upload it into Instagram. For example: stickers, tags, GIFs, drawing using the pen tool. Some of this has to be done “live” in Instagram Stories, so having even a rough plan can help.
- Text that you will add to your actual story. Adding it here in the captions means you are ready to go when you post your story. You’ll save time later thinking about what to write!
- Notes between team members (you could even add feedback).
- A reminder to add a “Swipe Up” link or a “Link in Bio” if you have a particular call to action.
Note that this none of what you write is “set in stone” – you can change the content when you go to upload it. But planning makes it easier!
Step 6 – Schedule Your Post
To schedule your post, all you have to do is
- click any image for the story you want to schedule.
- click on “schedule date”.
- add your preferred date and time.
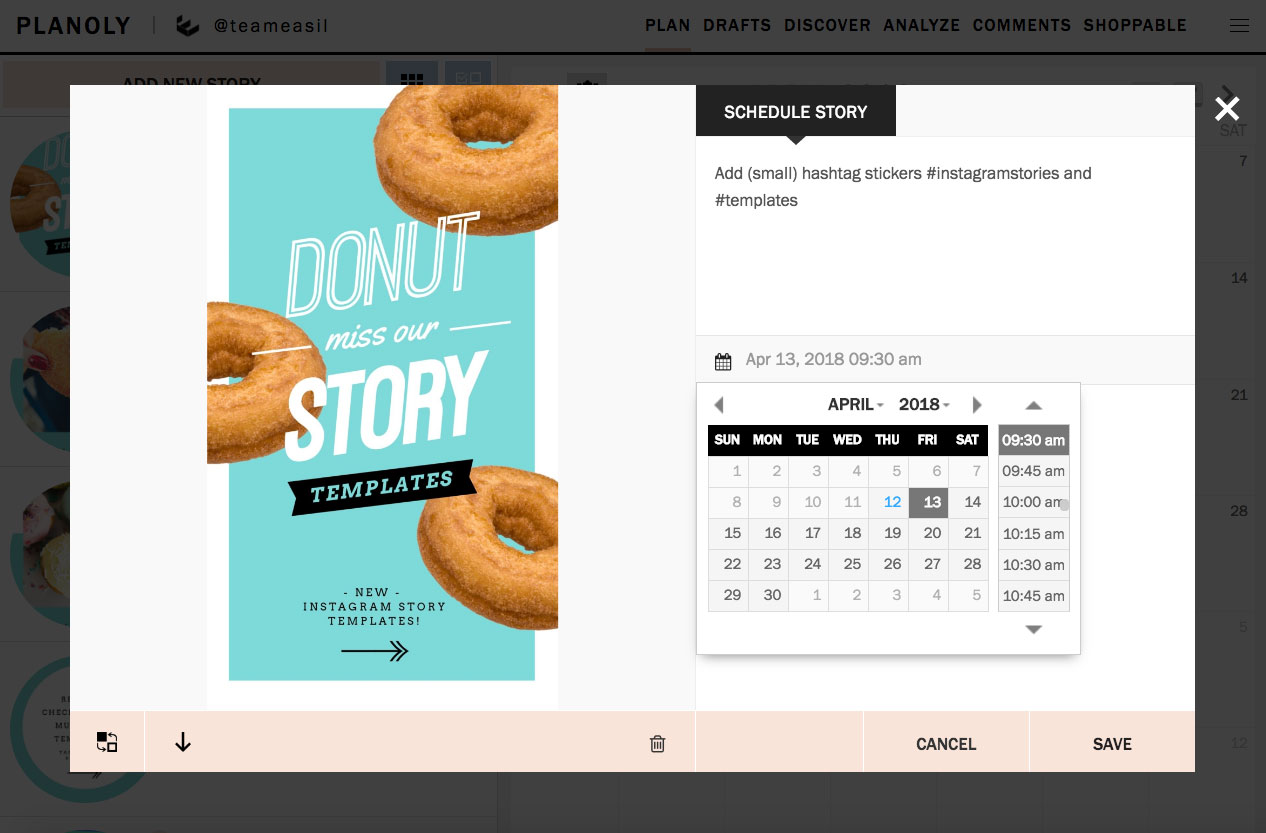
Planoly will send a reminder notification to your mobile phone through the Planoly mobile app (at the time you have designated).
Step 7 – Upload the content into your Instagram Story
Then all you have to do is post your story at the time you set – you’ll receive a notification on your phone and it’s a couple of clicks for Planoly to send the image to your camera roll. From there you can upload it straight into Instagram Stories to set up your story.
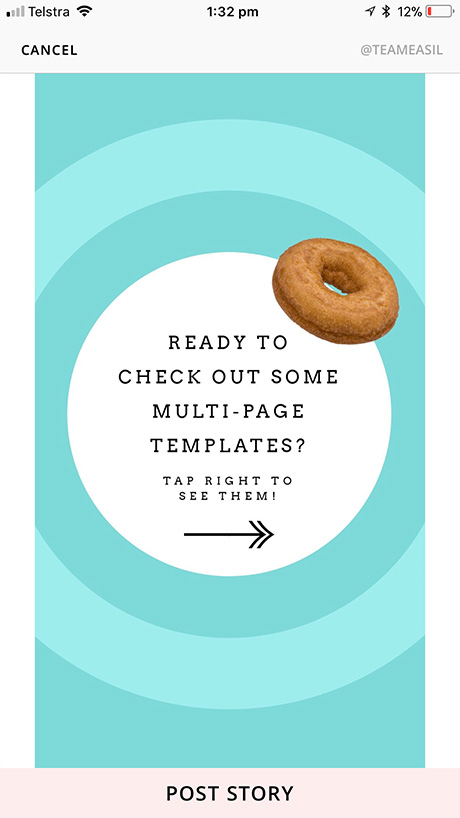
Or you can post your images anytime by clicking “Post Now” if you don’t want to wait for a reminder:
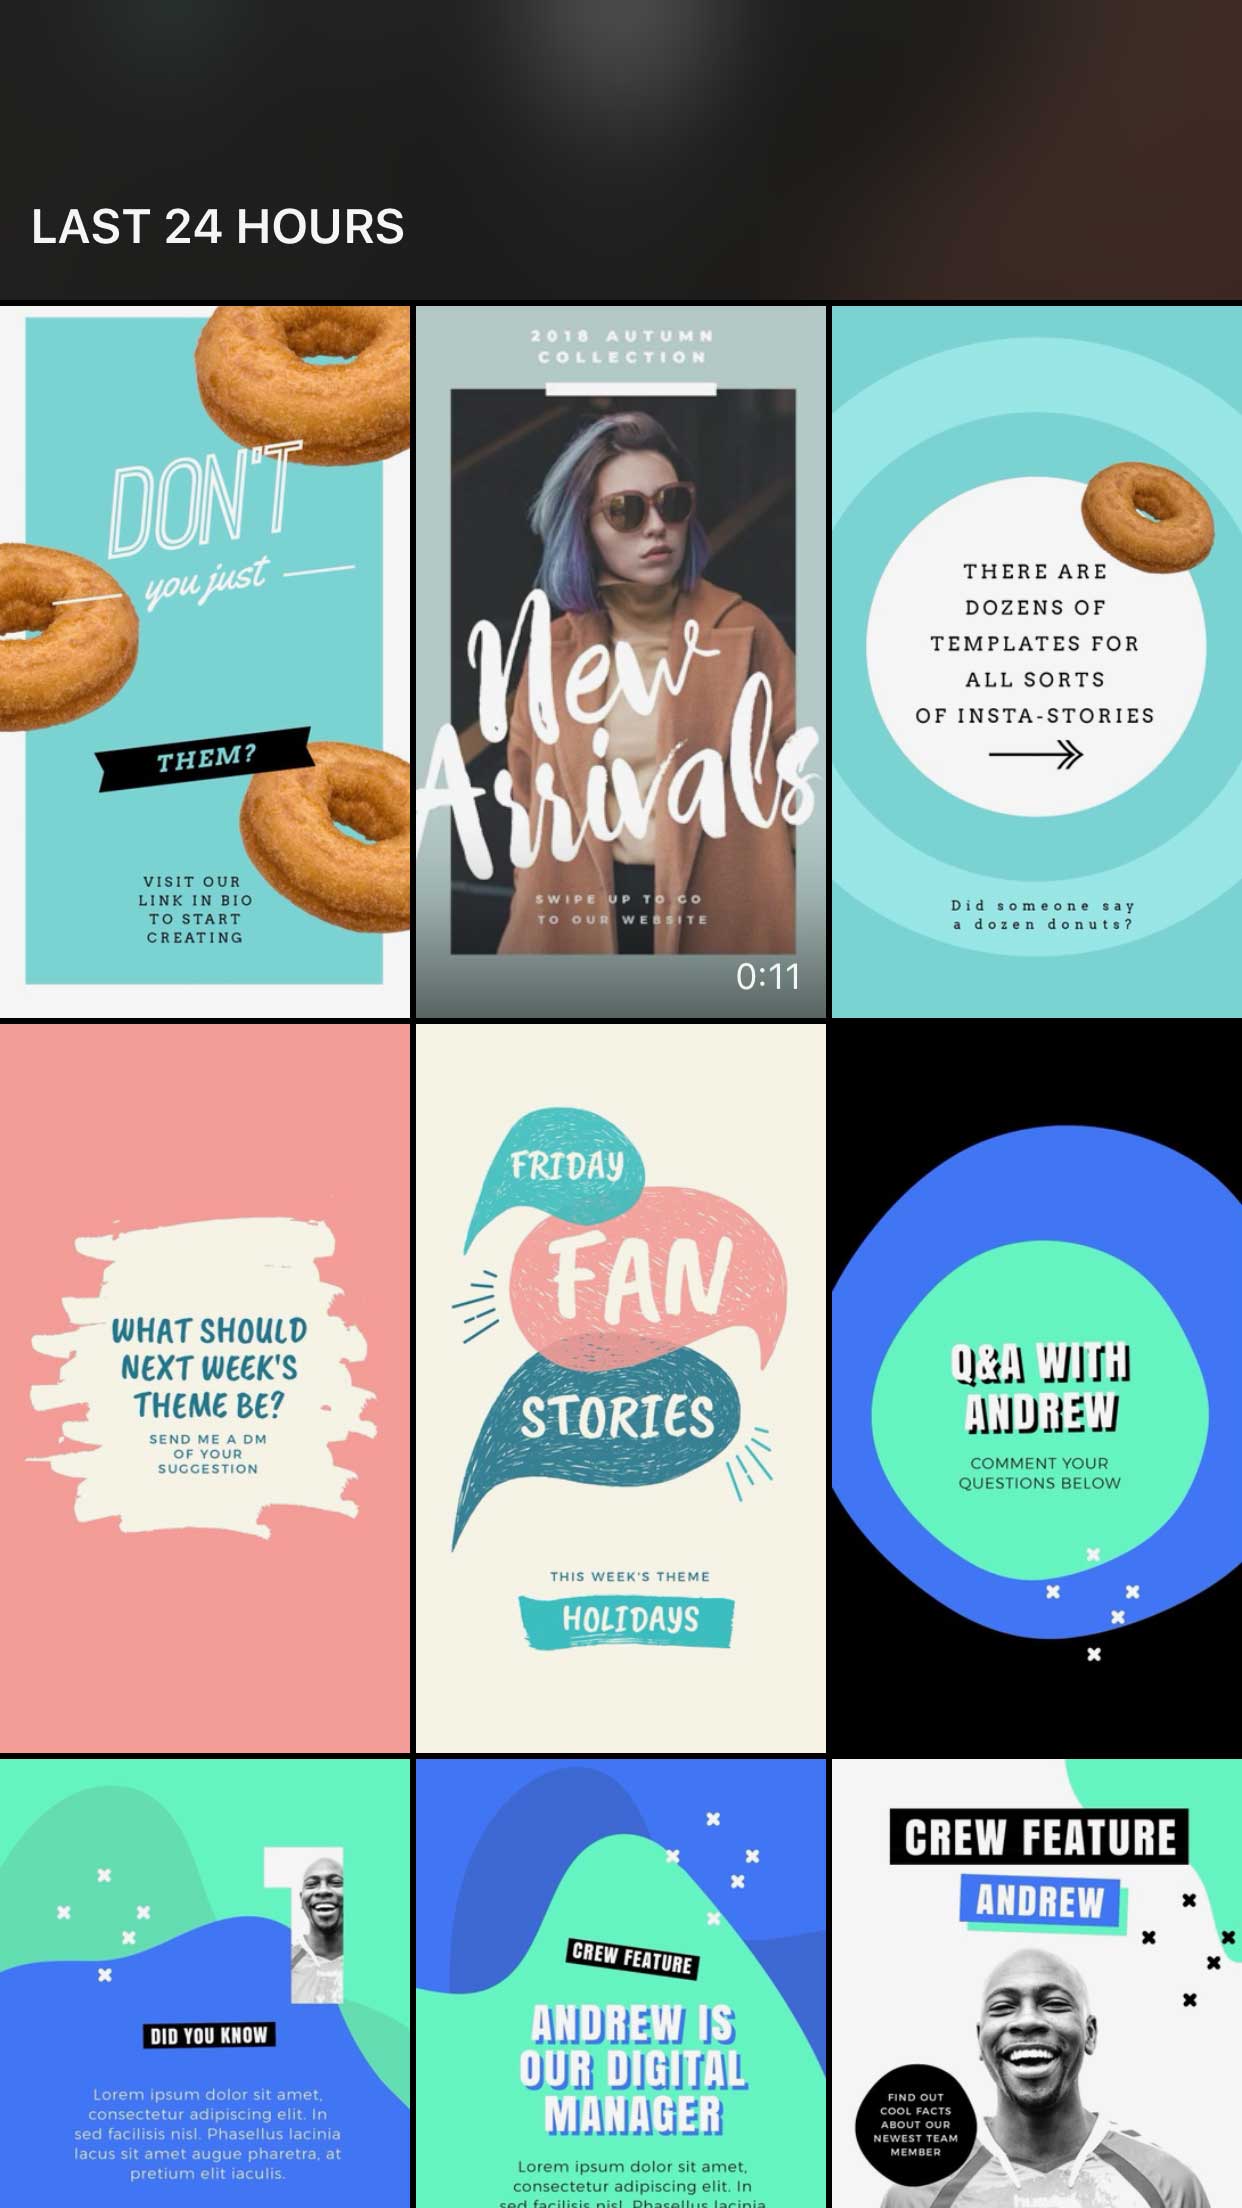
Remember that you will need to click on each post individually in order to download it from Planoly to your camera roll ready to upload into Instagram Stories. You will be able to view all the images uploaded in the last 24 hours, like this:
It can be a little more labour intensive than uploading a single image BUT the time you save by having your stories planned and ready in Planoly is worth every second.
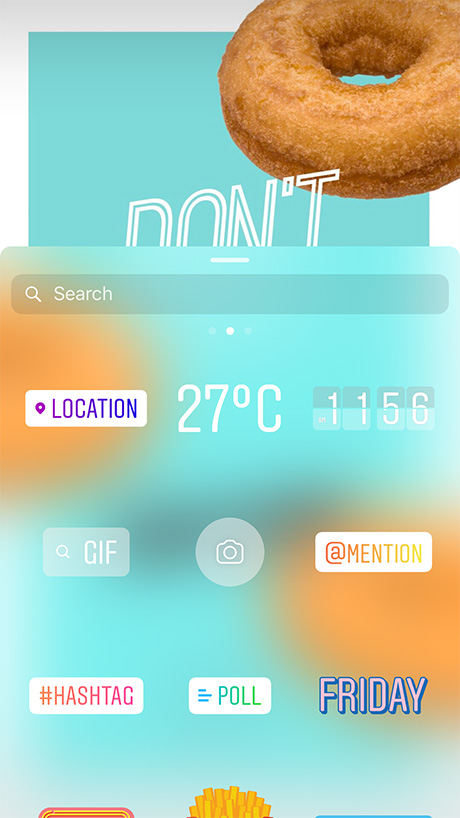
Step 8 – Add Stickers, Tags and Text
Instagram Stories has a huge array of elements you can add to enhance your story. The most important of these are the elements that help to get more reach and engagement:
- tagging other users (in a relevant way)
- adding location stickers and
- hashtag stickers.
You can also add text, fun stickers and GIFs to make your story more engaging. You can be as creative as you want. For the final image in this story, we added an animated GIF of the “heart eyes” emoji. To do this, click on the sticker icon in Instagram Stories then choose GIF:
Once you have selected “GIF” simply search for the sticker you are looking for. We entered “Heart” to find an animated heart. Scroll through the options to choose one:
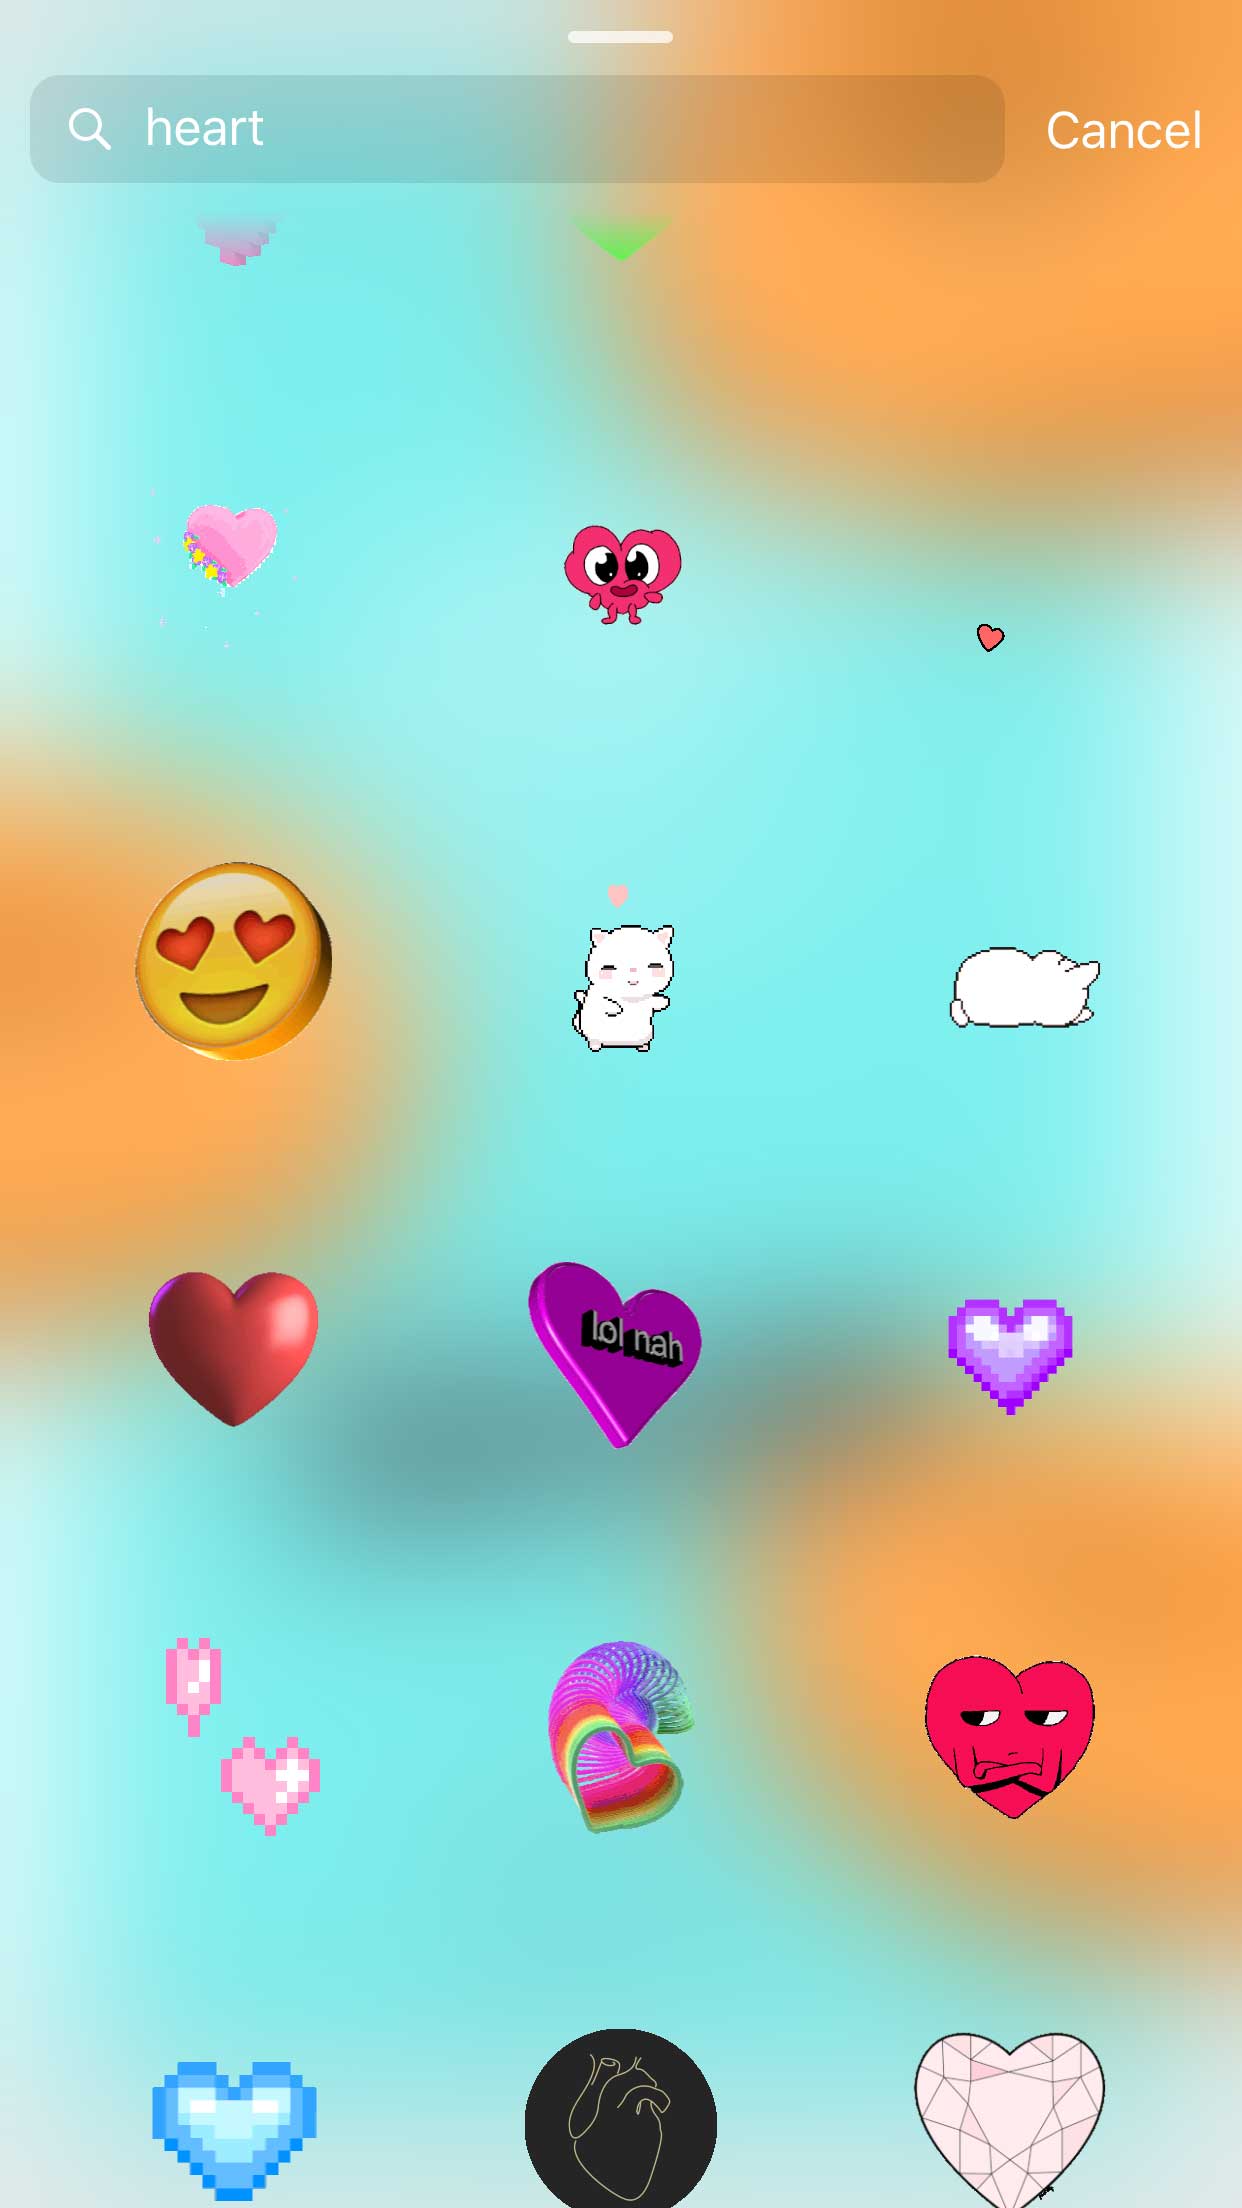
Your animation will be added to the screen. Then all you have to do is position it where you want it and click Done. Boom – you’ve animated your image!
Hot Tip: Remember that you may have to spend a little time adding these elements to your story as you upload it, so allow for that.
Step 9 – Engage, Engage, Engage
Don’t “Set and Forget” your story. Make sure you engage. In fact, 1 in 5 Instagram Stories receives a Direct Message – that’s a lot of potential customers reaching out to say hi.
So, make sure you check your direct messages after posting the story. It’s the primary way for people to say “hey, I loved your content” or to ask a question or respond.
Posting is only half of the process. Engaging is the rest. And when you have Planoly AND Easil in your back pocket, posting is sooooo much easier.
The Final Story
Here’s our final story video for you to check out. Watch it here:
Ready to Create with Planoly and Easil?
You can get started with both Planoly and Easil on their free accounts.
Try Planoly for free here. and Easil for free here.
If you start creating (and scheduling) Instagram stories with this powerful duo then please don’t forget to tag us at @teameasil and @planoly in your story.
Over to You
Are you posting Instagram Stories yet? What’s your biggest challenge with stories?