
Are you ready to transform your DIY poster designs from ordinary, to extraordinary? Whether you’re a seasoned graphic designer or a complete novice, adding images into text (aka Text Masking) is a skill that will ignite your creativity and take your designs to new heights!
In this article, we’ll show you how to effortlessly blend your typography with imagery; seamlessly merging words and visuals in the most striking ways. With Easil’s Text Masking Tool, you don’t need to be a graphic design expert to achieve expert looking designs – we’ll show you all the tricks, and equip you with 7 free poster templates that you can get started with!
New to using the Text Mask tool? Watch this YouTube video to see it in action!
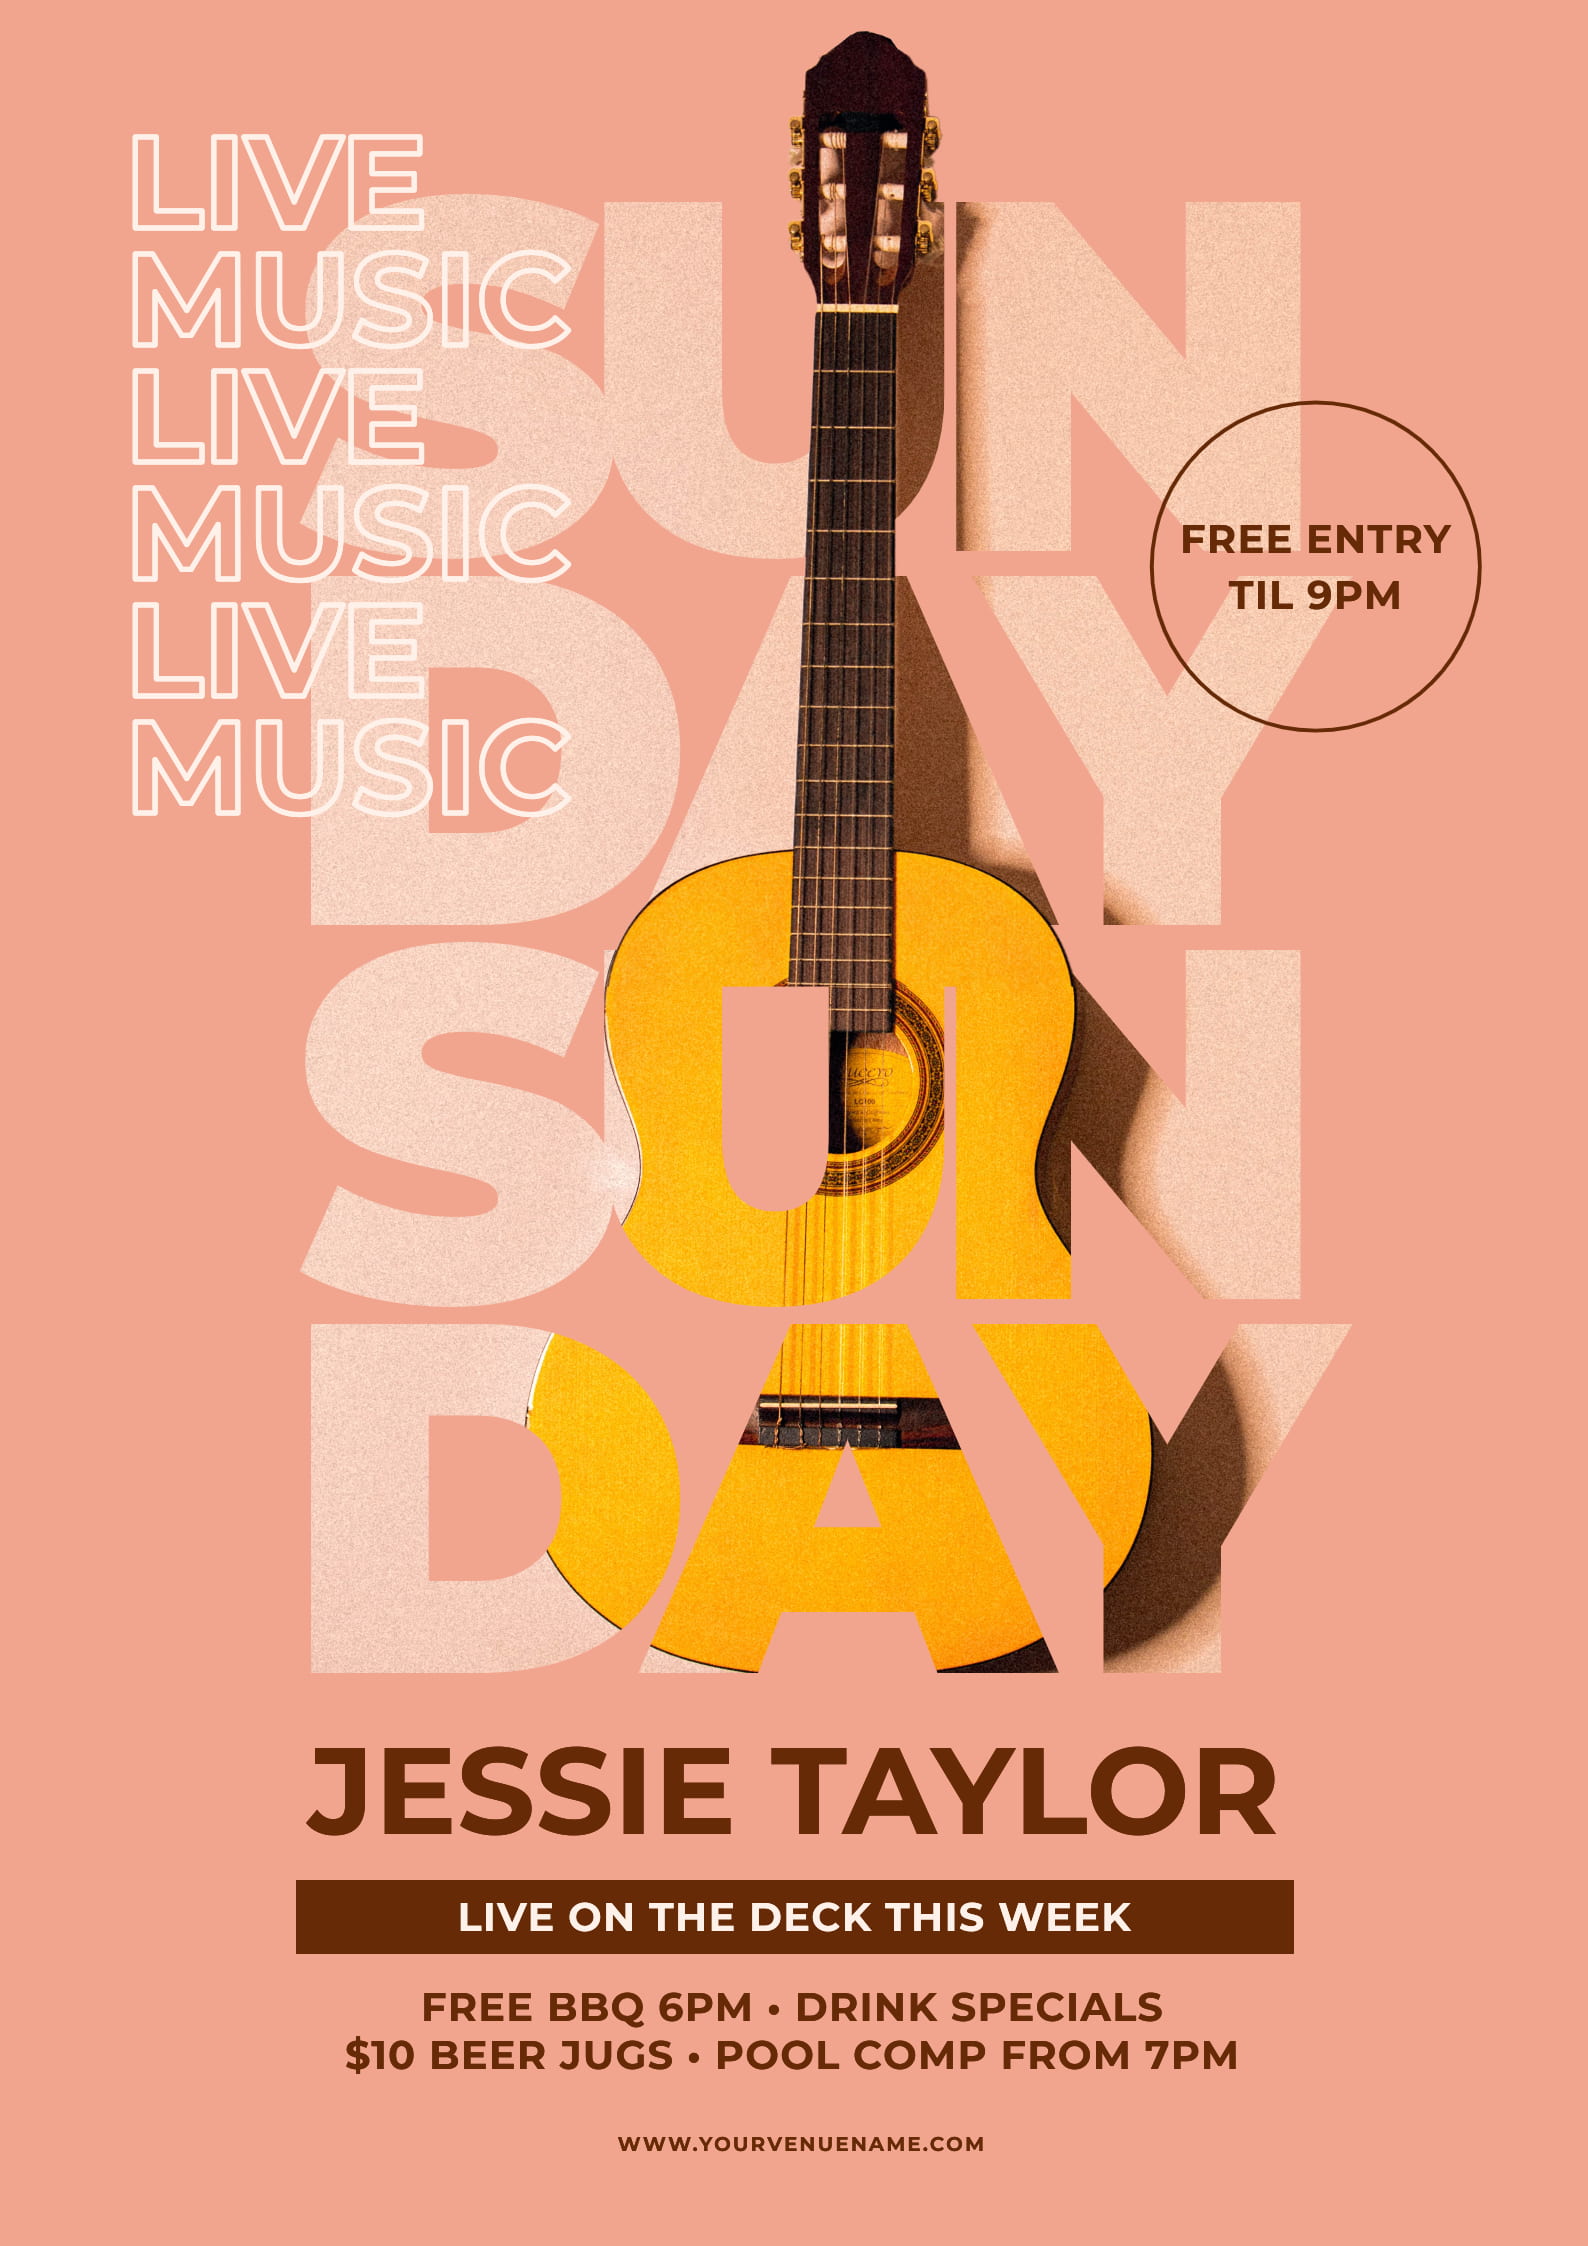
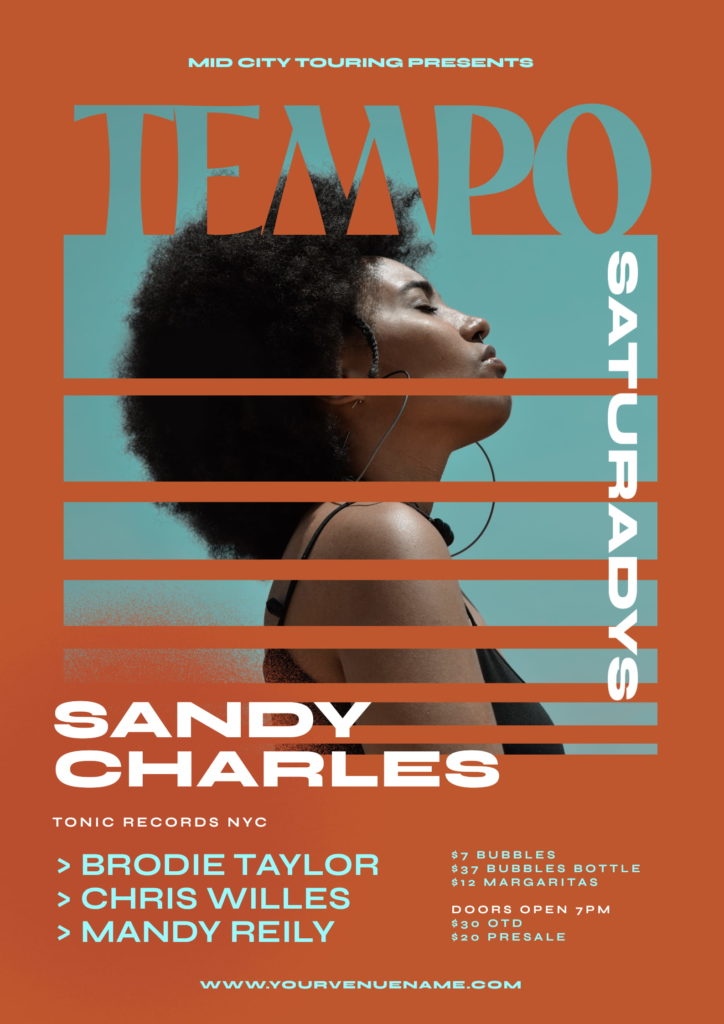
1. USE BOLD IMAGE IN TEXT AS YOUR DESIGN HERO
Adding an image into your headline and making it the focus of your design is a great way to take an image that may otherwise be less than exciting on its own, and take it to the next level!
The key to making this style effective in promotion is to keep the letters bold, and tightly spaced so that the image is continuous, whilst keeping the text legible. To do this in Easil, use the Letter Spacing and Line Height sliders within the ‘Align and Space’ panel to bring the characters in close.
How to achieve this effect:
- Typeset your text as you’d like it to appear on your design.
- Select the textbox, and then the Text Mask tool from the top Action bar.
- Apply your image from the Images tab on the right sidebar.
- Use the Text Mask cropping tool to expand and reposition your image within the text.
- Use the Align and Space panel to adjust your letter spacing and line height, or try applying a new font – it remains editable even once you’ve placed your image!

2. MERGE IMAGE IN TEXT WITH AN IMAGE POPPING OUT OF IT!
Ignite your audiences curiosity with an image that pops right out of the text! This technique combines text masking with an image that has had it’s background removed and cropped to extrude from the edge of the type. The result is a stunning
How to achieve this effect:
- Select your focus image. Choosing an image with ample clear space will work best so that it allows the image to fill the text area, and also be big enough to ‘pop out’ of the text area.
- Use Easil’s Background Remove tool to create a second copy of the image that will be used outside of the text.
- Typeset your text on your design.
- Place the copy of your image with the background removed on your design, placing it where you’d like the elements to extrude. (You’ll find the image in the right sidebar > Images > My Images).
- Send this layer behind the text layer (using either the mouse right-click options, or the Layers tab).
- Select the text you’d like the main image to go into, and then the Text Mask tool in the top Action bar. Add your main image (with the background included) into the text. Adjust the size to match the placement of the bottom layer image.
- Use the crop tool to crop off areas of the extruded image, so that it only appears to be coming out of some letters, and leaving other areas clear, so the text is legible.
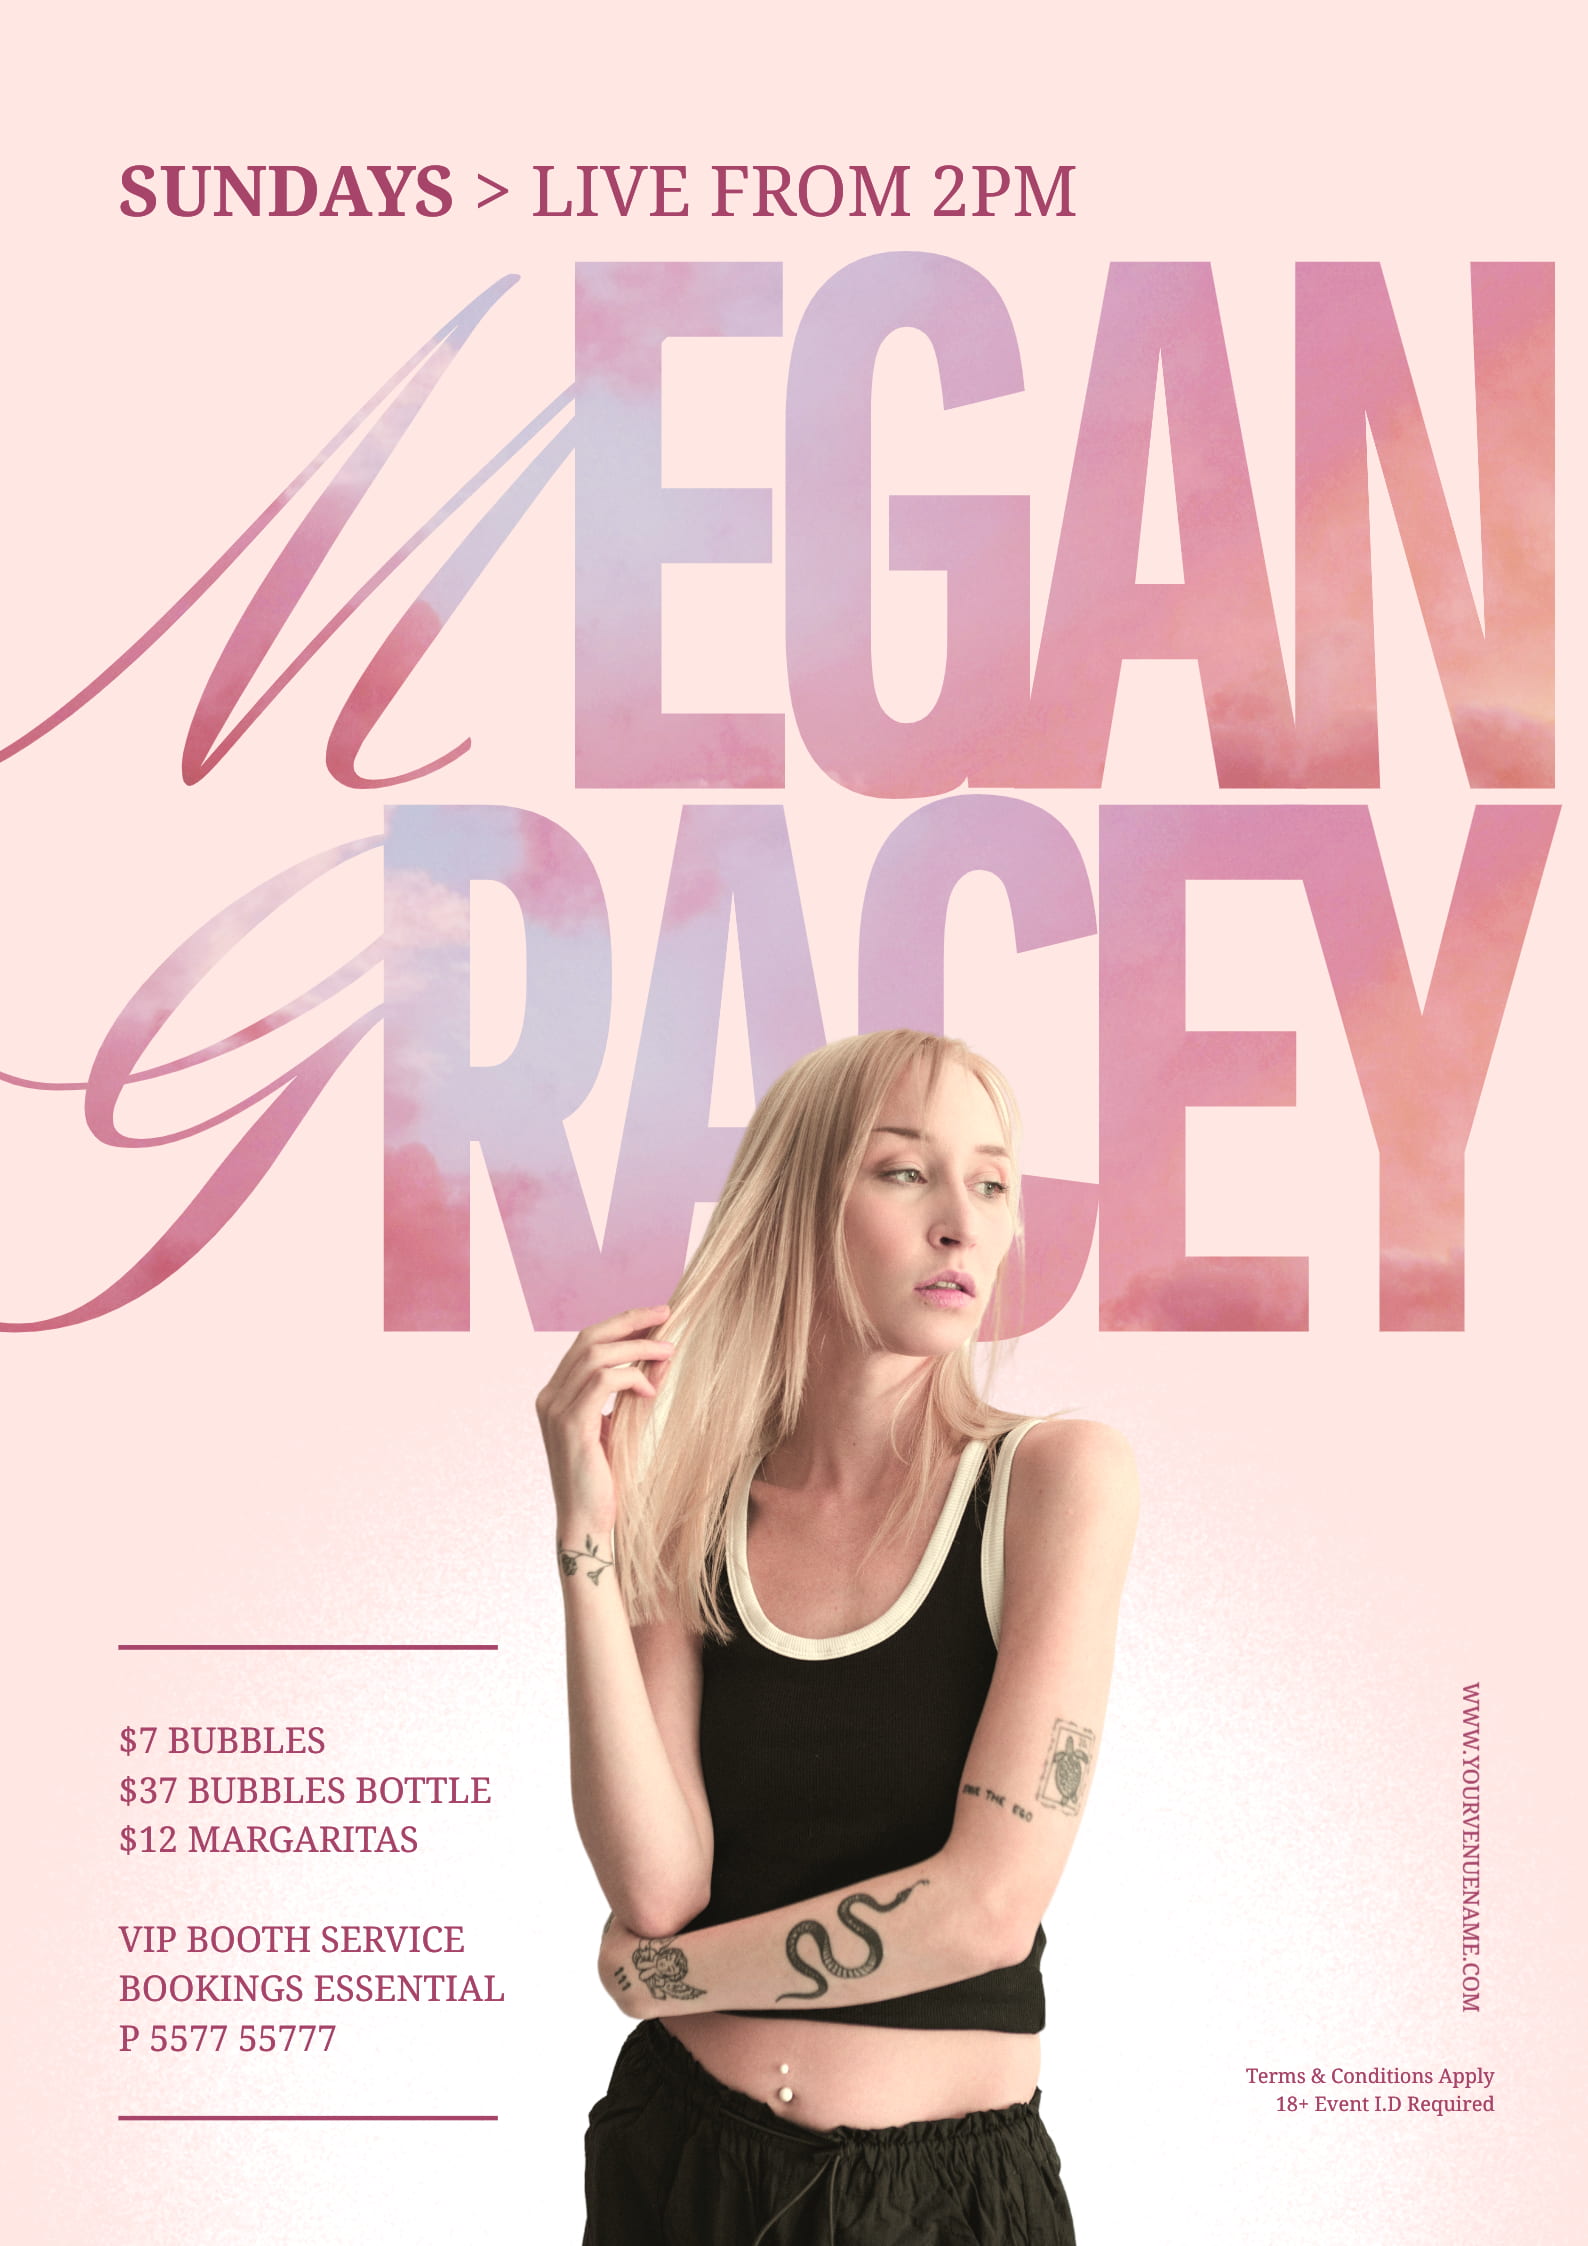
3. COMBINE TWO FONTS FOR A MODERN TYPOGRAPHIC STYLE
Text masking isn’t limited to a single font! Experiment with combining two different fonts within a single text box, and then apply your image using the mask tool across the whole text box. This effect unites the type into a stand-out feature that works perfectly either on it’s own, or as the background for another image which has been isolated, like in our example template.
How to achieve this effect:
- Typeset your text, using more than one font within the same text box.
- Select the text box, and then the Text Mask tool from the Action bar (top tool bar).
- Choose your image and apply it to the text, adjusting to fit where you’d like it with the crop tool.
- Optionally layer an image with it’s background removed and place it in front of the text, ensuring that it’s still legible, as we have in our example here:
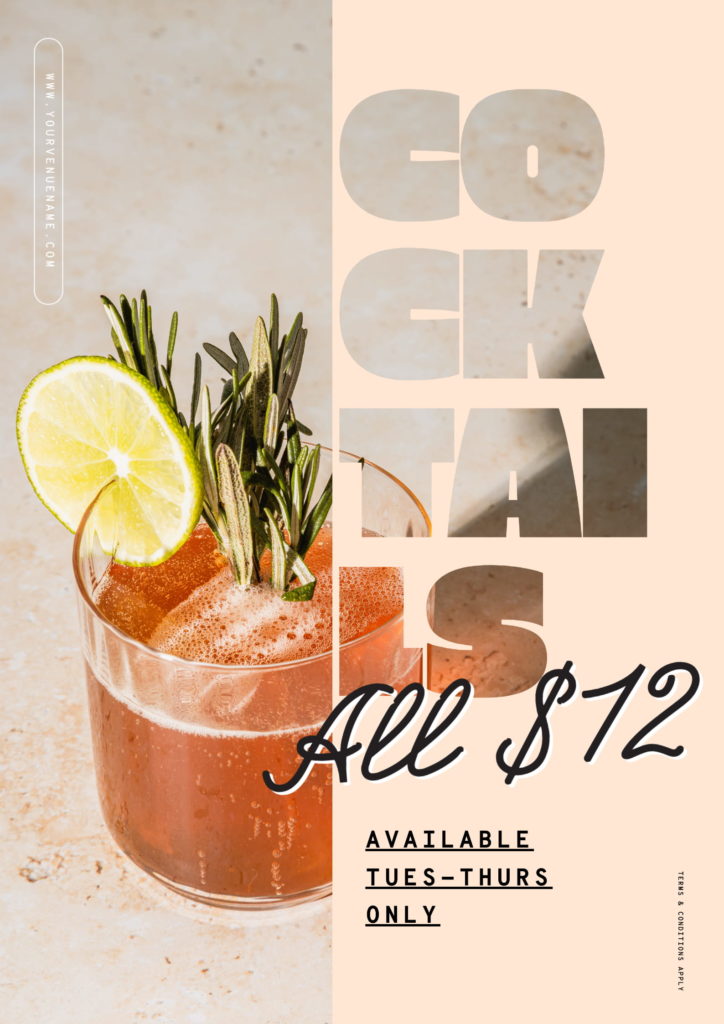
4. SPLICE YOUR DESIGN: IMAGE PLUS IMAGE IN TEXT
Creating a half image, half masked text image is an easy technique to use when you want to show off your hero image, but also create ample space for the copy area of your design. The block color provides a solid base for legible text, whilst drawing your audiences eye in with the image placement.
How to achieve this look:
- Select an image that is large enough to span the whole background of your design, but has the hero of it focussed to one side.
- Place the image on your design as the background.
- Add a solid color shape overlay (Select a square from Elements > Shapes, and stretch it out to create an area to place your text. Adjust the color of the block to contrast with the background image.
- Typeset your text and place it above the colored block, ensuring that it’s large and bold.
- Use the text masking tool to apply the same image into the text, and use the crop tool to stretch it out, and adjust the positioning within the text to match the background image as closely as possible.
5. BLEND SHAPE MASKING WITH TEXT MASKING
Taking the previous example one step further, this example uses a shape mask to create the illusion of the image merging from the shape into the text area, for a stunning effect.
How to achieve this look:
- Choose a shape mask from the right side bar (Elements > Shape Masks) that fits the orientation of the image you’d like to feature.
- Typeset your text to appear either directly above, or directly below the shape mask, ideally touching the edge.
- Drop your featured image into the shape mask by dragging it onto the shape (select shape with mouse, drag image from the right side bar Images tab).
- Once the image has snapped into the shape mask, double-click to enable to crop control handles and allow you to enlarge the shape to extend out into the type area.
- Select the text you’d like to mask, and use the text masking tool to apply the same image. Use the crop tools to adjust the size until it matches the bottom side, making it appear as a single image blending from text to shape.
OVER TO YOU
Whether you’re promoting an event, showcasing your brand, or simply looking to explore your creative side, Easil’s Text Masking Tool and exclusive templates are here to make your poster designs truly unforgettable. Enjoy exploring the potential of this remarkable tool, and don’t forget to DM us, or tag your designs created with this method! @teameasil


