Combining several of your favorite images into one layered photo collage is a skill that can produce stunning results, and it’s easier than you may think to make one!
Join Easil’s Art Director, Kris, as he walks you through how to create an impressive photo collage using shape masks and the background removal tool, from scratch.
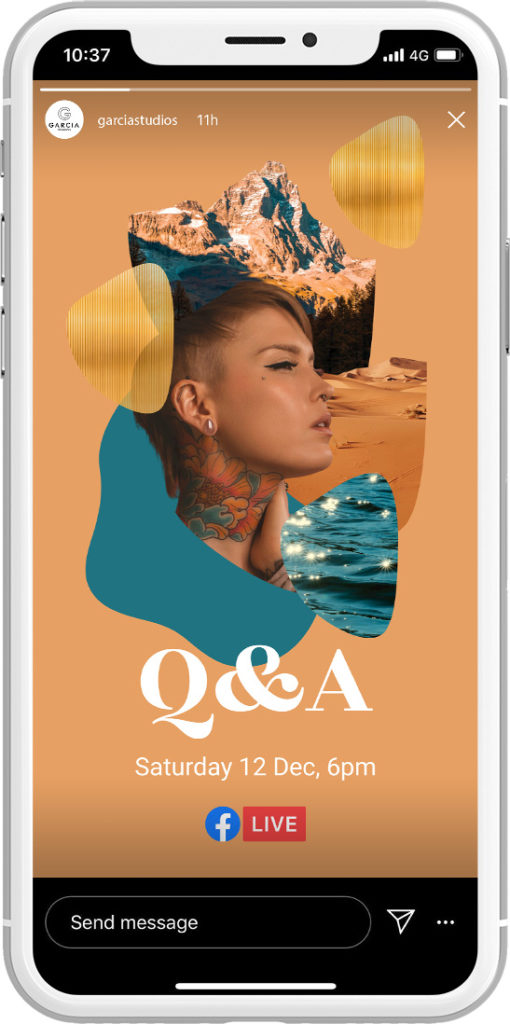
Here’s a peek at the type of graphic you’ll learn how to make:
HOW TO CHOOSE THE RIGHT IMAGES FOR YOUR PHOTO COLLAGE
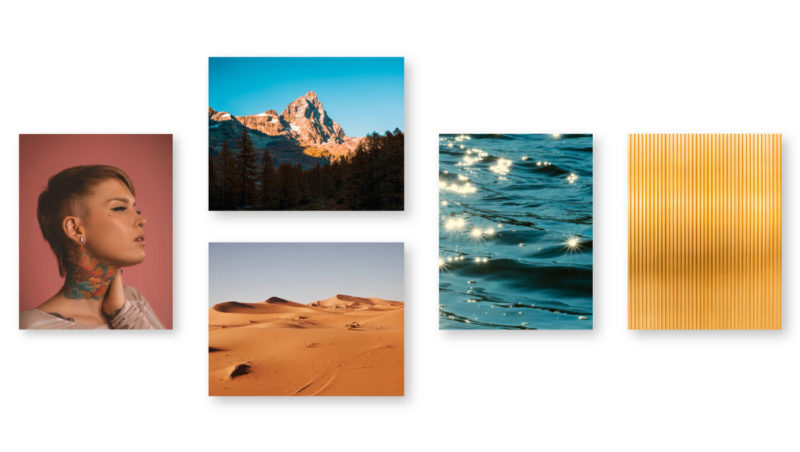
When you’re working towards creating a collage graphic using multiple images, it’s essential to choose the right photos that will work together for visual harmony.
- Most importantly, select images with a similar color tone.
- Select 2-3 images that include a clear area that will be removed using the background remove feature. Landscape images with clear sky areas are perfect!
- Choose a focus image, like a human portrait image. As the hero of your photo collage, this image should also have a clear area behind it that will be removed to make the subject stand out.
Once you have your chosen images, upload them into ‘My Images’ in Easil.
Prefer to watch a video? Check it out here:
REMOVE THE BACKGROUND FROM A SELECTION OF THE IMAGES
Any images uploaded into Easil via the editor upload or via the My Images tab in the Workspace can have the backgrounds removed (available on paid plans). The Background Remove feature is housed in the ‘My Images’ section of your Easil Workspace.
- Click on the upload button within the My Images tab.
- Once your image is uploaded and is visible in the images list, click on the arrow icon on the right side of the applicable row.
- Select ‘Remove Background’.
- Your new image copy will be saved in the same location.
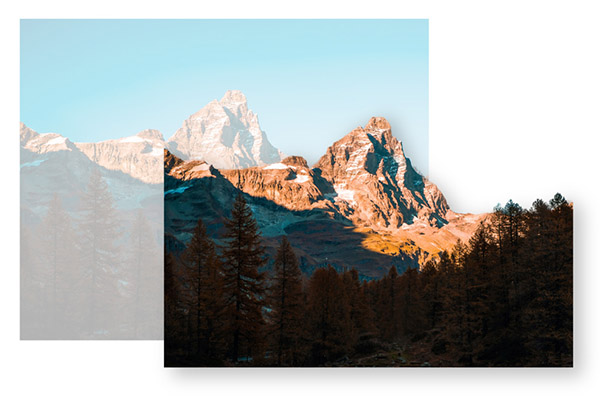
Apply the process with the landscape images, taking them from a before state like these images below, to how they look with the removed background:
Once you’ve uploaded them, all of your images will be saved and available to use in the Easil editor for the next step.
HOW TO COMPILE YOUR IMAGES TO CREATE A PHOTO COLLAGE
1. Select your blank canvas size
To get started with creating your design, you’ll need to select a template size in Easil and begin with a blank size. Select the size you’d like to work with from the template selector, and the first size will contain a blank canvas option.
2. Add shape masks to your design
To begin to create your design you’ll need to apply a shape mask to your design, which you’ll drop your photos into. Go to go the ‘graphic tab’ in your sidebar and select ‘Shape masks’ . Choose an organic blob shape to use, and add it to your design by clicking on it, or dragging across to your page.
Tip: You can play around with using different shapes, however it’s a good idea to use the same shape repeated, enlarged and layered.
3. Drop in your Images
To populate the shape masks with images, ensure you have the Shape mask selected on your design by clicking on it. Then, on the right sidebar, go to the ‘images’ tab. Here you can see all your uploaded images, including any that have had their background removed.
Select your first image and drag it over the shape mask. Hover your image over the shape mask until it snaps into place.
Tip: Drop in your ‘focus image’ first and build your design from that.
4. Duplicate and add new images
With your focus image in it’s shape mask selected by clicking on it, go to the top Actionbar and click the Duplicate button.
Use this duplicated copy to then drop in another images and start to compose your design. Repeat this process for as many images you want to include in your collage.
5. Position and layer your images
Use the Position tool in the top Actionbar to arrange your images according to where you want them in your design in relation to foreground, background, or somewhere in-between!
Clicking on ‘Send backward’ will move your layer back one level, as opposed to ‘Send to Back’ which will move the selected layer to the very back of your design collage.
Tip: Keep your background images to the rear of your design, and your textured images in front of your focus image.
6. Edit your images within their shape mask
You can reposition and enlarge the visible parts of an image within it’s shape mask by double clicking on it, and then using the corner control handles to enlarge the image. Click and drag the image within the shape to reposition the portion of the image showing in the mask.
With the top Actionbar, you can also use the opacity button to adjust the element’s transparency, meaning the layers below that will show through.
7. Add in a solid shape and update the background color
To add a solid shape to the background go to the graphic tab and search for ‘blob’ Select a solid shape (without a check pattern) and arranging it to the background using the position tool in the top action bar.
When you’re happy with the position, update it’s color by using the color palette at the top left of the Actionbar. Update the background color by clicking off any design elements and using the same color selector.
Tip: To keep all the colors in harmony, use the pre selected colours from image colours in the color palette.
8. Add any required text to your completed photo collage
If you want to add text to your design collage, head to the text tab on the right Sidebar and select ‘click or drag to add new text’. Once you’ve added it to your page, double click it, and type in your new text. Further styling can be applied with colors, the font dropdown, letter spacing and opacity. Play around with the options in the Actionbar to see what suits your design!
To add in any stock logos, such as the Facebook Live logo used in Kris’s example, click on the graphics tab, Search ‘live’ and drag and drop to add the logo. If you’ve added your own logos to the Brand kit, you can select those from the ‘Brand’ option in the images tab, and add in the same manner.
Tidy everything up and then you’re done!
Tip: Drag your mouse over all your elements to quickly select them all, or Shift+click to manually select multiple items to either move, or resize at once!
OVER TO YOU
Will you be getting creative with making your own customised artwork? We’d love to see what you make, or answer any questions to help you get your desired outcome. Pop your questions in the comments below, or send us a DM!