

Want to learn how to Resize Your Design to take one Poster image and turn it into 10 Different Designs?
In this post we’ll take you from a single Mother’s Day Event Poster Design to 10 branded, complementary designs, resized and optimized for your Mother’s Day event, for a complete marketing campaign.
In this blog series, we’ve been taking you through the process of transforming one design into 10 different stunning designs.. in just a few clicks each time. You can see more of the previous posts at the bottom of this article, but here’s a sneak peek at some of the sizes that we’ll create from one template:

In this tutorial, we’re going to start with a simple poster design for a Mother’s Day event, and take you through the process of resizing it and repurposing it for a number of promotional items including social media images, an Instagram story template, HDTV design, flyers, menus and more.
These are quite literally jobs that can take hours (days!) with a designer, especially where you have a campaign with multiple pieces of collateral that have to be produced in order for you to roll out a promotion across different modalities and platforms. Let alone all the back and forth changes and edits that need to happen!
We’re going to show you how to do the same thing, in-house using Easil and our handy design features... especially our Resize Tool (it’s about to become your new best friend).
Take note of our tips and suggestions throughout this post as we transform design after design. They are there to help you learn how to edit professional design templates without messing them up too much. If you stick to a few principles while editing and resizing, you’re more likely to have a professional image at the end of it.
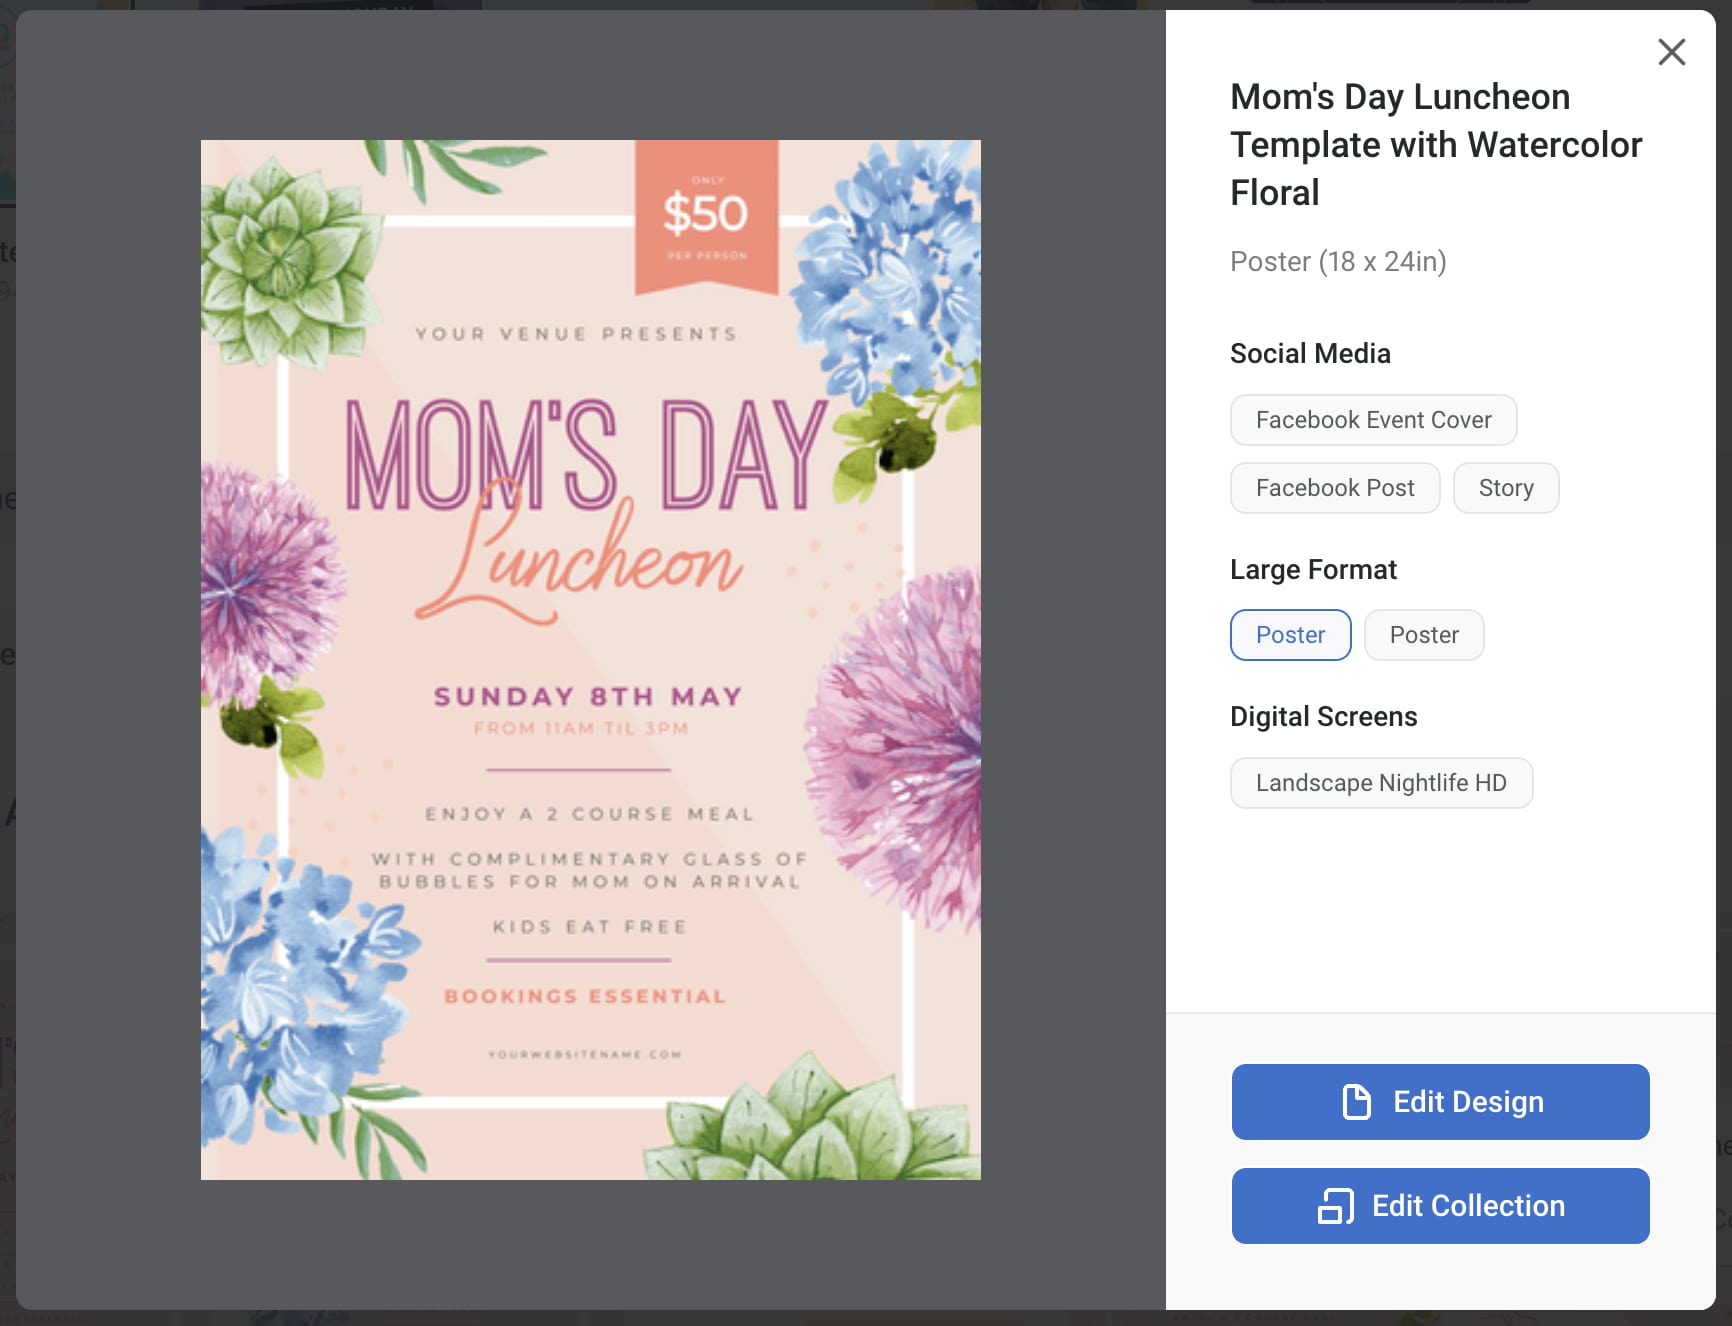
HOT TIP before you get started! If you’re only making minimal changes to an Easil design, ensure you select ‘Edit Collection’ when you are opening a template. If your chosen template has this option, it means you’ll have ALL the listed resizes already done for you! These are a great head-start for those who need to make an entire campaign in a hurry, or those who love the design as it is, but just need to tweak a few places.
This is what the Update Collection option looks like – be sure to hit that bottom option to open the designs listed, and then you can simply access them from the ‘Sizes’ sidebar, and continue on making any additional resizes you need with the details below!
Why Should you Resize Your Design? (or What’s the Purpose of Repurposing?)
With any business promotion, it’s important to keep consistent brand messaging across your promotions and visual content. This can be hard to do if you are creating each image, poster, promotion, flyer in isolation!
But using a resize feature you can ensure that you not only take your brand message through all of your promotions, but you get to save time and money by being able to repurpose your content quickly and easily. And you can do all that, without losing the design quality.
But there are a few tips and tricks to making it work. We’re going to walk you through how to do this in this article. Lucky for you (and us) we have Easil’s handy Resize Tool with us to do the heavy lifting. You’ll likely be super excited about what’s possible with our design Resize Tool by the end of this post.
Let’s jump in and get started. Ready to hack your visual design?
Repurpose Your Design – Hack Your Visual Design Series
Firstly, let’s take a look at the base template, and then jump into all the stunning Mother’s Day designs you can make with it. We’ve included hot tips at the end of this post, to help you use templates better or you can read more about how to use DIY Graphic Templates like a Pro here.
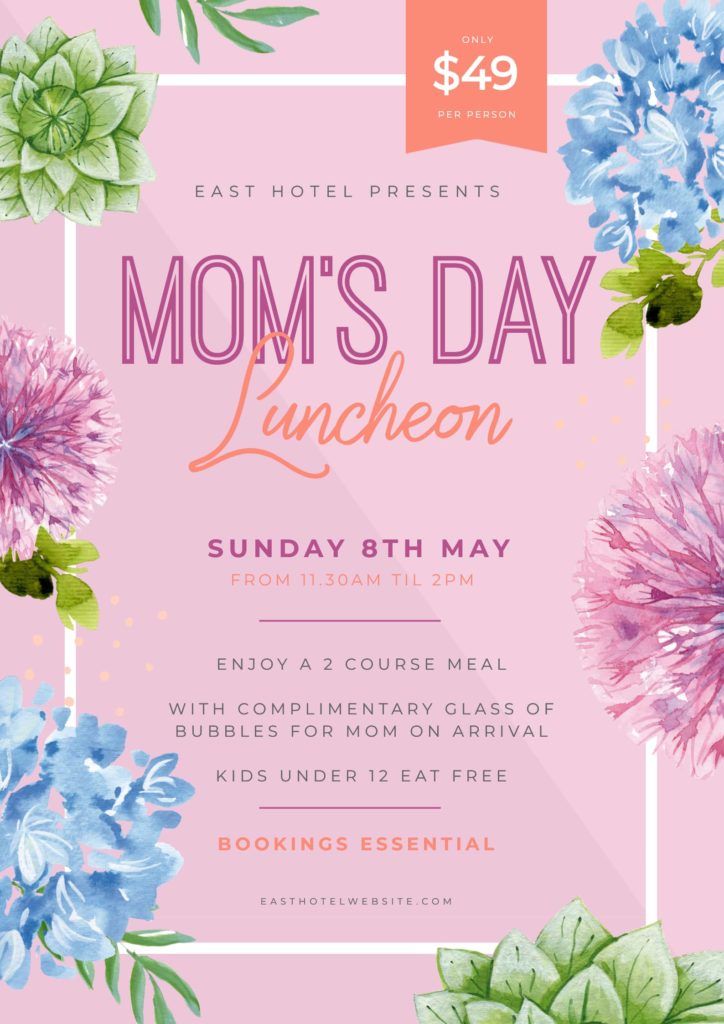
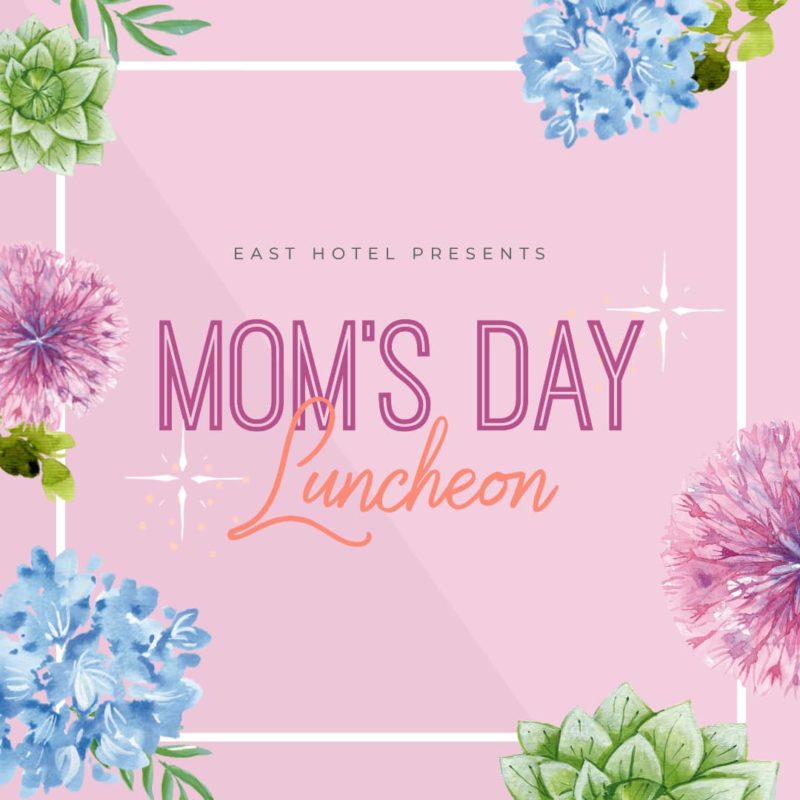
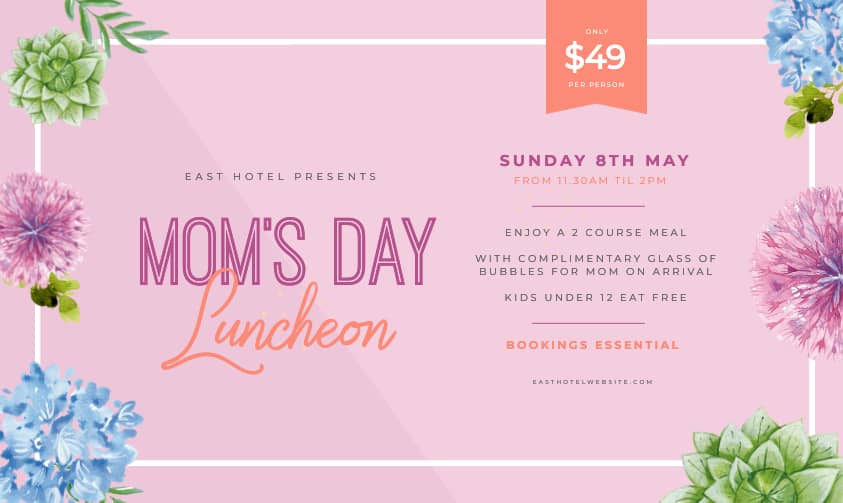
#1 THE BASE TEMPLATE
We’re using a Mother’s Day Event poster size template as our base template in this example. Here it is before we make any changes, and after updating the content to suit our promotion. In this step, we simply updated the event text details (the date, our venue details, and pricing) as well as changed the background color to tie in more with the theming we are going with for the event:

#2 Resize to Instagram – Animated Feed Post
With this first resize example we’ve taken our portrait poster into a square animated design for social media use, in less than 2 minutes!
- Click on the ‘Resize’ tab at the top of the right sidebar, and click the ‘Resize’ icon
- From the category titles, click on ‘Social Media’ tile. From there, you’ll see a range of pre-set options. We’ve used Instagram Post size in this example.
- Your original artwork will be centered within the new design size.
- To start adjusting the content to fit into the new square orientation, click on the ‘Layers’ panel. In Easil templates, you’ll find the content has been pre-organized into groups for you. Click on the ‘eye’ to toggle between seeing the group, and hiding it, to get familiar with what’s in the group you’re working with.
- We’re only going to need a couple of small tweaks to make it fit in the square size: Stretch out the size of the square border by expanding the handles to each side, and then move out the floral elements to the edge of the graphic to frame it nicely.
- Add an animated GIF element (or two!), and set the page duration to your desired time (eg here we set it to 10seconds play time) and download as an MP4 video file.
#3 REPURPOSE YOUR DESIGN TO AN INSTAGRAM CAROUSEL
With this carousel example, we’ve started with our single Instagram square size from example #2. If you haven’t created the square template as yet, please go ahead and follow the steps and then follow on with these additional ones to complete a carousel post:
- We started by creating a duplicate copy of the Instagram post (via the Resizes tab, in the right sidebar).
- Then we duplicated the first page, so we have 2 pages in our carousel to work with.
- We deleted the detailed text from the first page by using the content already grouped in layers, or you can click to remove any elements you don’t want to include, and press ‘delete’.
- We then resized the heading on the first page to make it more of a focus.
- Moving to the 2nd page, we removed the heading, and instead enlarged the event information, and re-arranged the surrounding elements slightly to fit better.
Hot Tip: This format should tell a Story as you scroll through. Start with the main image – don’t include too much text on this one! Then use the following pages to provide more detail. Instagram allows you to add up to 10 images in this type of post.
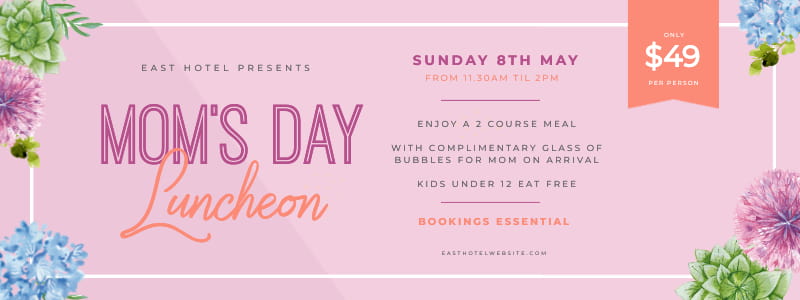
#4 Resize to a DL or Rack Card Menu Size
For an event such as Mother’s Day, your menu will play a key deciding factor in whether your customers will book with you or not. This Rack Card size [or DL Card] is handy for displaying on tables whilst promoting the event, as well as using at the actual event.
With this DL menu we’ve started back with our poster size:
- We clicked on our poster option in the Resizes tab and selected the Rack Card size option under ‘Documents’ to create our new size.
- We then rearranged the elements, included stretching the border, to match the new page size, keeping it even all around.
- Then we added the menu content and made some final graphics and text formatting adjustments.
- We downloaded the files as a PDF for printing for the highest quality.
Hot Tip: Create a secondary version to print out and use at your event, that eliminates any pricing information. You can also opt to choose a different size menu by selecting ‘Custom’ and entering your measurements into the input fields, and selecting the mm or inch options for print output.
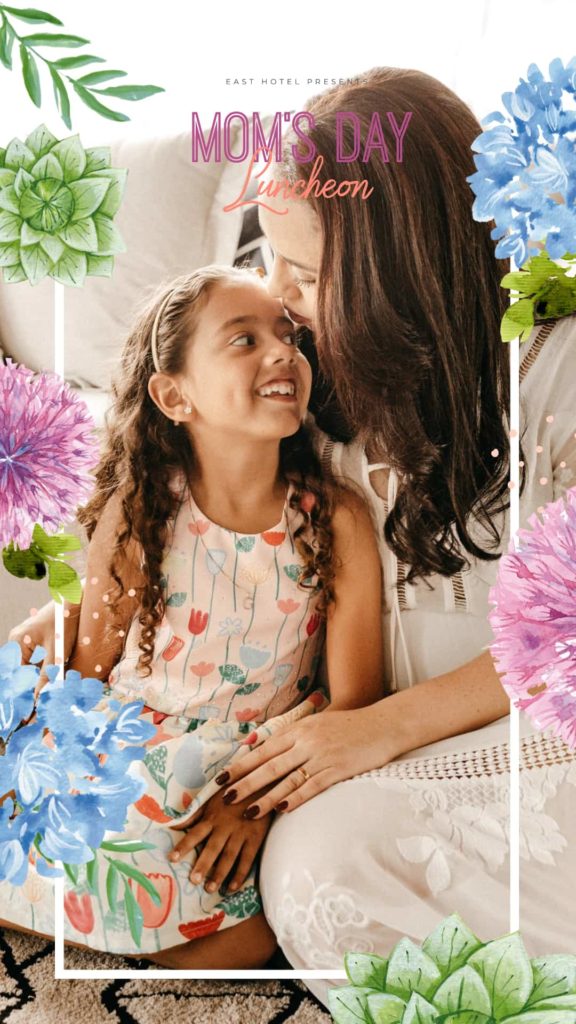
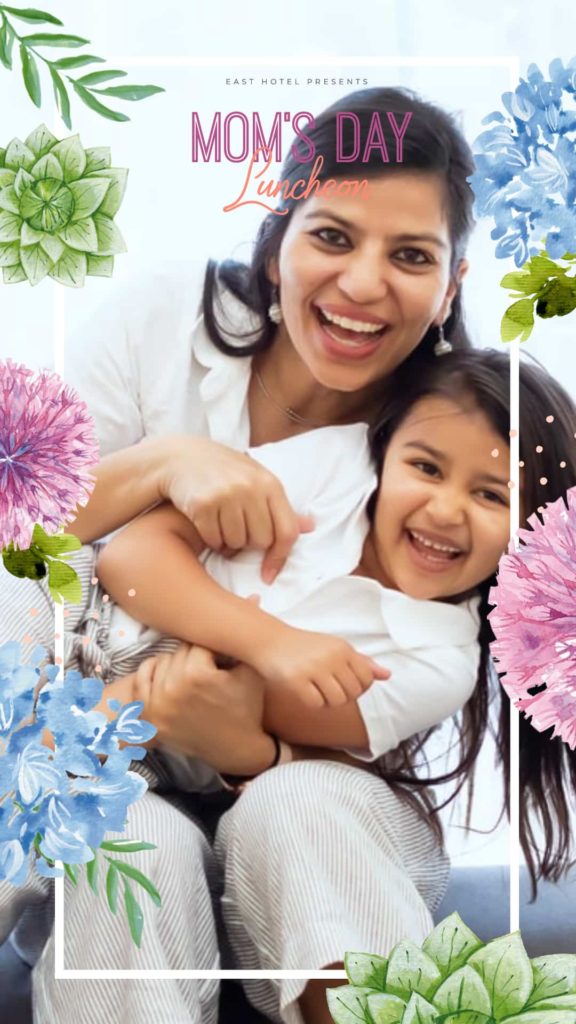
#5 Resize to use as an Instagram Story or Facebook Story [Static or Video!]
Creating an Instagram Story slide is the easiest resize you’re likely to do! Following these steps, you should be ready to post in just a minute:
- With your original poster size open, select the resize button from the ‘Resize’ tab at the top of the right sidebar.
- Filter through ‘Social Media’ to then click on ‘Instagram Stories’ to create the new design.
- In some designs, you may just need to stretch out the background image to cover all edges, but it’s generally a small amount of adjusting going from a poster to a story format – easy!
- Want to post it as a video file that you can add music to in your chosen platform? Head on over to the Graphics tab on the right sidebar, and then to ‘Animations’. Add any of the elements to your design by dragging over, and resize into position. Then, use the page duration slider on the left side of your design to set your time, eg 15 seconds.
- That’s it! Download your graphic or video, and send it to your phone; add some music, location stickers, and post – or save to your favorite scheduling application.
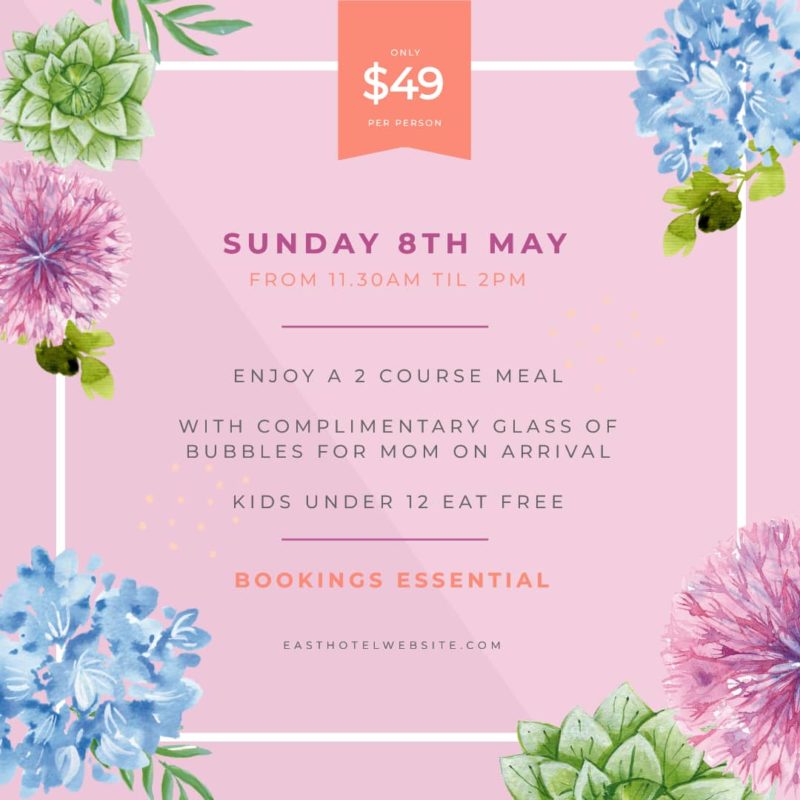
#6 Resize to Facebook Post Size
Repurposing your design across various social media networks is guaranteed to get you in front of a greater audience. You can use the square size on Facebook posts, but we’ve included this landscape post option as you can also format in the same way to use for ‘Facebook Events’ (1200x628px).
With this Facebook Post example we’ve started with our Instagram square size, as it contains all the details we want to include:
- Select the ‘Resize’ tab on the right sidebar, and click the ‘Resize’ icon
- From the category titles, click on ‘Social Media’. You’ll then see a range of pre-set options. We’ve used Facebook Post – 843x503px in this example. We’ve done this specifically knowing that it will also work well with our next size required for our campaign – HD TV!
- Your artwork will be centered within the new size. It’s time to adjust it to fit perfectly!
- Click on the frame, and stretch it out to again fit evenly against the new landscape page orientation, and move the floral elements to the sides.
- In the layers tab, use the Groups functionality to select the Heading and move it across to the left side. Keep the other text to the right so you can then select both groups, and enlarge them to fit the landscape width.
- When complete, download as a PNG file, or if you kept the animated elements, select MP4 for your video download format.
#7 Resize to use on a HD landscape TV
If you’ve been following along completing the resizes in the order we’ve noted here, the HD Landscape TV size will be a super-easy one after completing the Facebook resize! Just a couple of small adjustments, and it’s also ready to get on the screens:

With this example, we have clicked on our previous Facebook landscape resize to start.
- We then followed the resize process, selecting ‘Landscape TV’ from the Digital Screens options in the Resize panel.
- Then we adjusted the border on the left and right screens to be evenly aligned and moved the elements a touch.
- That’s it – this one was done in less than 30 seconds! In many designs you’ll find that resizing between these two options does not require any tweaking of the design at all!
#8 Resize to use as a Footer in your Emails
Email footers are a fantastic piece of digital real estate to promote your upcoming events. You can create a horizontal strip graphic and distribute it to all of your team that uses email regularly, and gain extra promotion exposure with little to no extra effort!
With this resizing example we’ve started with the Landscape TV size option from the previous item in the blog, as our email signature will also be a landscape size. You could also choose to start with the Facebook size post.
- We clicked on our previous landscape sized design in the Sizes tab (choosing Landscape TV to make this the active working design).
- After this, we click on the ‘Copy and resize’ option, and select Custom Size, and entered 800px x 300px for our Email signature document size.
- We then went through and made minor formatting adjustments using groups from the layers tab, as well as moving individual items out to the border area to finish off the professional look.
- The file was then downloaded as a PNG, ready to be placed into our email signature whilst the promotion is running.
#9 Repurpose your designs with different colors
It’s no secret that not all of your followers see your social media posts, each time you post them. (Thank you, algorithms….) So often you’ll need to promote something more than one time, but will want to vary the design a bit to freshen things up.
The easiest way to do this is to batch a second (or third) color option whilst you are creating your first graphic. Whether it be a Story, or a feed post for Instagram, you can use Easil’s color tools to quickly create those extra graphic versions to get more eyes on your promotion.
With this Instagram post example we’ve used Easil’s eye-dropper color tool to select a new color background, from one of the existing image elements. If you have several images in your design, you can also use the auto-magic color palette generator that provides you with matching color options for your designs.
- We clicked off any elements, so that we’d have the background selected.
- Then we opened the color options, and scrolled to the eye-dropper tool.
- Using the eye-dropper, we positioned it over the color we want to apply, and clicked.
- We then repeated the process for another option, so that we have a few posts ready to go to promote this event.
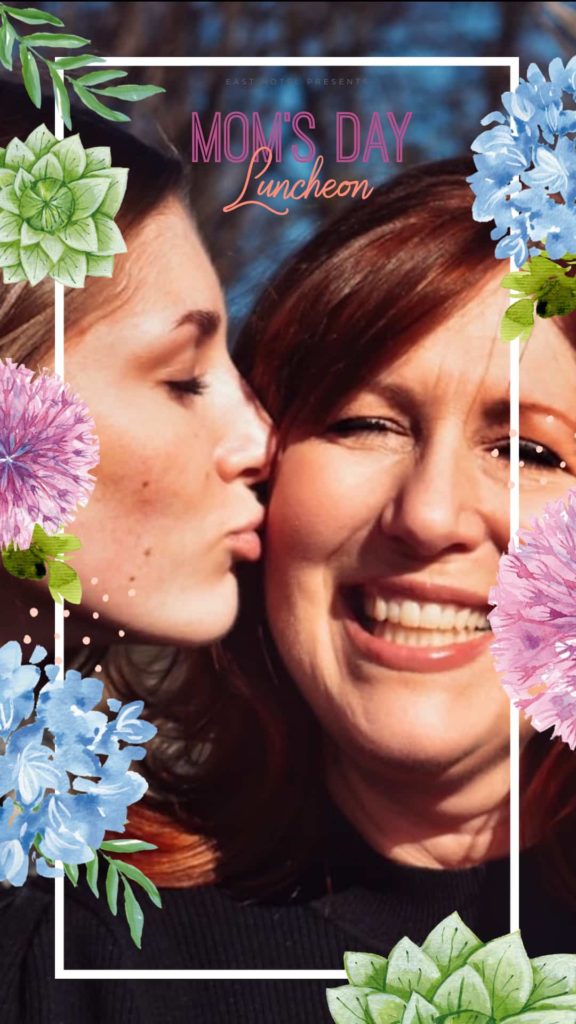
#10 Create a branded Instagram story overlay for your event
Whilst our first 9 have been focusing on creating graphics to pre-promote your event, this last one is to be used at the event! Once you create this design, you can save it to your phone, and have it ready to overlay on any event images you take, ready to post and themed with your event graphics!
Our Instagram story overlay will be based on our previous IG Story resize, so we’ll click back to that size to get started.
- We created a duplicate copy of our previous story.
- Then we removed any of the promotional text that was included by clicking on each element and deleting.
- We repositioned the heading at the top of the story, and reduced the size a little, to allow for maximum photo area!
- Finally, we changed the background color to transparent and downloaded as a PNG file.
From there, you’ll need to save it to your phone’s photos. As you take photos of your guests at the event and post to stories, you can access the frame overlay by:
- Create your Instagram Story and leave it ‘open’ (eg unposted), and open your Photos app.
- Locate the frame image and ‘Copy Image’.
- Return to Instagram and a small pop-up will appear in the lower-left corner asking if you want to ‘Add Sticker’ with a preview of it.
- Add it to your design, resize to fit the photo, and then post your story with a location tag sticker added.
Hot Tip: Create 3-4 different overlays that you save to your phone, so you can quickly vary between story posts, but still keep them consistent!
COOL, HEY?
Does this make you excited? The potential for you to roll out a whole series of promotions (not just one image) is huge! And it’s all drag-and-drop.
Easil has all the tools ready for you to use. Before we leave you to play with Easil, we want to share some quick tips for editing your DIY Design Graphic Templates.
If you want to edit professional templates (so they still look professionally designed), there are a few key “rules” to consider.. and common mistakes to avoid:
How to Resize and Repurpose Your Images Like a Boss
We have included tips like these in every post in this series – because it matters. It’s all about keeping it simple and not messing too much with the template itself, even when resizing. Try to avoid making these mistakes.
Firstly, remember that with all Resize Tools, the image you see after resizing might not be perfectly designed and ready to publish. You may need to do a little tweaking to finish it off. Common things you will have to check and possibly edit are:
- Any borders or design elements that may have moved due to the resize.
- Font sizes. Moving from a smaller image to a larger design will render your fonts much smaller. You may need to resize them to get the balance back.
- Line breaks may move if your font sizes etc change. You may need to edit some font sizes, make new line breaks and generally tidy things up.
- Images may not suit the new size perfectly and you may need to grab the image, resize it and position it again.
Saying that Easil, in particular, is pretty intuitive when it comes to resizing. This helps you a lot as there is less that needs to be edited after resizing. However, to always be on the safe side, we recommend that you check and fix any elements that need fixing before publishing the image.
And remember, it’s best to not mess around with elements too much. They are there because a designer created the template and so it’s already optimized to look great. Stick to similar fonts, font sizes, and text length and if you switch out an image, try to make it similar in terms of style.
Hopefully, the walk-through for each new resize in this post has given you the confidence (and eagerness) to give it a go yourself!
Oh and one last tip! Don’t forget that every social platform is different – which is why we have given you the ability to resize images. Images have different optimal sizes on different platforms, so make sure you post content that is native to the platform. Resize it, edit it, and make it perfect for the platform you’re on!
Don’t forget our other Hack Your Visual Design Posts!
You can check them out here:
- Menu Template, 10 Ways
- Instagram Stories, 10 Ways
- Pinterest Templates 10 Ways
- Quote Graphic Templates 10 Ways
- Image in Text Poster Designs 10 Ways
- Animated GIFs 10 Ways
YOUR TURN
Are you excited about the potential for resizing and repurposing your images? Do you have any questions about how it works? Leave us a comment on our socials or send us a DM!


