Sharing engaging social media images is an effective way to build an audience. However, there’s a big difference between the images most people share and the type of images that gain the attention you want.
In this post we look at how you can power up your social media images.
The good news is that images that do well on social media tend to have certain things in common – things you can use to improve your own. Best of all, it doesn’t take a lot of effort to quickly improve the quality of your social media images.
No matter what your goal is for posting social media images, you want them to look amazing. Start with at least one of these 10 tips and you’ll begin improving your pictures – and the response they get – right away.
10 Ways to Power Up Your Social Media Images – Now!
1. Start with Simply Using Better Social Media Images
This may seem obvious enough, but if you’re not using attractive images to begin with, the rest of this advice probably won’t help much.
For many of you, this will mean investing in a better camera. But it doesn’t even have to be expensive. It could be as simple as learning to use your smart phone more effectively.
If you’re not looking to share personal images, don’t worry. You can always use free stock images. Just keep in mind that these images are available to everyone, so you’ll still want to use some of the tips in the rest of this post to customise your stock images.
And of course you can use our Easil Stock images. We have hundreds of gorgeous, fun, fresh (not boring) stock images that you can use as part of your Easil membership.

Our Easil Stock library will power up your social media images!
Here are some ways to use stock images so that they don’t look like stock images:
- Use unusual search words. Words like “funky” or “retro” might turn up something different. Use a specific color or even the “era” like 1920, 1980.
- Add search phrases and keyword terms like “bright background”. A term like “instagram style” will instantly show up images with instagram style filters or lighting. Get creative.
- be prepared to pay a small amount for a stock photo – it will instantly lift the quality of image you get (and it adds a layer of safety re licencing).
2. Add Text to Your Images to Increase Engagement
You’ve probably heard that a picture is worth 1,000 words. That may be true, but it turns out that most social media users would still like a few more.
Words can help add context to your photo. They can also further the point you might be trying to make with the image, adding context.
Here are some ideas for adding text to your image:
- Adding a meaningful, relevant quote over a picture will power up your visuals. There’s no doubting that quotes work exceptionally well on any social platform. Obviously, the “better” the quote, the better the image is going to do with your followers.
- Try finding unique quotes – maybe you have heard someone speak at a conference, and you wrote down a quote from their brand new keynote presentation. Turn that into a visual quote! Chances are nobody has heard it before and they are more likely to share it.
- Include header images in your blog posts – adding the text or heading from your post means that when it is shared to Pinterest, the person viewing the image has context and knows what to expect if they click through to your post.
- Play with fonts. The difference between an image that catches attention and one that doesn’t could come down to choice of fonts. You should place just as much emphasis on how the quote looks as you do on the image you’re sharing. Choose something that is easy to read – you want it to stop the scroll.
3. Brand your Social Media Images with Consistency & Style
It’s good to be creative with your social media images. If you’re just starting out, it makes sense that you might experiment a bit at first.
Over time, however, your goal should be to develop consistency. Whether it’s for a personal account or one for your business, consistency is important for increasing the connection you have with your audience (especially on Instagram).

Here are some tips for branding your images:
- View your social media images as having a tone of voice, just like the one you use for the text of your posts. If your tone varies too much (one day it’s humorous, the next day it’s deadly serious) it can be confusing and won’t attract people to connect with your brand.
- Brand your images in a consistent way – this way your audience will recognise “your” content and will be more likely to stop scrolling and read it… but:
- Use watermarks or logos but keep it subtle – it’s ok to brand your images but keep it subtle. Use a transparency tool to lighten them a little so they are less obvious, and keep them small. I should not overpower the image.
- Use templates to get you started – these are designed by a professional so you don’t have to worry about all the designer stuff as the spacing, fonts, style and shapes have already been set in place. Just make sure you have your text and photo ready, switch them out, and you’re good to go!
Once you find your “tone” in terms of style, stick with it. Consistency will pay off through the connection you form with your audience.
4. Don’t Center the Focus of Your Images
Does that sound counterintuitive to you? Shouldn’t you want to focus on the focus of your picture? Actually Subjects that are off center tend to be more pleasing to the eye.
This tactic is actually widely known in the world of art.
Some Tips for Being Off-Centre:
- Use the Rule of Thirds. It’s a failsafe rule for making sure every image looks great. Most phone cameras will have a grid to help you line up your image so that your point of focus meets one of the intersection lines on the grid. Read more here if you don’t know what the ruler relates to.
- Do the opposite. There will be times when it makes sense to center the subject of your photo, perhaps if you are showcasing a product.
- Don’t push an image too far to one side of the photo. Make sure it can be clearly seen.
- Find some great Instagram accounts and follow them to see how they do this. We love Lauren Bath for her use of leading lines and the rule of thirds. However, rules are made to be broken (sparingly) so follow her account, as sometimes she will surprise you with a completely unexpected perspective or angle too!
5. Think Mobile
More and more, people are using their mobile devices to go online. When you compare mobile devices to traditional computers, the former is used 51% of the time to go online and it’s increasing every day.
Traditional computers have fallen to 42% with other connected devices making up the remainder.
The point of this is that you need to think of mobile users when you post images. If it involves too much detail or the text is too small, it might not have the desired effect on a mobile device.
Here are some tips for going mobile:
- take photos with one singular subject – keep it simple, keep it uncluttered. Beautiful, simple images work well on Instagram especially.
- use a bright color or two so that your image pops – people are scrolling through the feed on mobile, so you want them to stop!
- Keep text short – so you can use nice big letters.
- Check your image – after you upload a photo, take a moment to view it on your phone just to make sure it’s going to be easy for your followers to see.
6. Use Contrasting Colors to Make Your Social Media Images Pop
Contrasting colors will help make your image jump off the screen. Contrast simply refers to the ease with which two colors can be distinguished from one another.
Here are some ideas for making your social media images pop with contrasting colors:
- Use Black and White contrast – it’s a winner every time for breaking up the feed and catching attention.
- Go for high contrast. Go for high contrast. Purple and Blue are too similar to one another. Yellow and blue, on the other hand, will contrast each other nicely. If you’re using software to prepare your social media images, switch to grayscale. It will make it abundantly clear if your color combination offers high contrast.
- Use a shape or graphic element to create a duo-tone look. Using a color overlay with a shape or graphic element adds contrast between your image and your text and make the right elements stand out.
- Use the color palette generator in Easil to choose your best suited colors. Check out the video below and try it out here!
7. Use the Power of Captions
Captions are your “back-up” team. They allow you to add extra content (and context). If you are trying to cram too much content into the image, remember that you can use the captions too.
Here are some tips for using Captions:
- On Instagram, use captions for storytelling – Instagram is all about staying on Instagram. Don’t rush to send people to another website, but instead tell stories in the captions.
- Overflow your text into the captions – Instagram is about beautiful engaging images. Too much text and you ruin it. Use captions to continue the story.
- Set your captions to suit the platform – Different social platforms suit different length platforms. For example, on Facebook, use shorter captions. On Instagram go longer. On Pinterest, include searchable keywords in your captions (as Pinterest is a search engine in its own right!).
8. Size Up Your Platform – Get the Right Dimensions
You want your social media images to look the best they possibly can, so make sure you optimise your images for the platform you are on.
Now, we could give you a long (long) list of image sizes for Facebook, Twitter, and Pinterest, LinkedIn, and Instagram – Go here if you want to check an individual image size – But really, there is an easy way:
It’s called a visual content tool: A tool like Easil should give you most of the sizes you need, optimized and ready to go with templates.
Here’s how to use templates on a visual design tool:
- Use a tool that keeps up to date with visual templates – then you don’t have to be always looking up the image sizes!
- If your favourite tool is missing a key size, ask them to include it. Also ask them to check sizes if you notice one is out of date. It happens – social media tools change their sizes all the time, especially Facebook.
- Create sizes that you can use more than once – Square posts well to Instagram, Facebook and Twitter. Landscape posts well to Twitter and Open Graph (ie Facebook). Portrait posts well to Pinterest (and even other platforms like Instagram and Google Plus, even Facebook).
As you can see, each platform is a little different. You’ll probably find it easiest to begin posting social media images to just one or two of these platforms first. Then, when the requirements of that platform become second nature, you can move on to learning the ropes involved with others
9. Use Image Editing Software
Truly unique and compelling social media images are easily achieved with a little image editing.
Sure, you can find interesting stock photos and add a quote to them, but for something truly memorable, it’s a good idea to modify these images to give them a legitimately professional look. Do this by using quality fonts, text effects, filters, photo effects and more.
Here are some ways to optimise your images with editing software:
- use quality fonts to add text and headings – use a quality tool with quality fonts (we like to think that Easil is pretty darn awesome when it comes to funky fonts, if we do say so ourselves)
- use text effects – take it one step further and use text effects to make your fonts pop! Easil has an awesome text effects tool to make text effects (like drop shadows) that look awesome!
- use filters to add a consistent look and feel – find a filter that you can apply across your images for consistency, especially on Instagram where it’s a good idea to have a consistent “look” to your feed.
- use fun editing tools – tools like Photofox on your phone can add some fun and surreal effects that will set your images apart.
10. Keep Up with the Trends
We’ve covered the importance of social media trends on this site before because it’s so important that you keep up with them.
First and foremost, you don’t want your brand to be seen as out- of-touch. Trends in social media images change, so you need to change with them (keeping in mind our earlier advice about consistency).
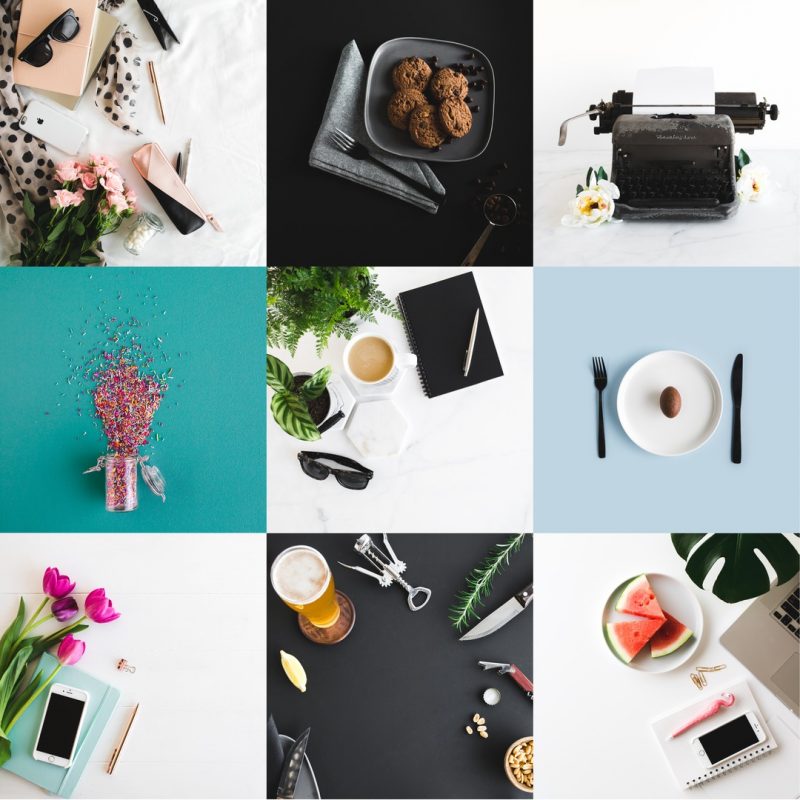
Secondly, trends speak to what people want. Adapt to these trends and you’ll find that the images you share are far better received. For example, Flat Lay images are quite popular at the moment on Instagram, so take advantage of our Easil Stock images while you can!
For example, quotes, GIFs and memes work well at the time of writing this but that may change in a few years.
Drone photography is super popular now but who is to say we won’t be dizzy and bored with looking at everything from up above in 2 years time.
Keep in mind, too, that different platforms often experience different trends. For example, what works for social media images on Twitter probably won’t work as well on LinkedIn.
Let Easil Help You Create Eye-Catching Social Media Images
If you want an easy way to power up your social media images, let Easil help. Our basic plan is free, so you can get started using a selection of our images, graphic elements, editable templates and much more right away.
Over to You
What’s your biggest challenge when it comes to creating shareable social media images? Which of these tips will you try? Leave a comment below!


